

More than 50% of the Digital Marketing budgets by retailers are defined to shopping campaigns. Shopping campaigns are very effective for ecommerce website to convert searches on Google. If you have an ecommerce website, shopping ads should be the first priority for promoting your products on Google Search.
In this article, you will understand what are shopping ads and also learn to create high ROI shopping campaigns for your online store.
So let’s get started!
What are Shopping Ads?
Shopping ads are ads which appear on Google Search with an image, below is how shopping ads look like on Google Search.
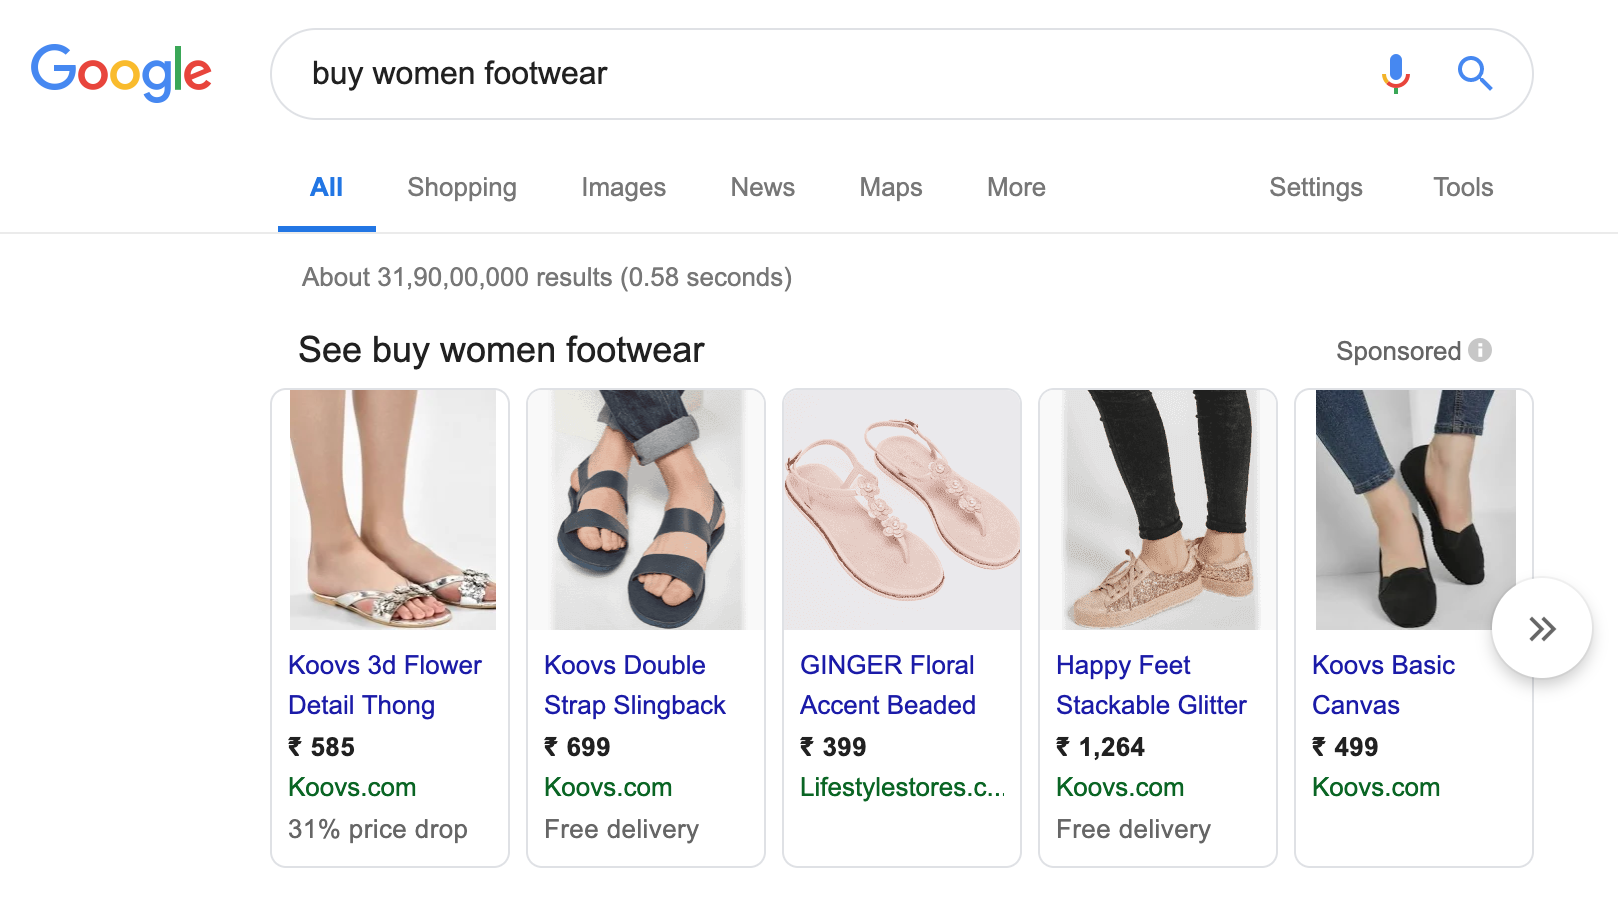
Google Shopping Ads are also called as product listing ads (PLAs). According to Google, you can only advertise products which can be delivered at a doorstep. For Eg: If you are a home tutor and you want to market your services on Google Shopping, in that case you won’t be allowed to advertise on Google shopping, as home tutor is considered as a service and not a product.
Shopping ads are very effective as they show image, product name and price on the ad copy itself.
So How to Setup Shopping Ads?
In order to set up shopping ads, the first thing you need to setup is the Google Merchant Center Account.
So what is Google Merchant Center Account?
Google Merchant Center account is an account where you add all your product details including price, size, color, landing page link, title, description etc.
Merchant Center Account is a separate account which is outside Google Ads/Adwords. You need to create a merchant center account to start with.
So let’s create a merchant centre account and then create Google Shopping Ads campaign.
Step 1:
Go to https://merchants.google.com/Signup and create a Google Merchant Center Account.
I am going to take an example of a business and help you understand how to create merchant center and shopping ads. So I am talking an example of an ecommerce store which is called La Marca, it focuses on women footwear and purses.
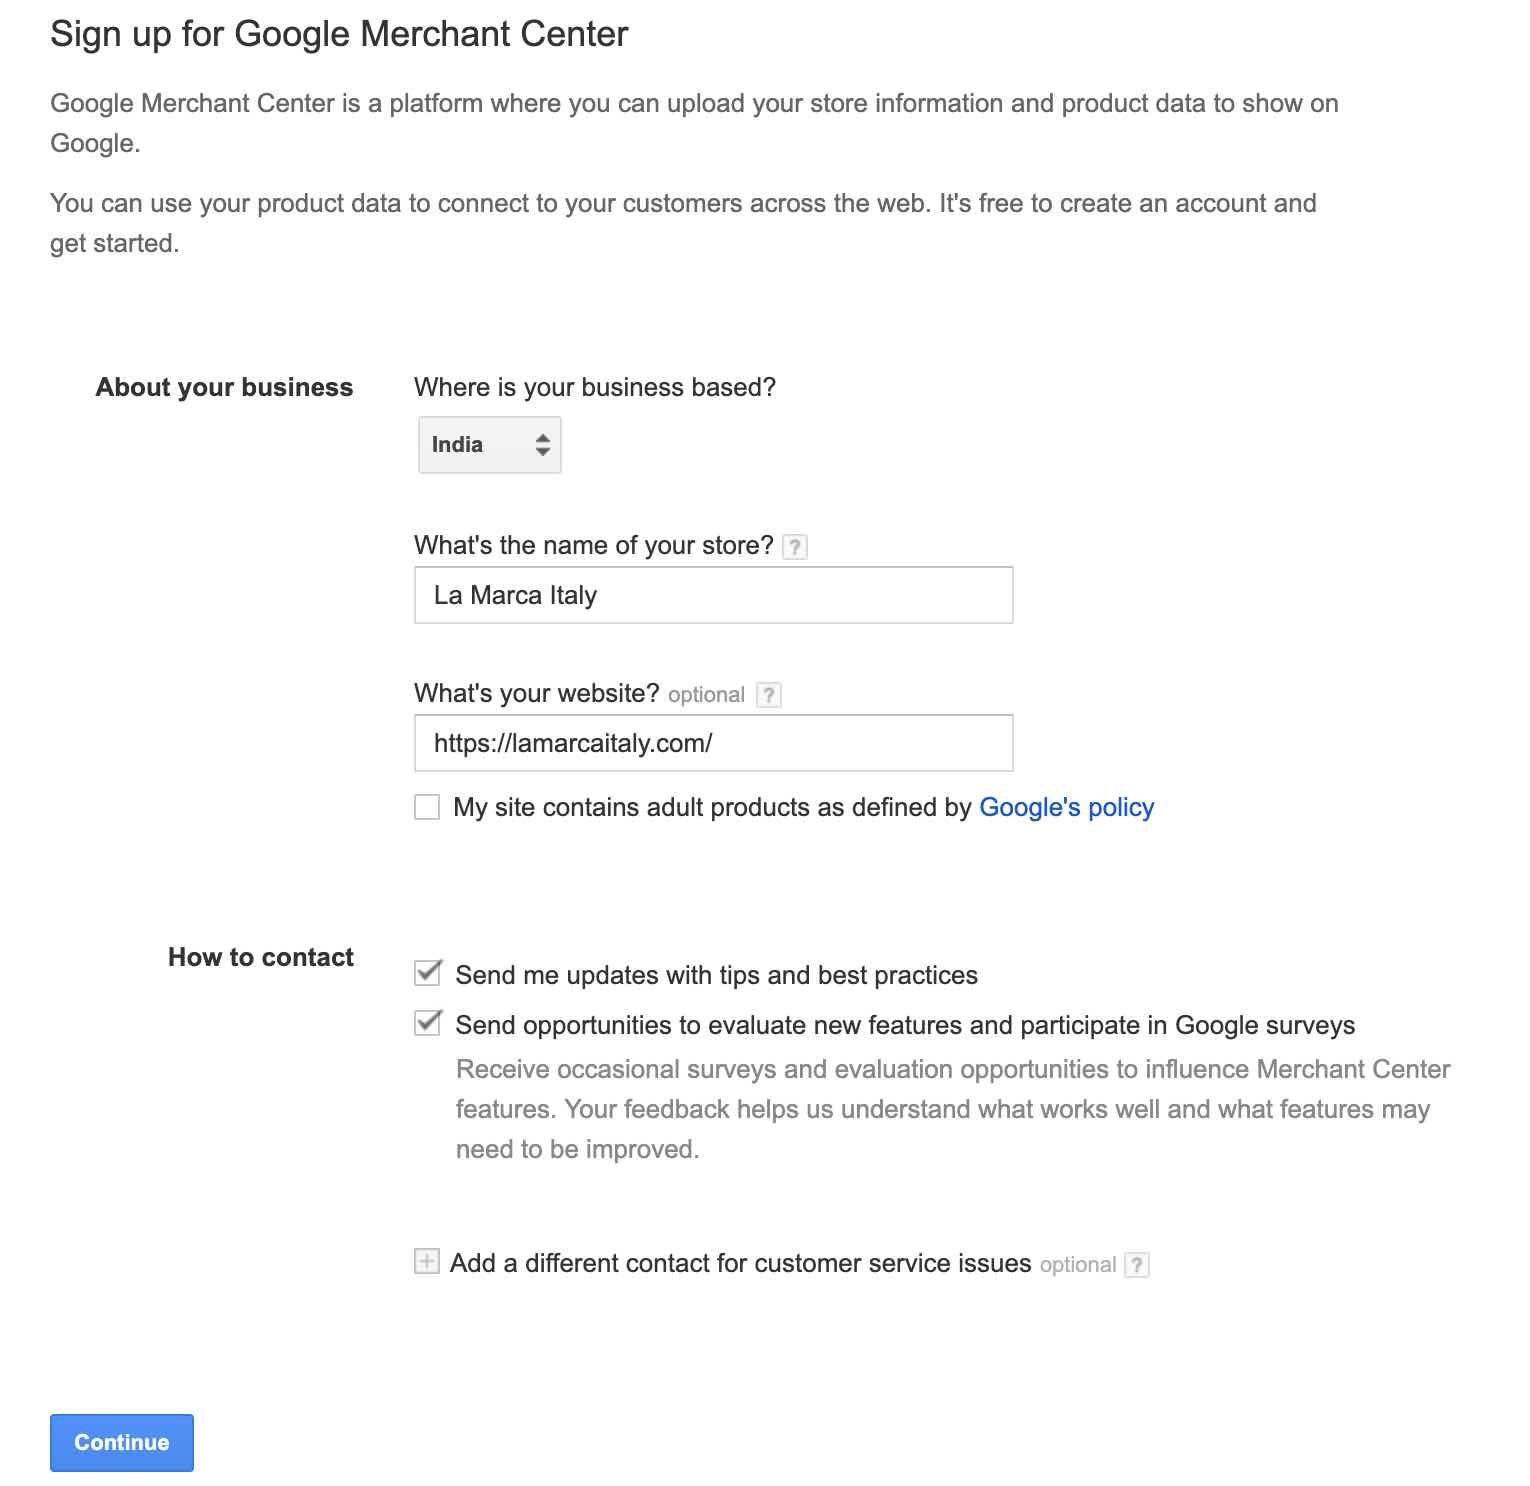
So, once you click on signup, you need to select the country where the business is based. I have selected India as the business is in India. If your business is in India but you want to market in another country like US, then also I will select India as the country.
Next is to define what’s the name of your store. You can define the name of store as the brand name of your store.
Then define the website URL, which is the domain name of your website.
Step 2:
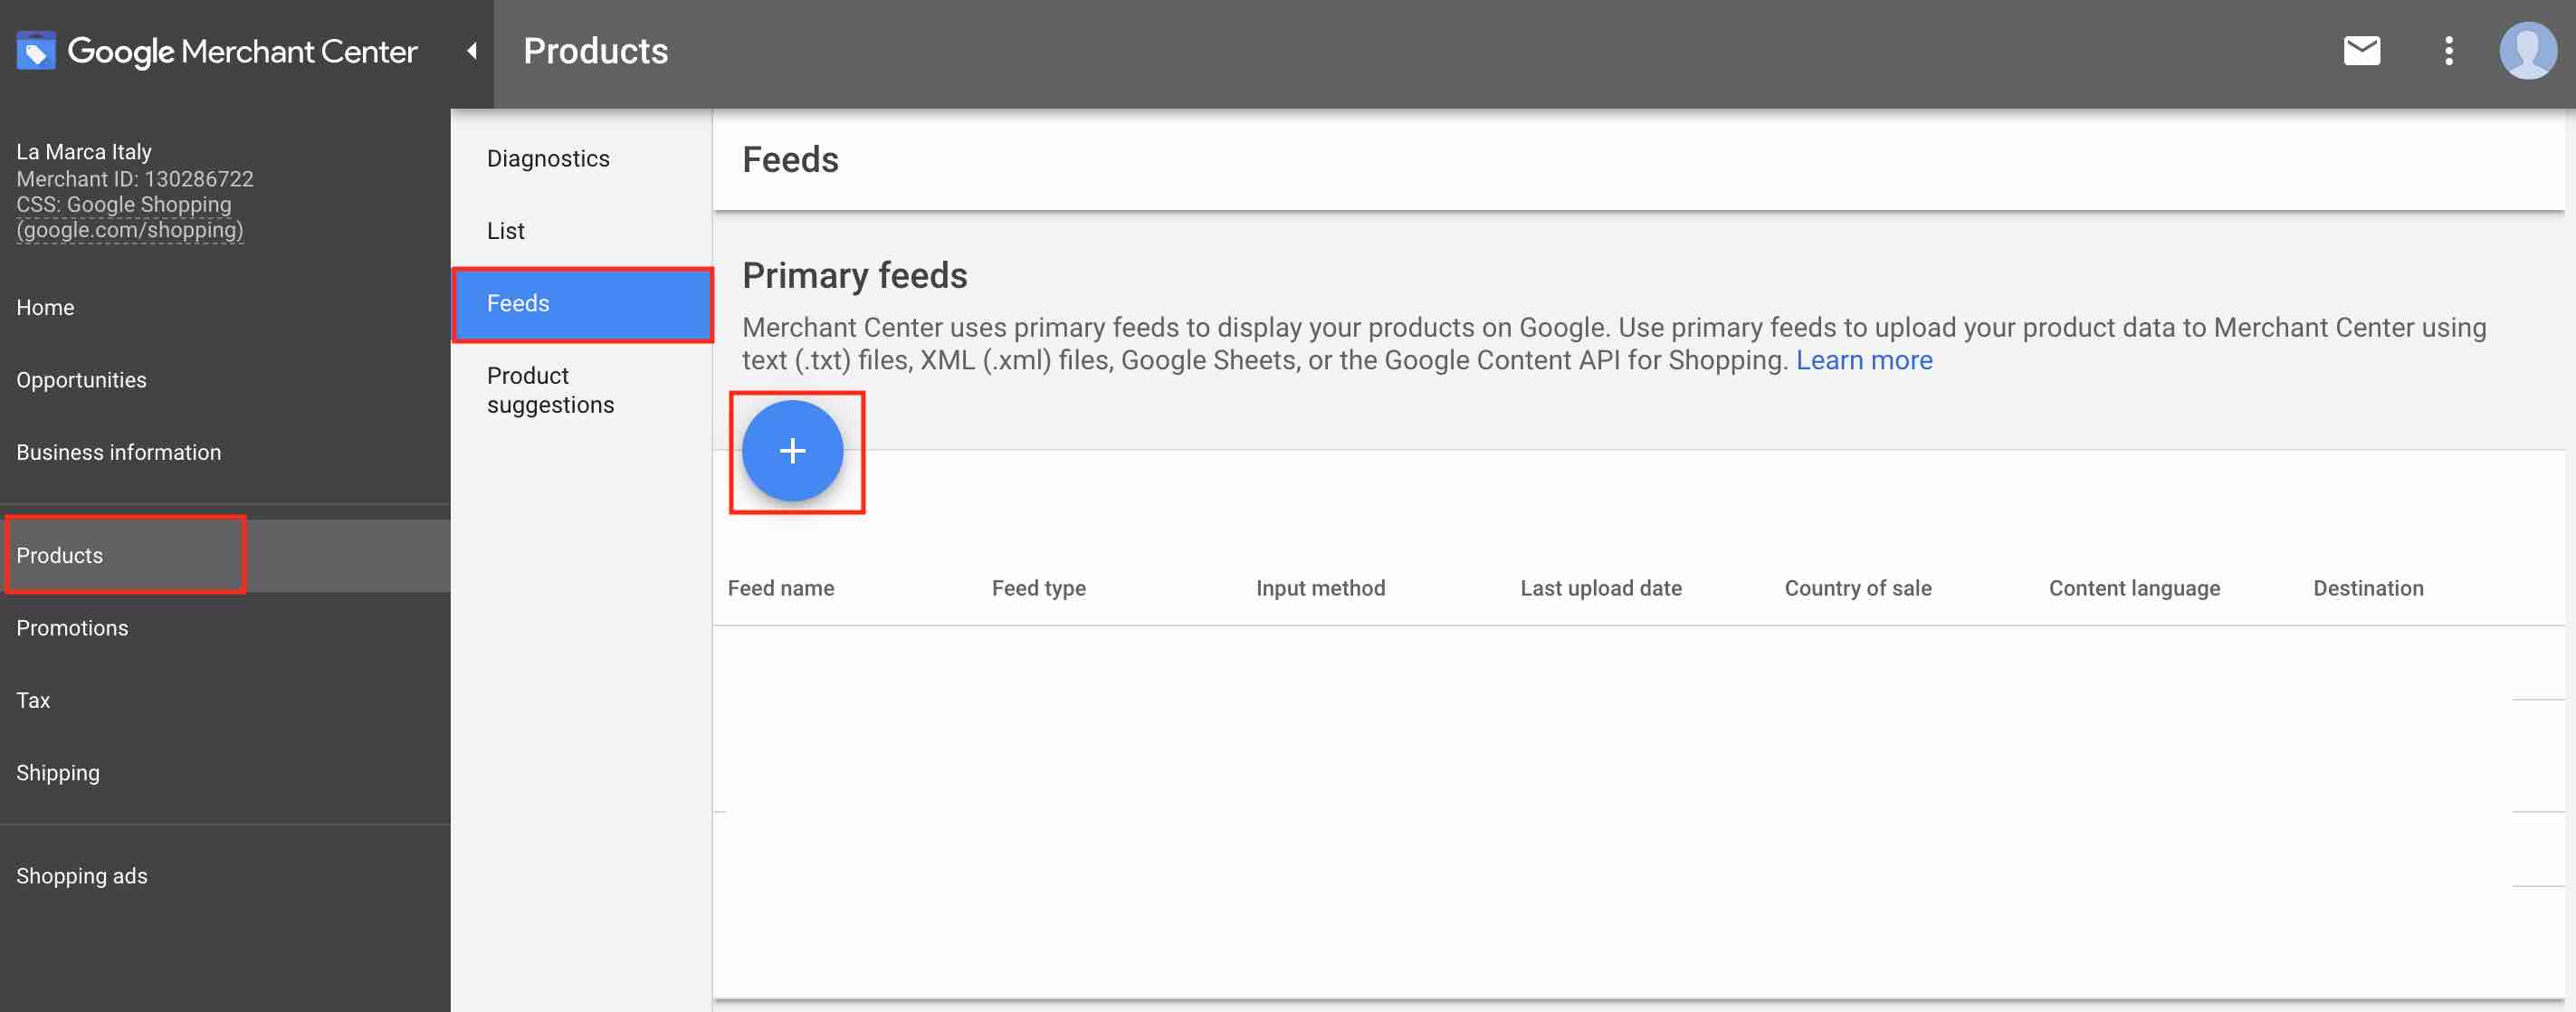
Once you have created merchant center account, you will enter the account. Once you enter the account, click on product, feed & then click on plus blue button to create a feed
So What is a product feed in Google Merchants Account?
Products feed is where you add all information of your products including price, color, size, gender, title, description etc.
Step 3:
Once you click on the plus blue button, you will view the below screen.

Select country basis the country in which you would like to market.
Next select the language basis the country language or you can go with default english language.
Next is destinations, in this select display and shopping both because, you can use the same feed for display campaigns also in the future.
Step 4:
The next step is to define the feed name and to choose how you want to connect your data feed and connect your data to merchant center. There are 4 options to choose from, to setup data feed:
- Google Sheets
- Scheduled Fetch
- Upload
- Content API
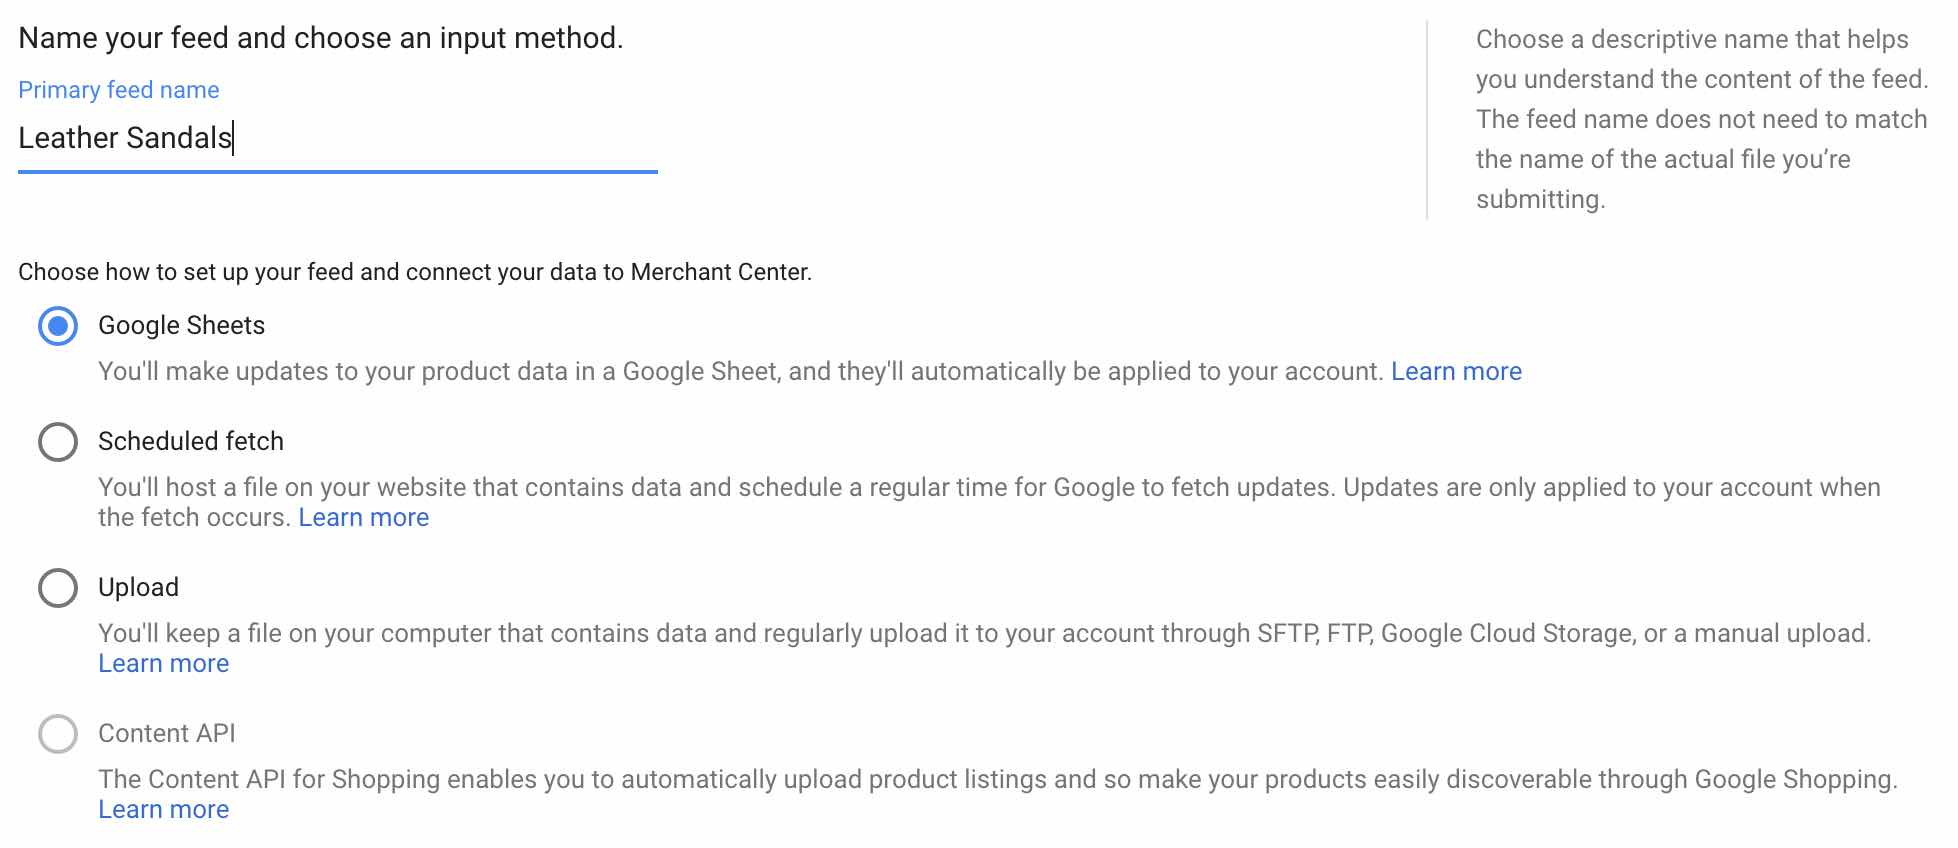
Google Sheets – With the use of Google sheets you can list all your products which can be automatically applied to your account.
Scheduled Fetch – Through schedule fetch you will have to host a file on your website that contain details of your products, this can be fetched on regular basis.
Upload – With upload option, you can upload a file which is on your system. This file has to be regularly updated with the help of FTP, SFTP, Google Storage or with manual upload process. If you are not familiar with FTP, SFTP etc, you would need to connect with a developer to do so.
Content API – The last option is content API. In this option you can upload the product sheet through content API.
From the above 4 options, the best option to go with is Google Sheets, as you can add all the product details in the sheet itself. But if you are having a large inventory of products then you can go with Content API Eg: Amazon, Flipkart etc.
I am going with Google Sheets as I have around 100 products on the website.
Step 4:
Once you click next, after clicking Google sheets, it will take you to Google Sheets where you need to add the below options:
- ID
- Title
- Description
- Link
- Condition
- Price
- Availability
- Image Link
- GTIN
- MPN
- Brand
- Google Product Category
Let’s Understand Each one of them
| Field | Description |
| id | It is the ID defined by the online store owner |
| title | It is the title of the product. Ideal practice is to add the name of the product |
| description | It is the description of the product. You should add all the details about the product. Description is very important because shopping ads don’t have keywords in it, the ads will trigger basis the description content in your product feed. |
| link | Link is the landing page link of the product page |
| image_link | Image link is the image link of the product. Google shows the image on Google search basis this link (you don’t have to manually add images) |
| condition | Condition of the product which includes new, used or refurbished |
| price | It is the selling price of the product. Make sure you use the selling price which is after discount |
| availability | Whether the product is in stock or out of stock |
| brand | It is the name of the brand. For Eg: If you are an aggregator website and selling samsung’s product. You should use Samsung in the brand option |
| google product category | Google product category is Google’s categorization of an item. This is mandatory. We should define it basis our product category. Add the details as per google product category |
| GTIN MPN | GTIN & MPN are required if you have it. It helps Google to identify the brand and the product they are selling. Refer for more info here – GTIN If you are in India GTIN & MPN is not applicable but do not delete the column, instead add another column and say identifier exists and define it as FALSE |
You can further add more columns like gender, color, size etc to make it more accurate for showing in search results.
So, below is how I have defined my product feed as per the available options.

I have defined around 28 products in the sheet.
Step 5:
Once you have added the products, the next step is to fetch these products, which means Google will review the added details and approve the same.
To fetch the sheet, click on the sheet name as below
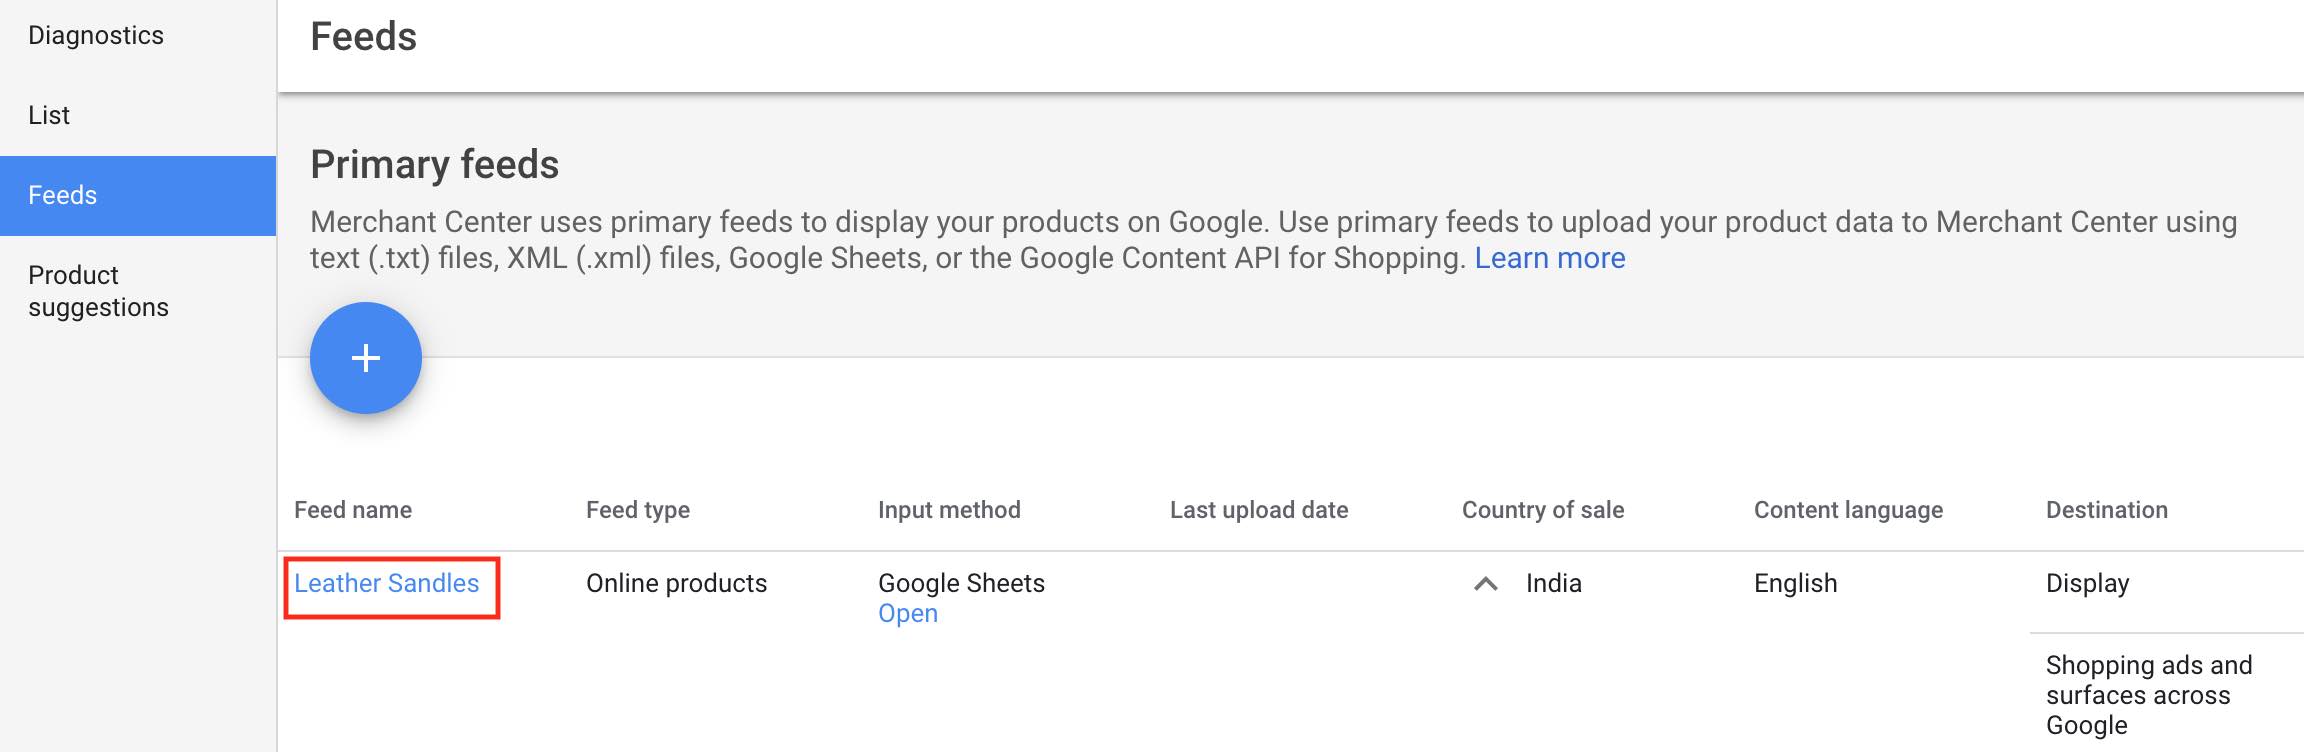
Post that click, fetch now on the right hand side which is as below.
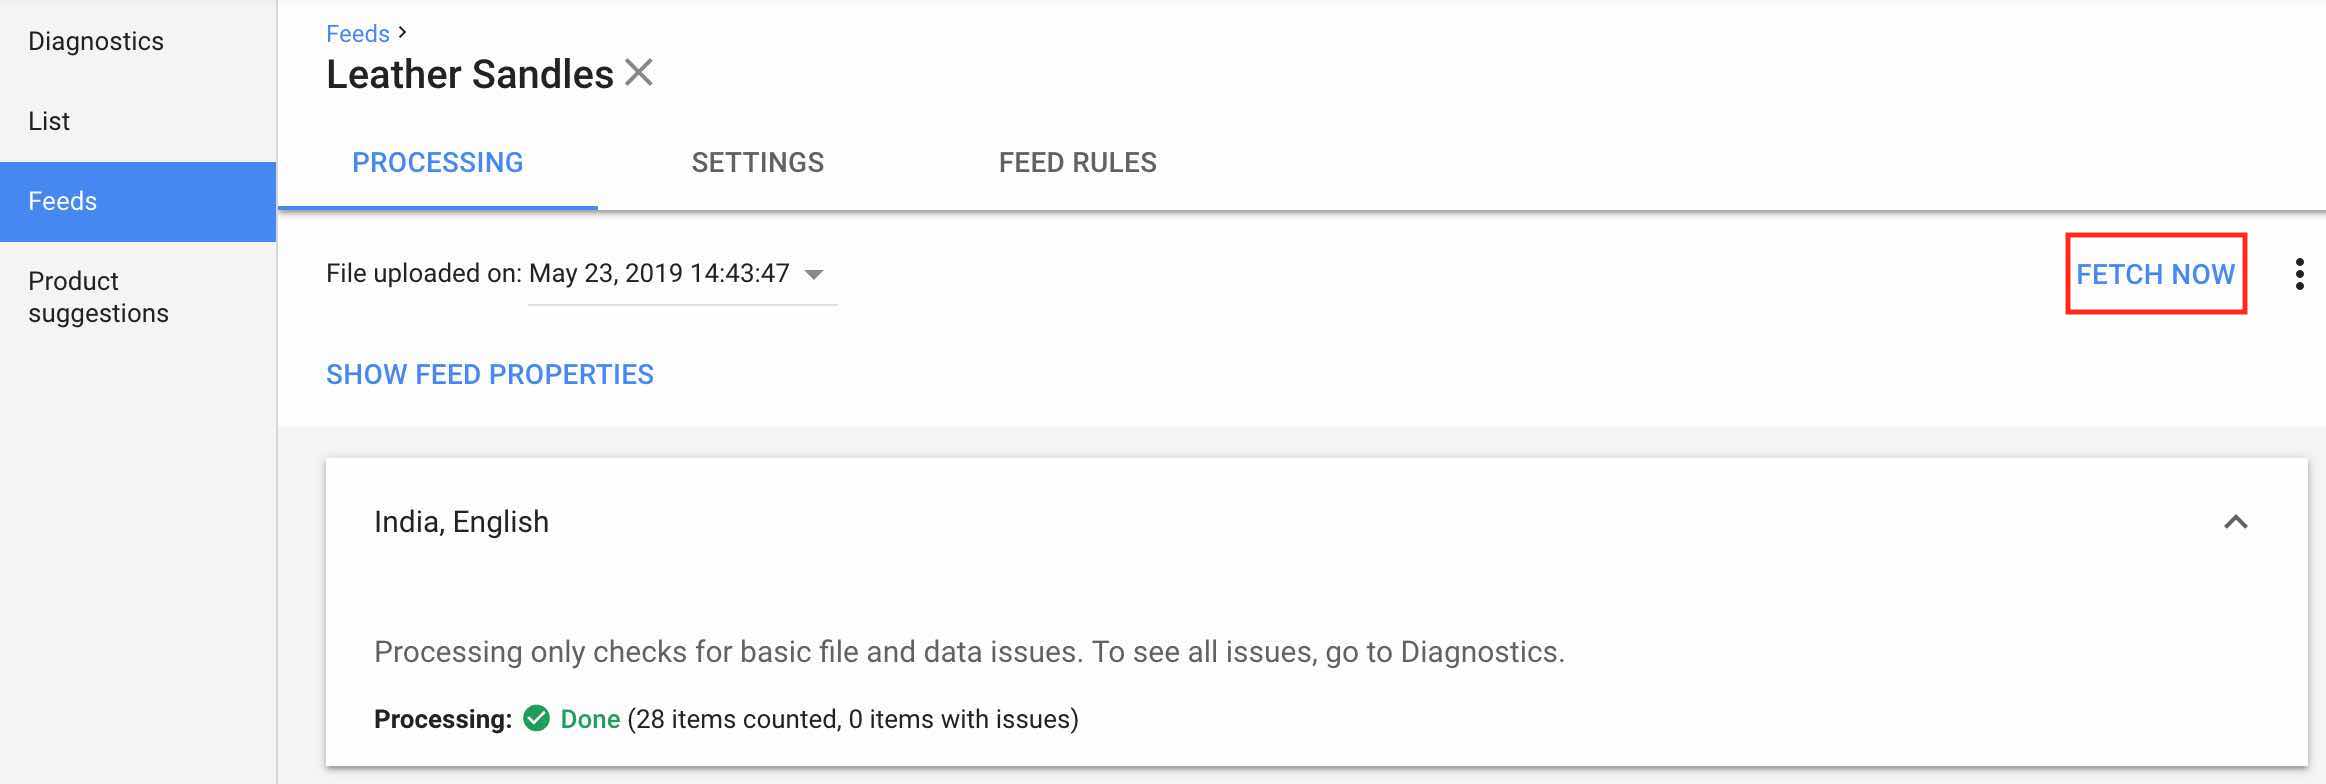
Once the fetch processing is done, you can see below a green tick mark, which means the details which you have added have no errors. If there are errors, Google will show errors, which we need to rectify to move ahead.
Step 6:
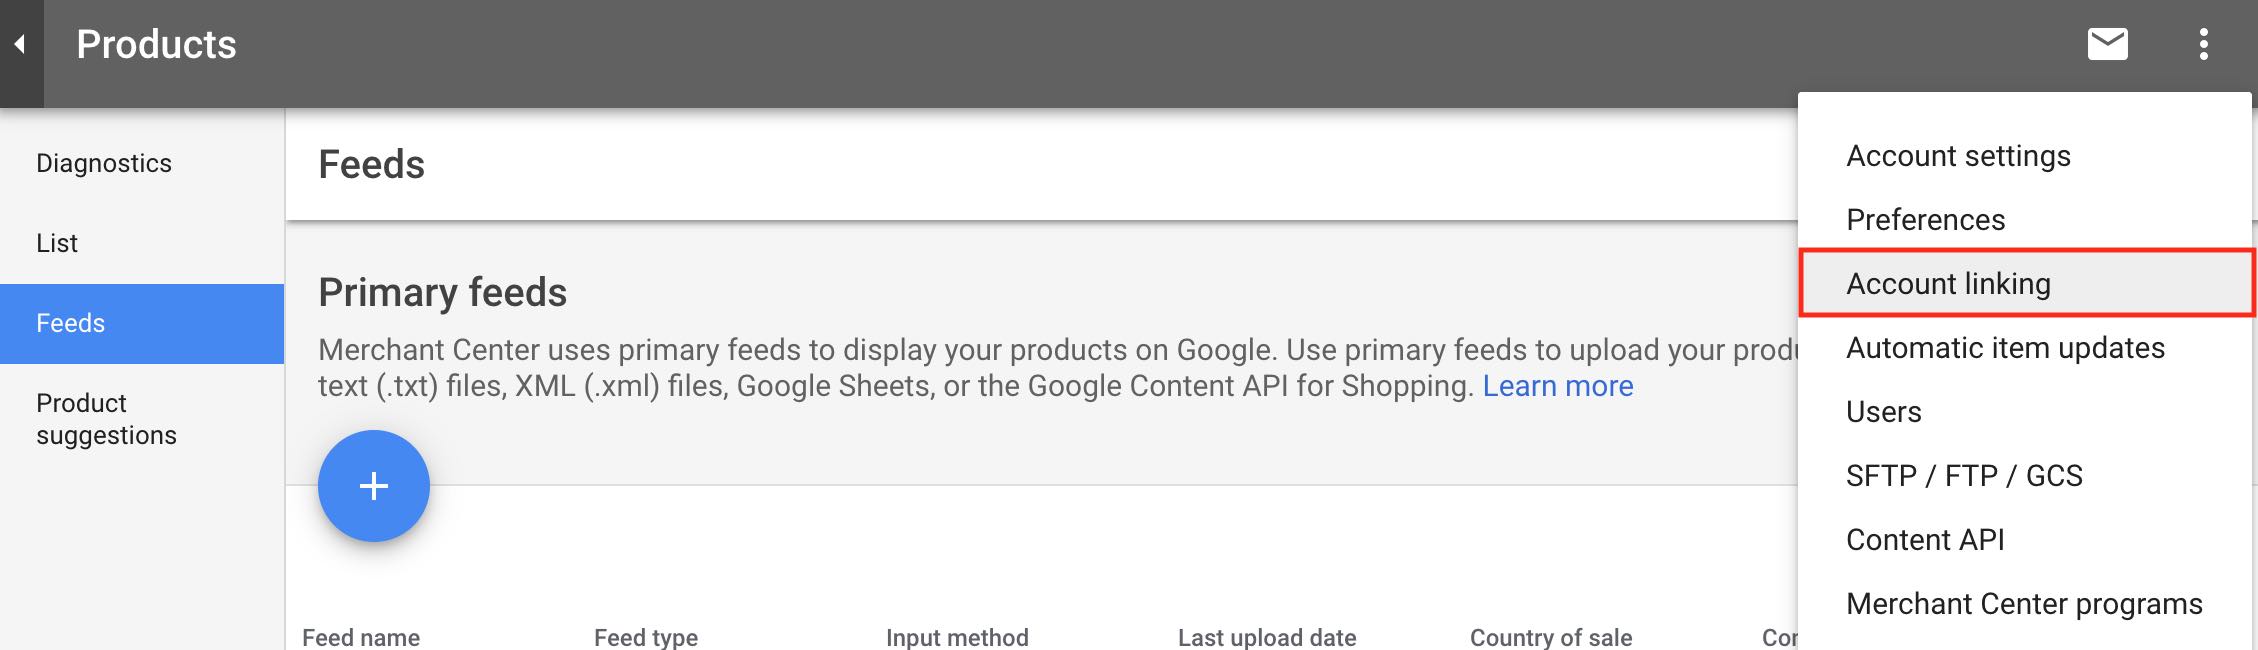
The next step is to link merchant center account to your Google Ads account, because the product data is in merchant center, so in order to advertise through Google ads, we need to link both the accounts. To link the account click on the right hand side option as below and click account linking option under it.
Once you click on account linking, enter the CID no of the Google Ads account to which you want to connect your merchant center for running shopping ads as below.
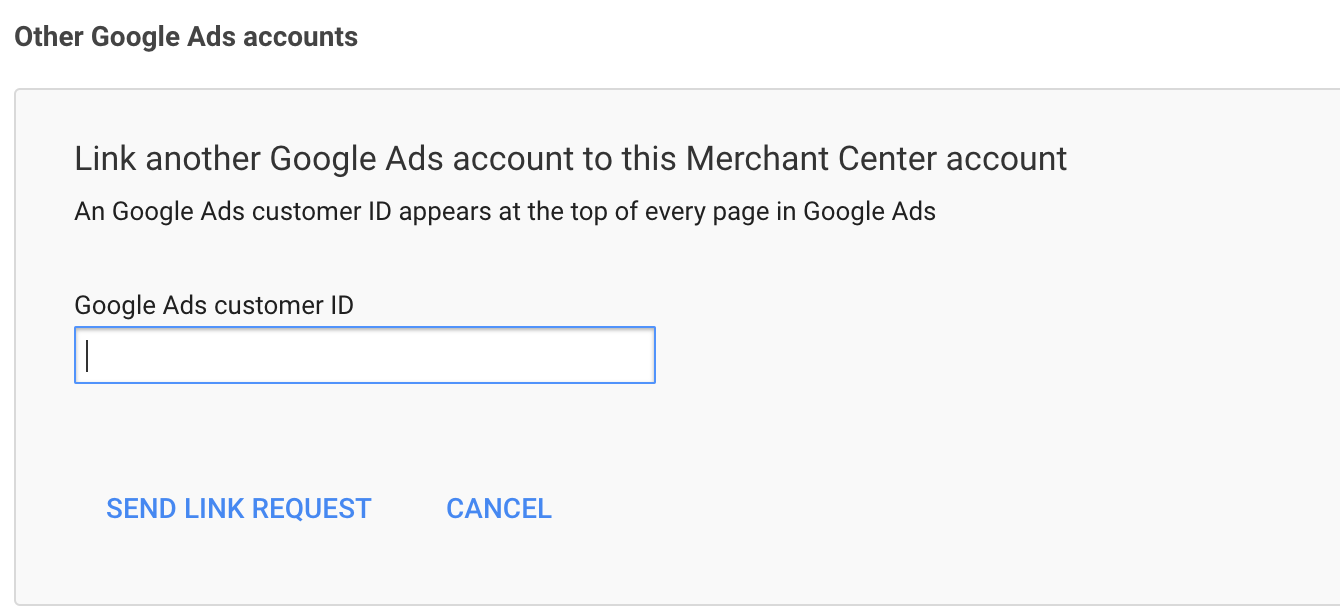
Once you send link request after entering the CID no, your adwords account will receive a request. You can accept the request by clicking linked accounts in your Google Ads account.
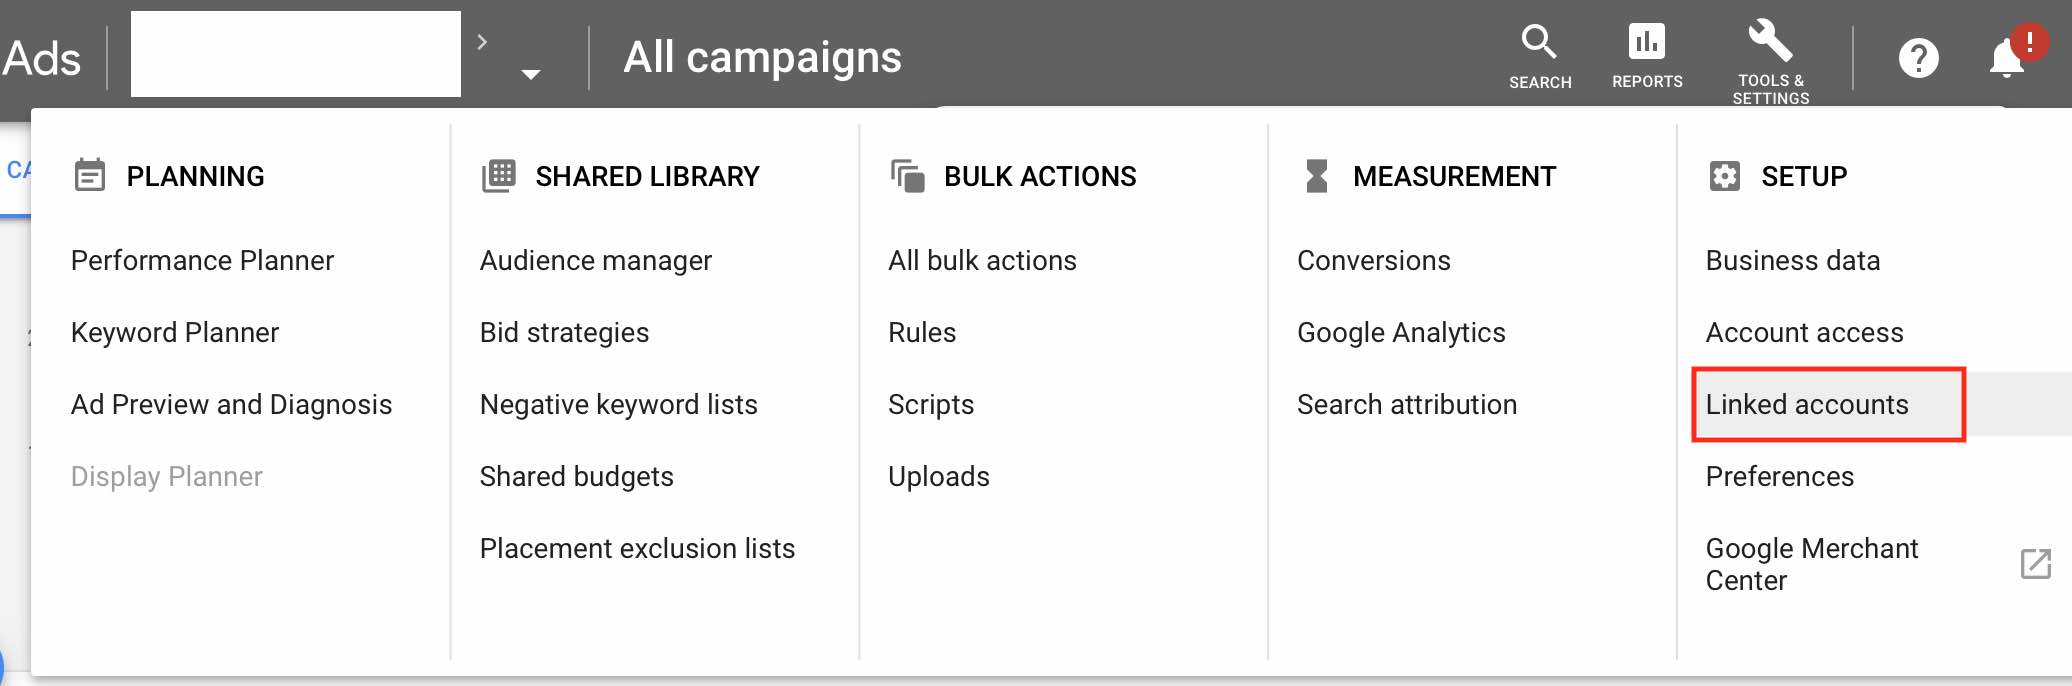
Once you click linked accounts, you will see the request, just accept it and your merchant center account is connected to your Google Ads account.
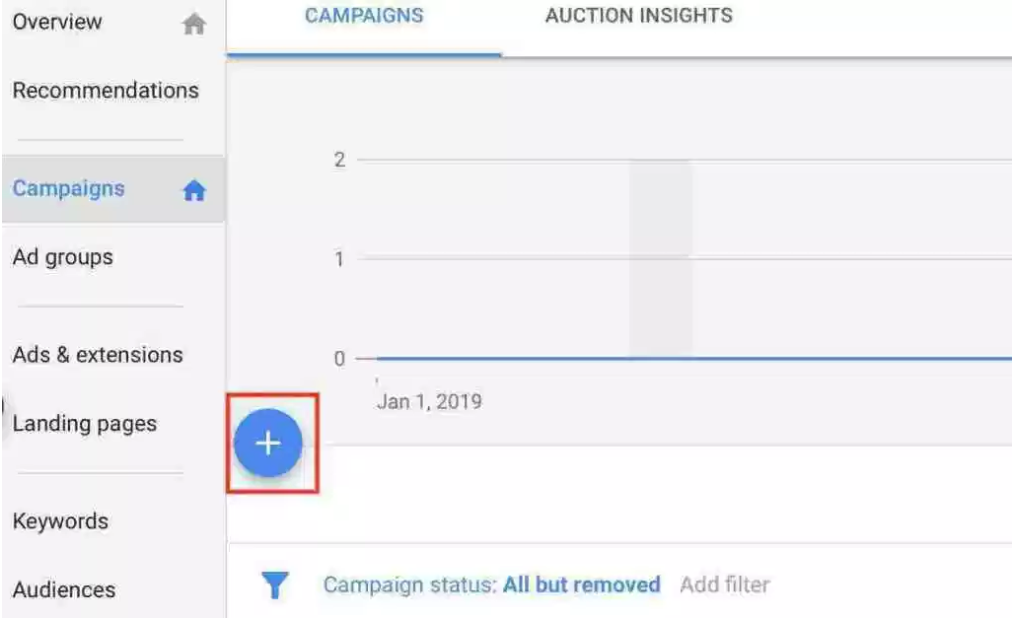
Step 7:
Now the next step is to create Google Shopping campaigns. Click on the plus blue button to create a new campaign.
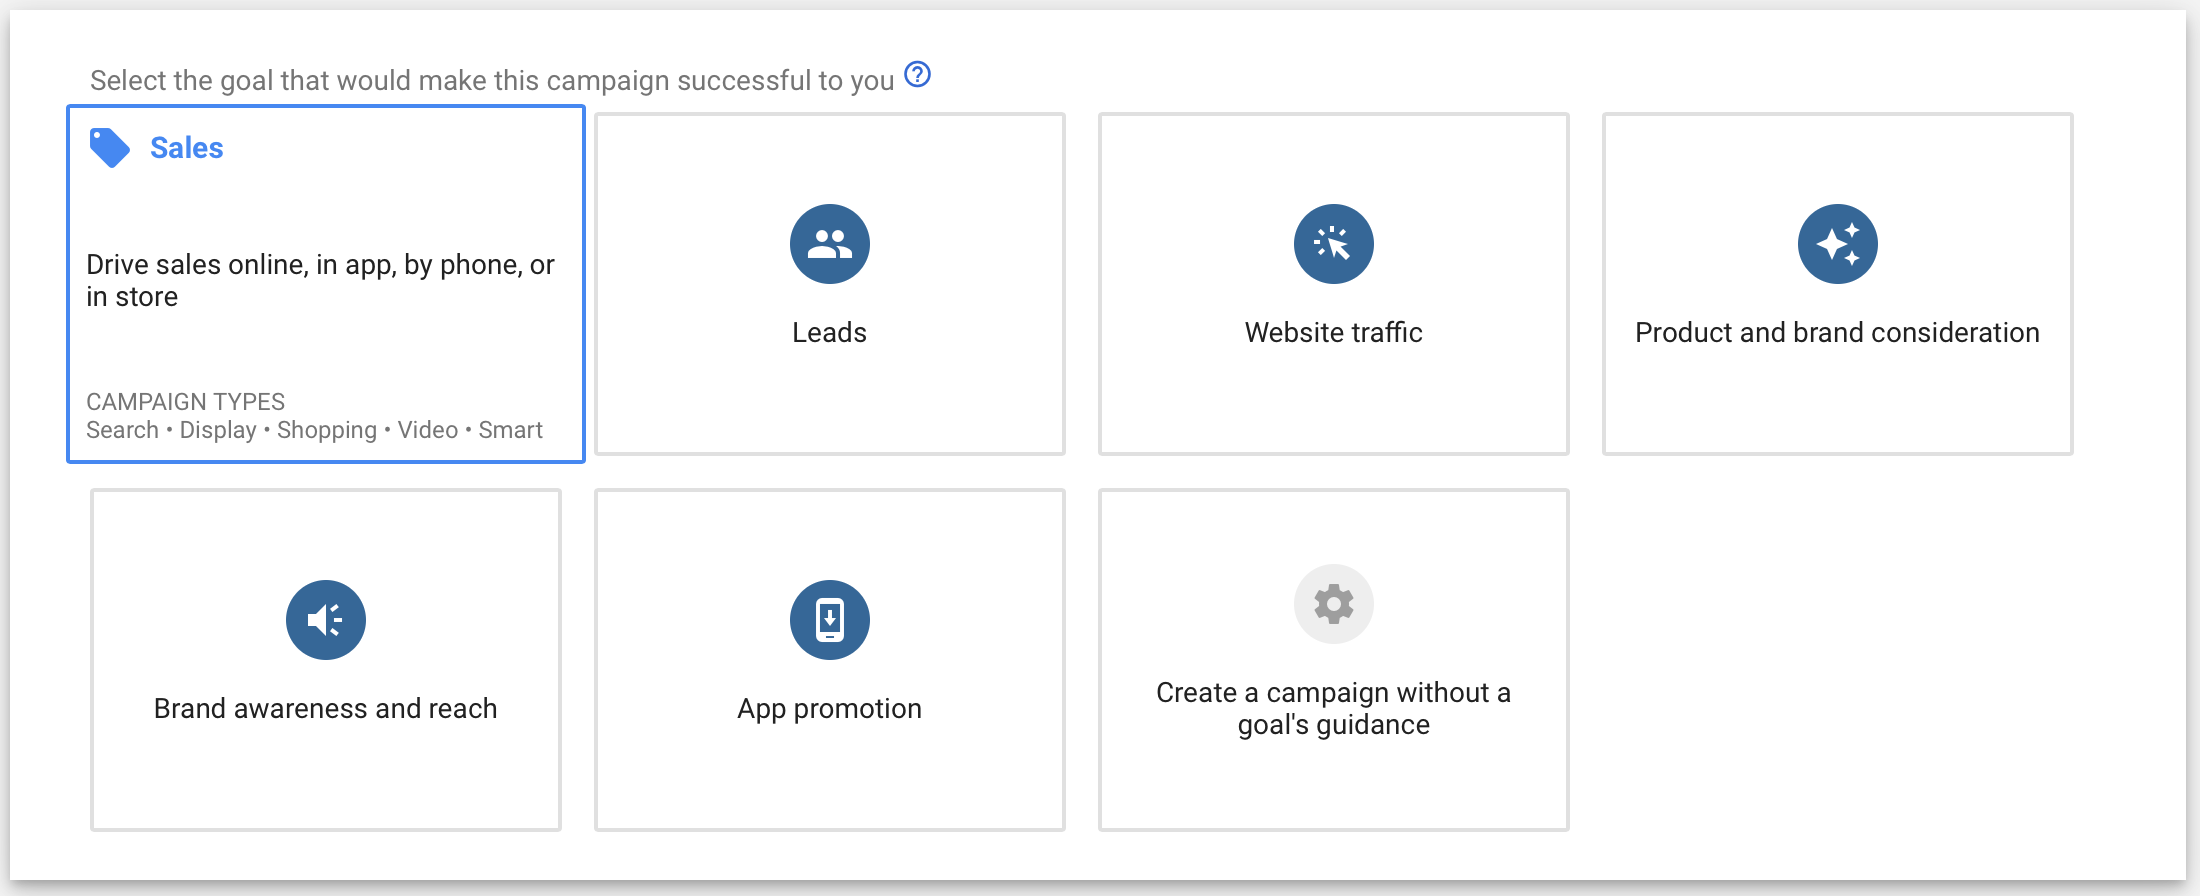
Step 8:
The next step is to select the goal of your campaign. There are different types of goals to choose from including sales, leads and website traffic for shopping campaigns.
As my goal is to generate sales on my ecommerce website, I am going with sales option. To understand other goals options, you can view step 1 in article An Ultimate Guide to Create Search Ads
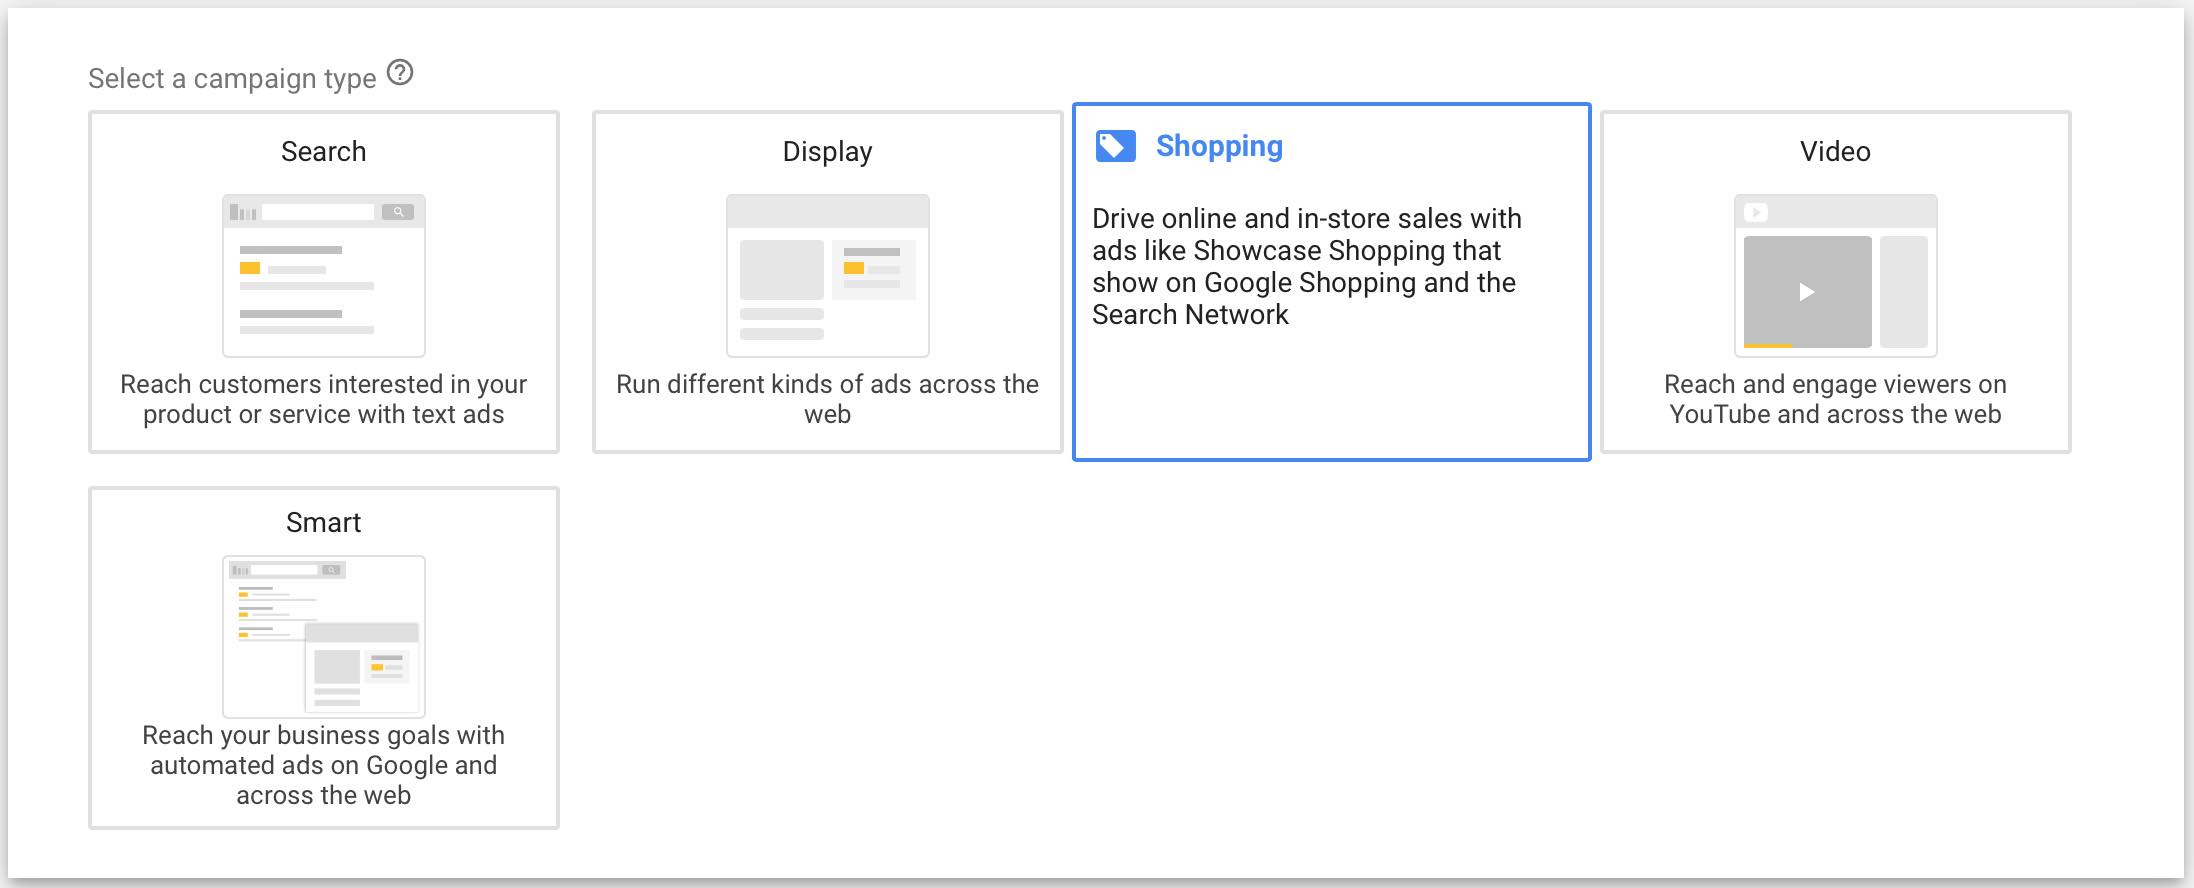
Step 9:
The next step is to select campaign type. As our campaign is shopping campaign, I am going ahead with shopping campaign.
Step 10:
The next step is to select merchant center account, you can select the one which has the product feed. I am selecting La Marca, as my objective is to define shopping campaign for La Marca website.

Step 11:
The next step is to select campaign type. There are two types of campaign sub types as below
- Smart Shopping Campaign
- Standard Shopping Campaign
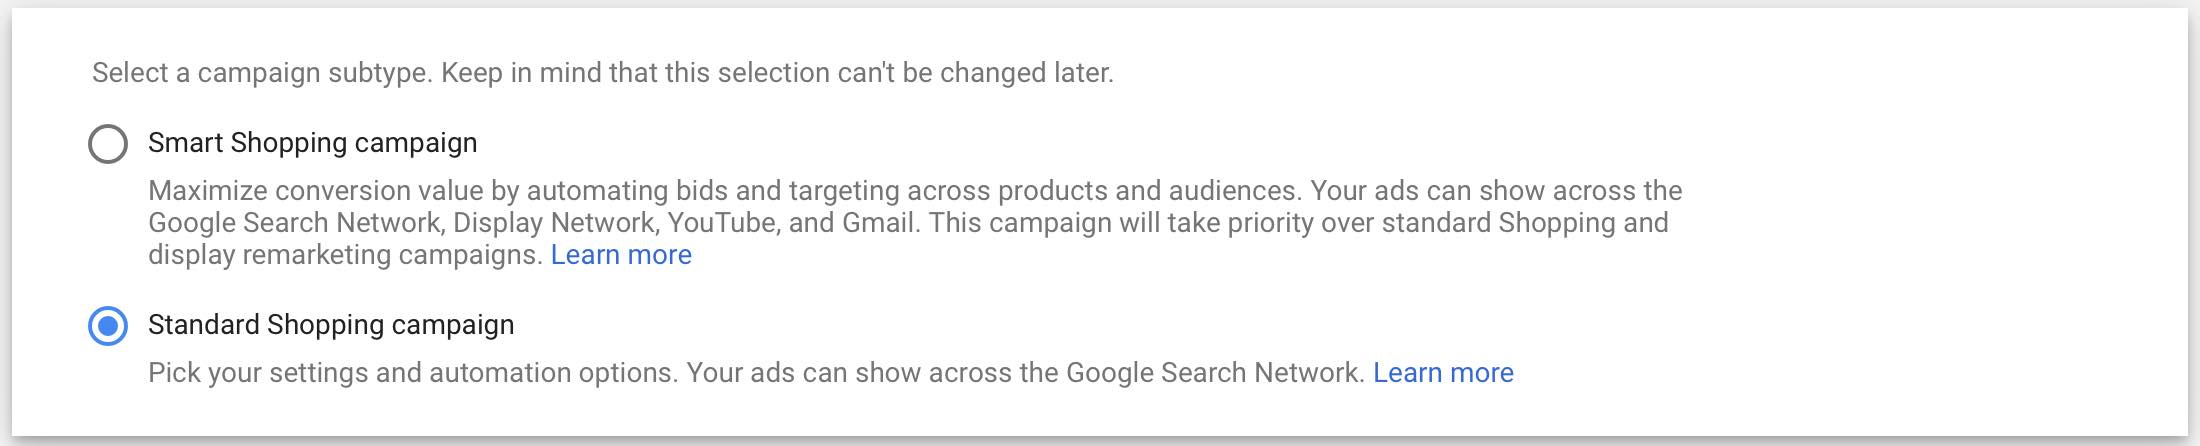
Smart Shopping Campaign
If you are looking to advertise on search network, plus display network, plus youtube and gmail, then this is the best option to go with. In this option, the bidding is automated which helps you to maximize conversions.
Standard Shopping Campaign
Standard shopping campaign included choosing your bidding strategy and targeting options which are only restricted to search network only.
I am going to go with standard shopping campaign because my objective is to only run shopping ads on search network only.
Step 12:
The next step is to define the campaign name. I am going with the below campaign name as I want to create a shopping campaign for targeting Delhi searches only

Step 13:
The next step is to define the bidding strategy. I am going with manual bidding strategy because I want to define the maximum CPC’s for my campaign.

To know more about other bidding strategies, refer article – An Ultimate Guide to Google Ads Bidding Strategies
Step 14:
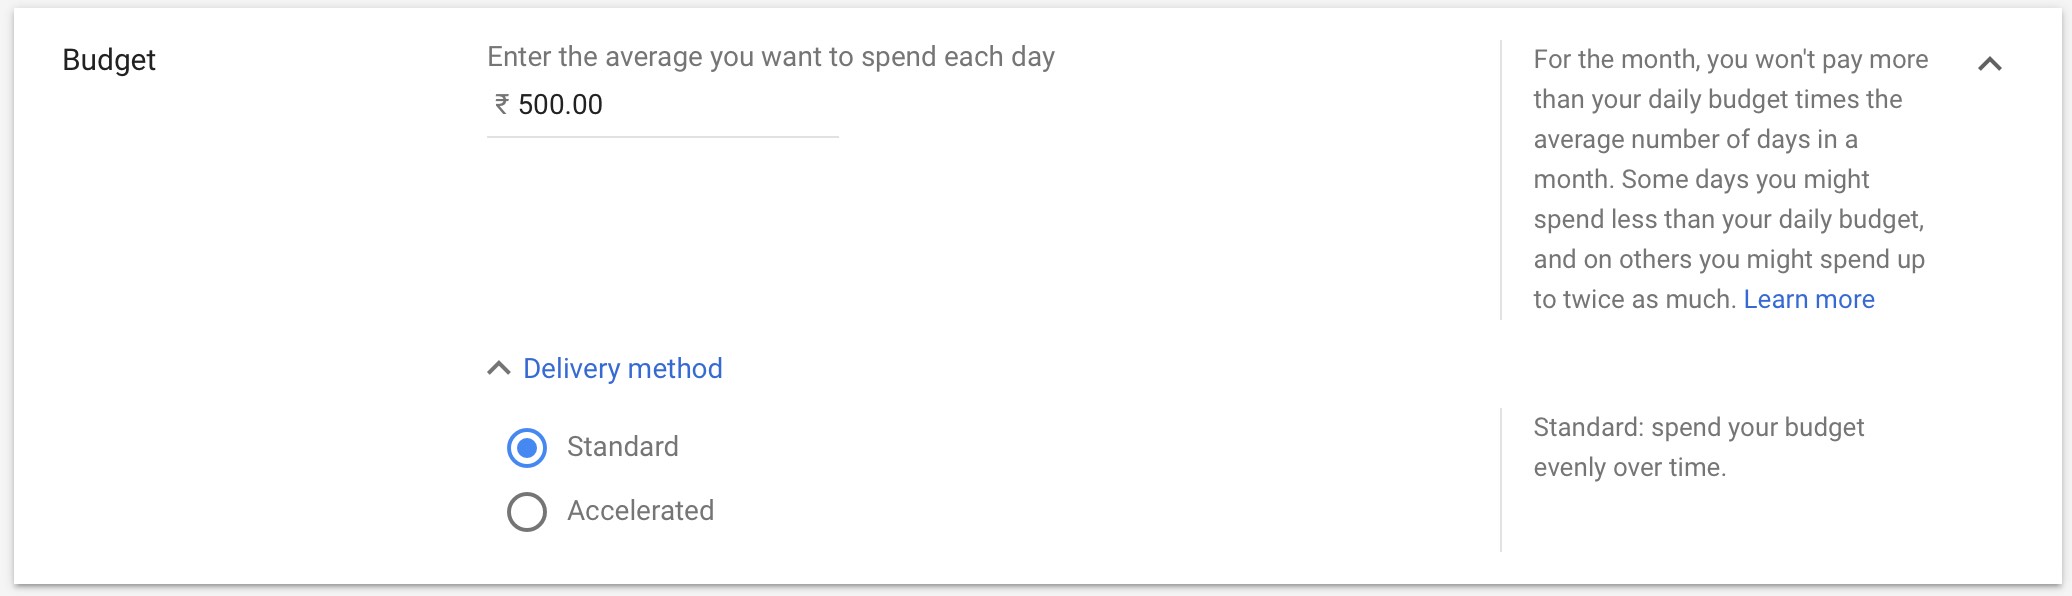
The next step is to define budget, you can start with any amount with min of Rs. 500 or $10.
Step 15:
The next step is to define campaign priority. Campaign priority allows to decide which campaign should place bid, if you have the same product in multiple campaigns. I am going with low because I have only one shopping campaign.
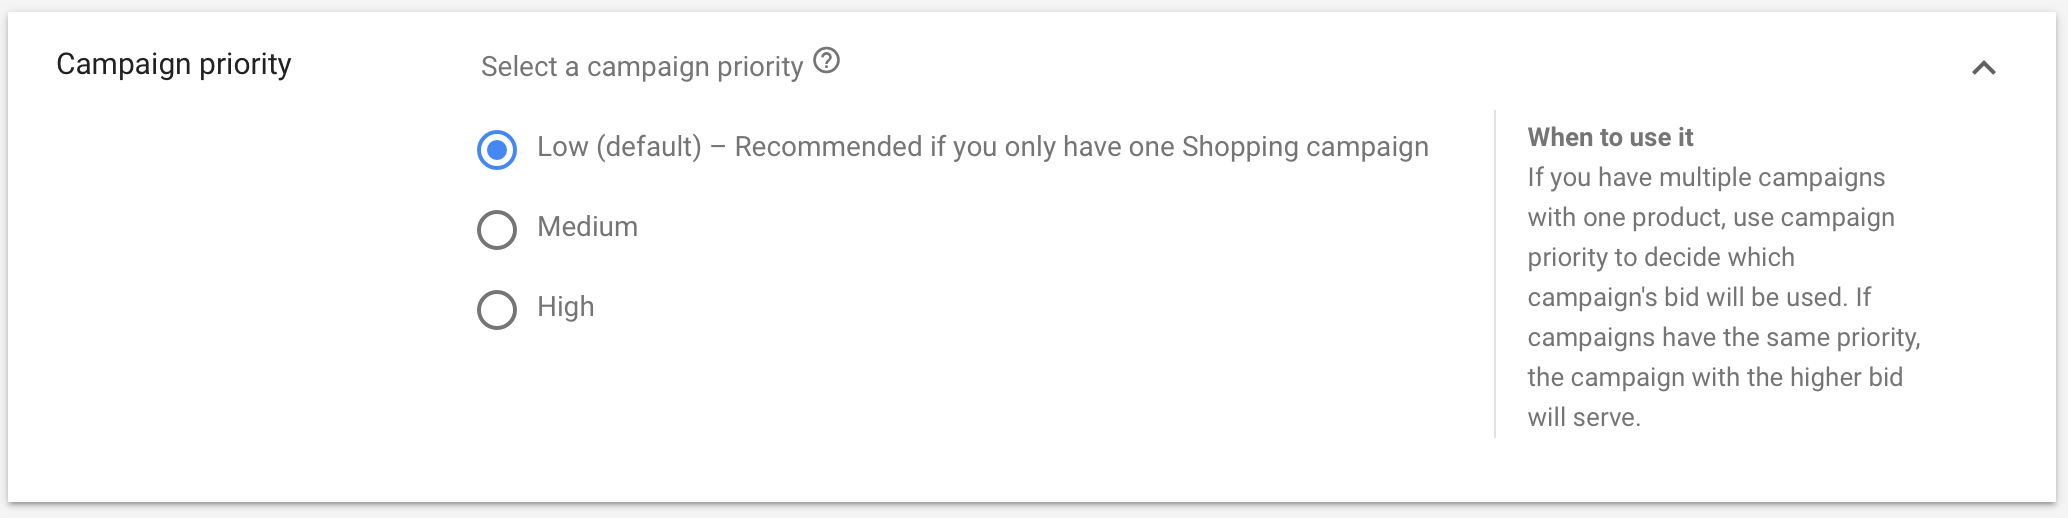
There are other two options medium and low. If you go with medium priority, the priority for this campaign will be medium and the campaign with high priority will be eligible to show the product.
If you set this campaign with high priority, then the priority for this campaign will be the first to participate in the auction and show the ad.
Step 16:
The next step is to select networks, as we are using search network, we will be going with search network.

Step 17:
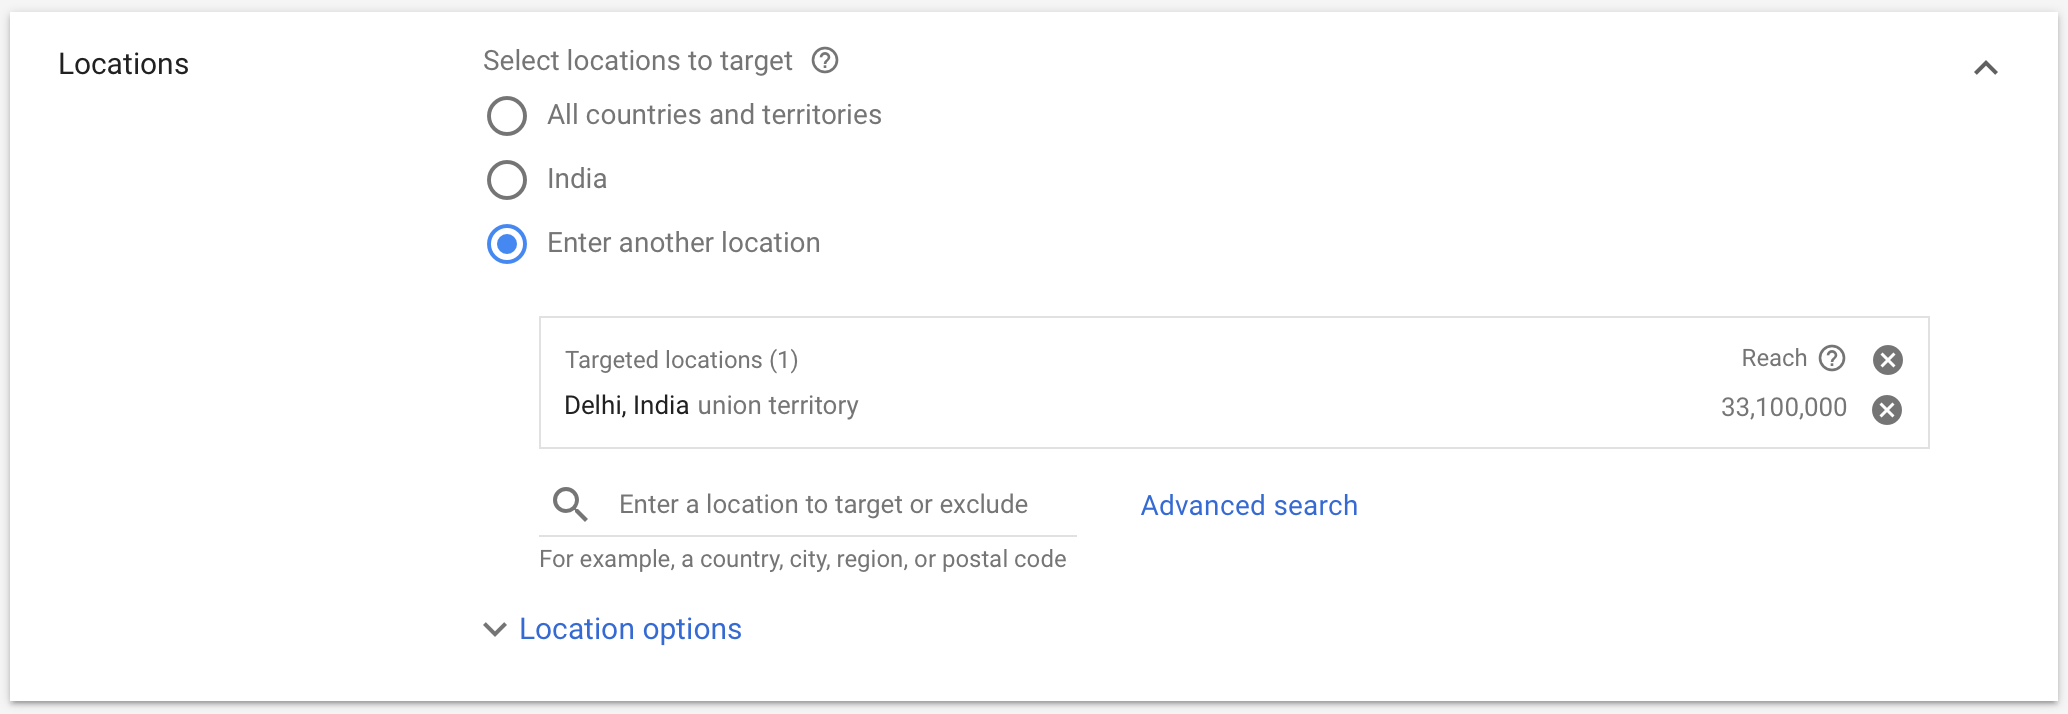
The next step is to select location. I am selecting Delhi because I want to go target users in Delhi only.
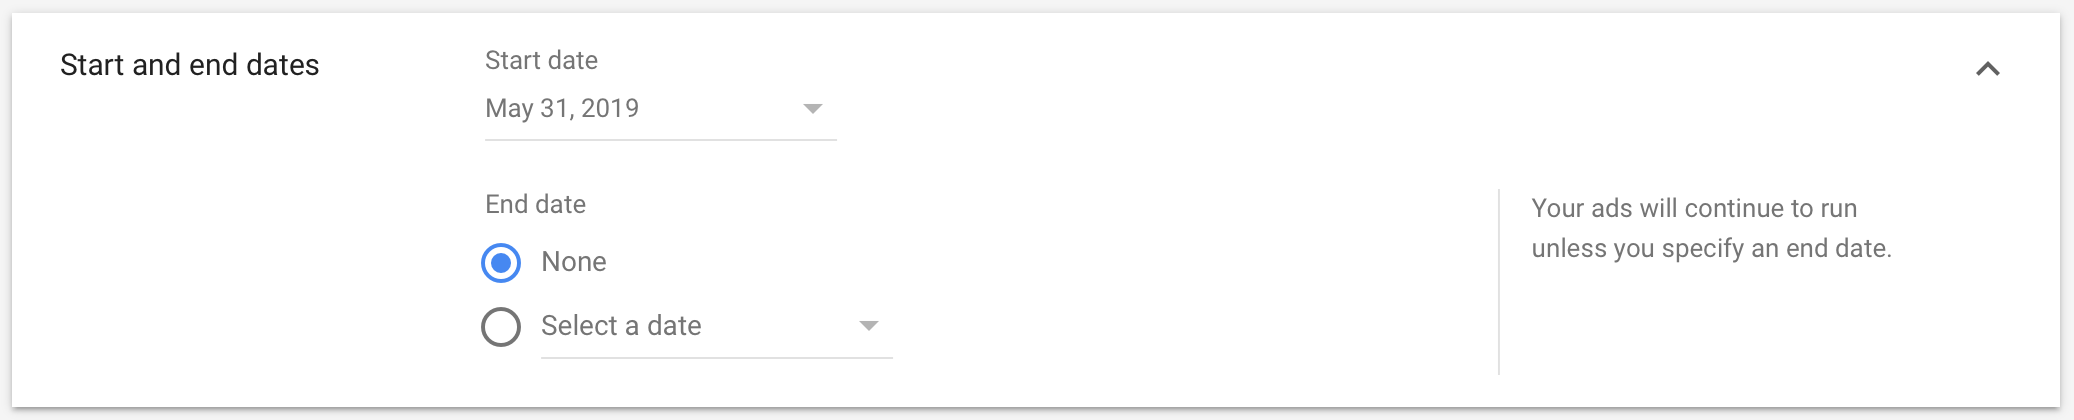
Step 18:
The next step is to define start date and end date for your shopping campaign. You can select as per your requirement for shopping campaign. I am not selecting any dates here as I want to keep this campaign on going.
Step 19:
The next step is to define ad group type. There are two types of ad group types as below
- Promote Individual Products
- Promote a Variety of Products
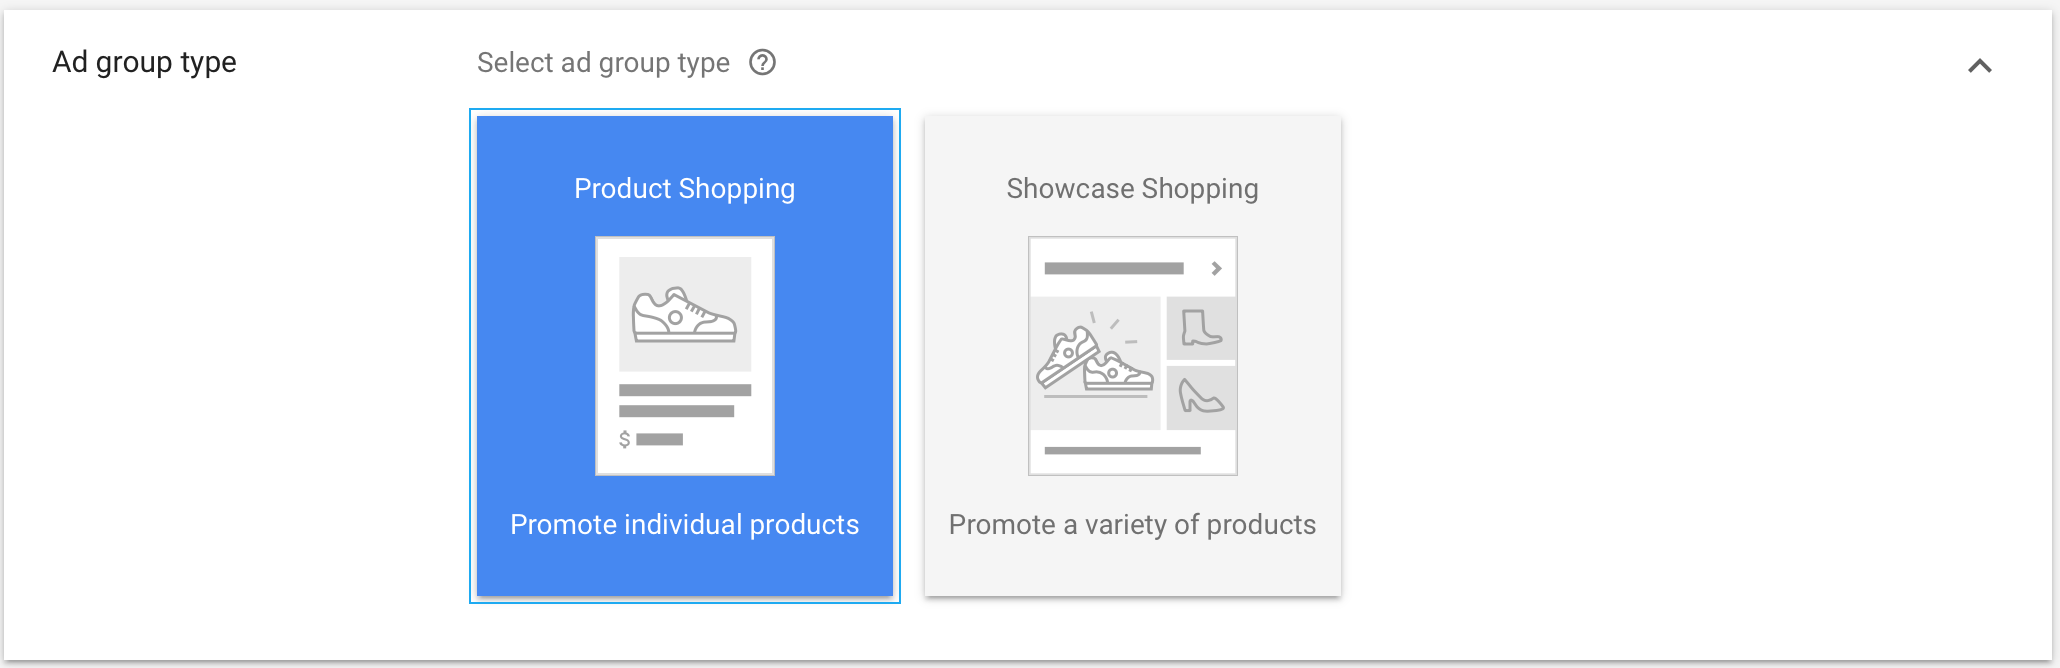
Promote Individual Products
In this option you can promote individual products on the ad copy
Showcase Shopping Ads
If you go with this option, you can promote multiple products within an ad copy. Showcase ads are a great way to showcase multiple products within the ad copy.
How showcase shopping ads work?
When someone clicks on the showcase ad, it expands, and users can view all the products. If a user stays for 10secs on the expanded ad or clicks on the ad, the advertiser is charged. The advertiser is not charged if the user closes the ad within 10 secs. Showcase shopping ads work on a CPE model (cost per engagement).
I am going with individual product ads, as I only have 28 products on the website and very few products under each category.
Step 20:
The next step is to define ad group name and bid for the ad group. I have defined both as below. You can define the name of the ad group basis the product you are marketing and define the maximum bid you are willing to pay.
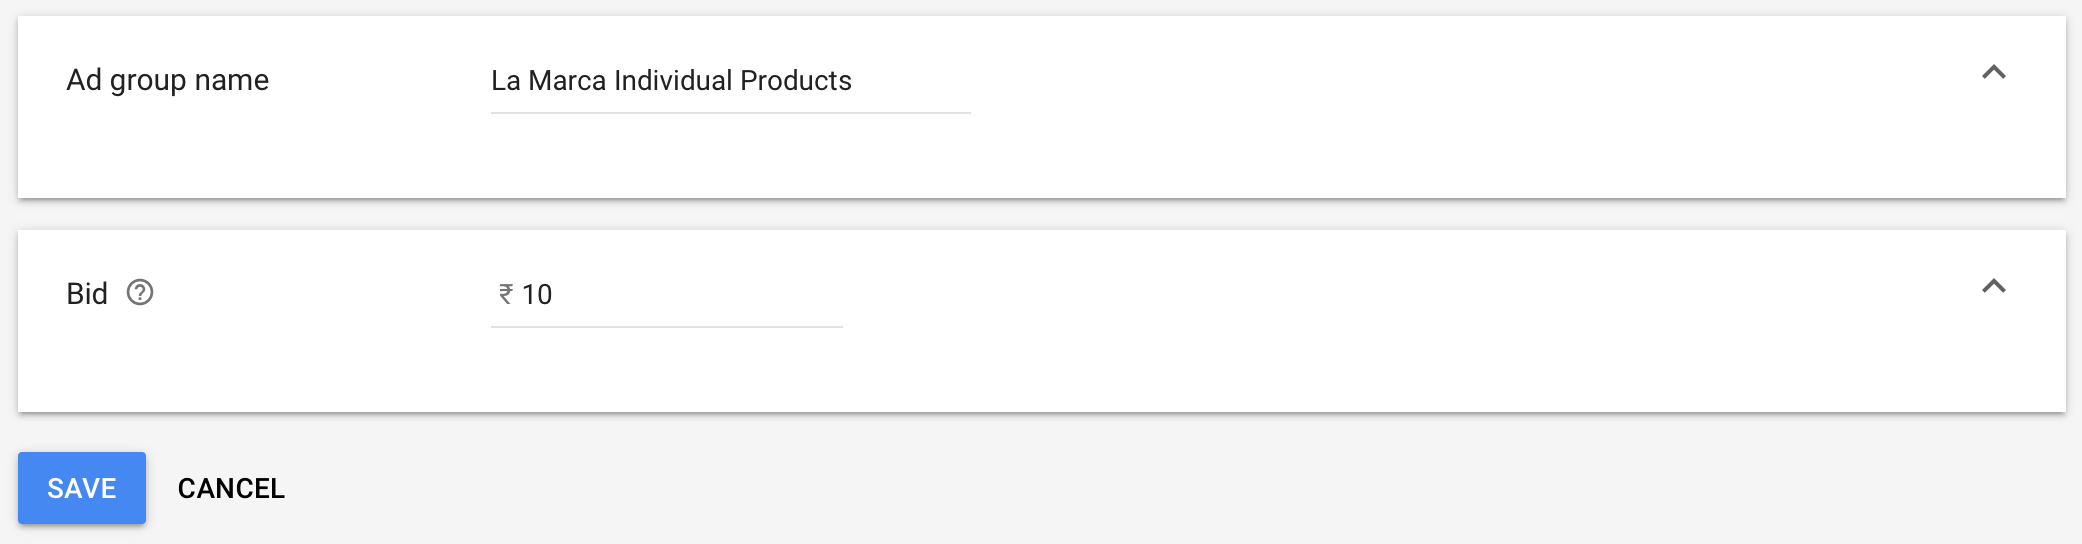
Click save and your campaign is ready to go live.
Step 21:
You can further subdivide the products. In order to do so, click on the plus button as below

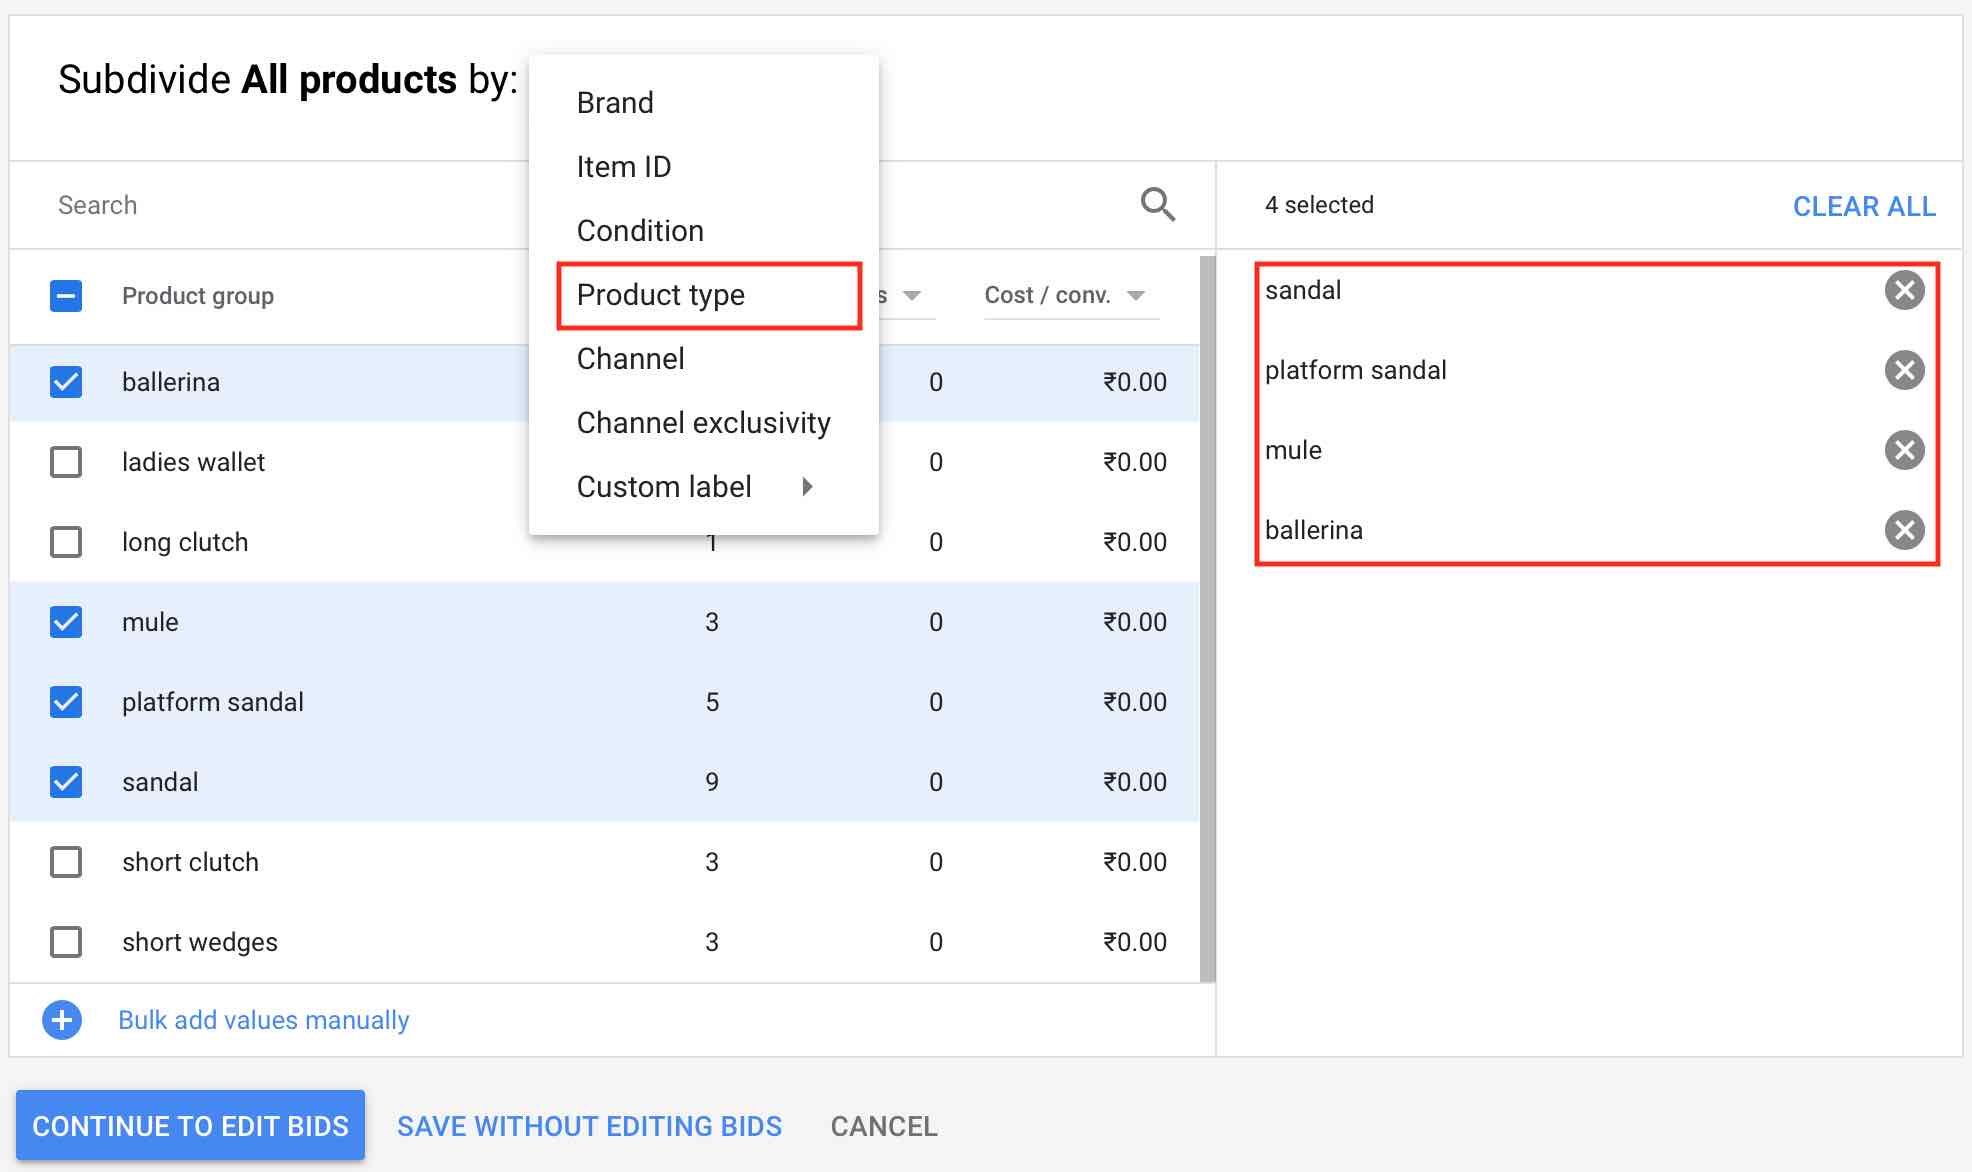
Once you click on the plus button, you will see different options to subdivide as below
- Brand
- Item ID
- Product Types
- Channels
- Channel Exclusivity
- Custom Label
Brand – If you are promoting multiple brand you can subdivide by brands.
Item ID – If you want to subdivide by item ID’s, you may move ahead with this, but I don’t it’s needed as every product has a different ID. You can use it during the launch of the product.
Condition – Basis the condition which is new, used and refurbished.
Product Type – This is interesting, as you would have different product types. For Eg: In the website which I am promoting, we have product types as platform sandals, mules, ballerine etc. So I have subdivided all the products by product type as I want to do differential bidding.
Channel – Channel has two options, online and local stores. As we have an online store, we would always go with online if we want to subdivide the groups. But I don’t think so it’s required in our case
Channel Exclusivity – Channel exclusivity allows you to segment products by their availability in one of channels or both of them.
It is important to note that for channel and channel exclusivity subdivision, you need to setup local product feeds in your Google Merchant center account.
Custom Label – Through custom label you can custom define subdivisions for your campaigns like collar tshirts, strip shirts etc. (if you are promoting shirts)
I am going with product type subdivision, so once I select that, I say continue to edit bids.
Step 22:
The next step is to define bids for the product types I have subdivided with. So I have defined the bids for the product subtypes as below. You can see I have differential bidding for different product types. So my ads will participate in the auction with different bids for different product types.
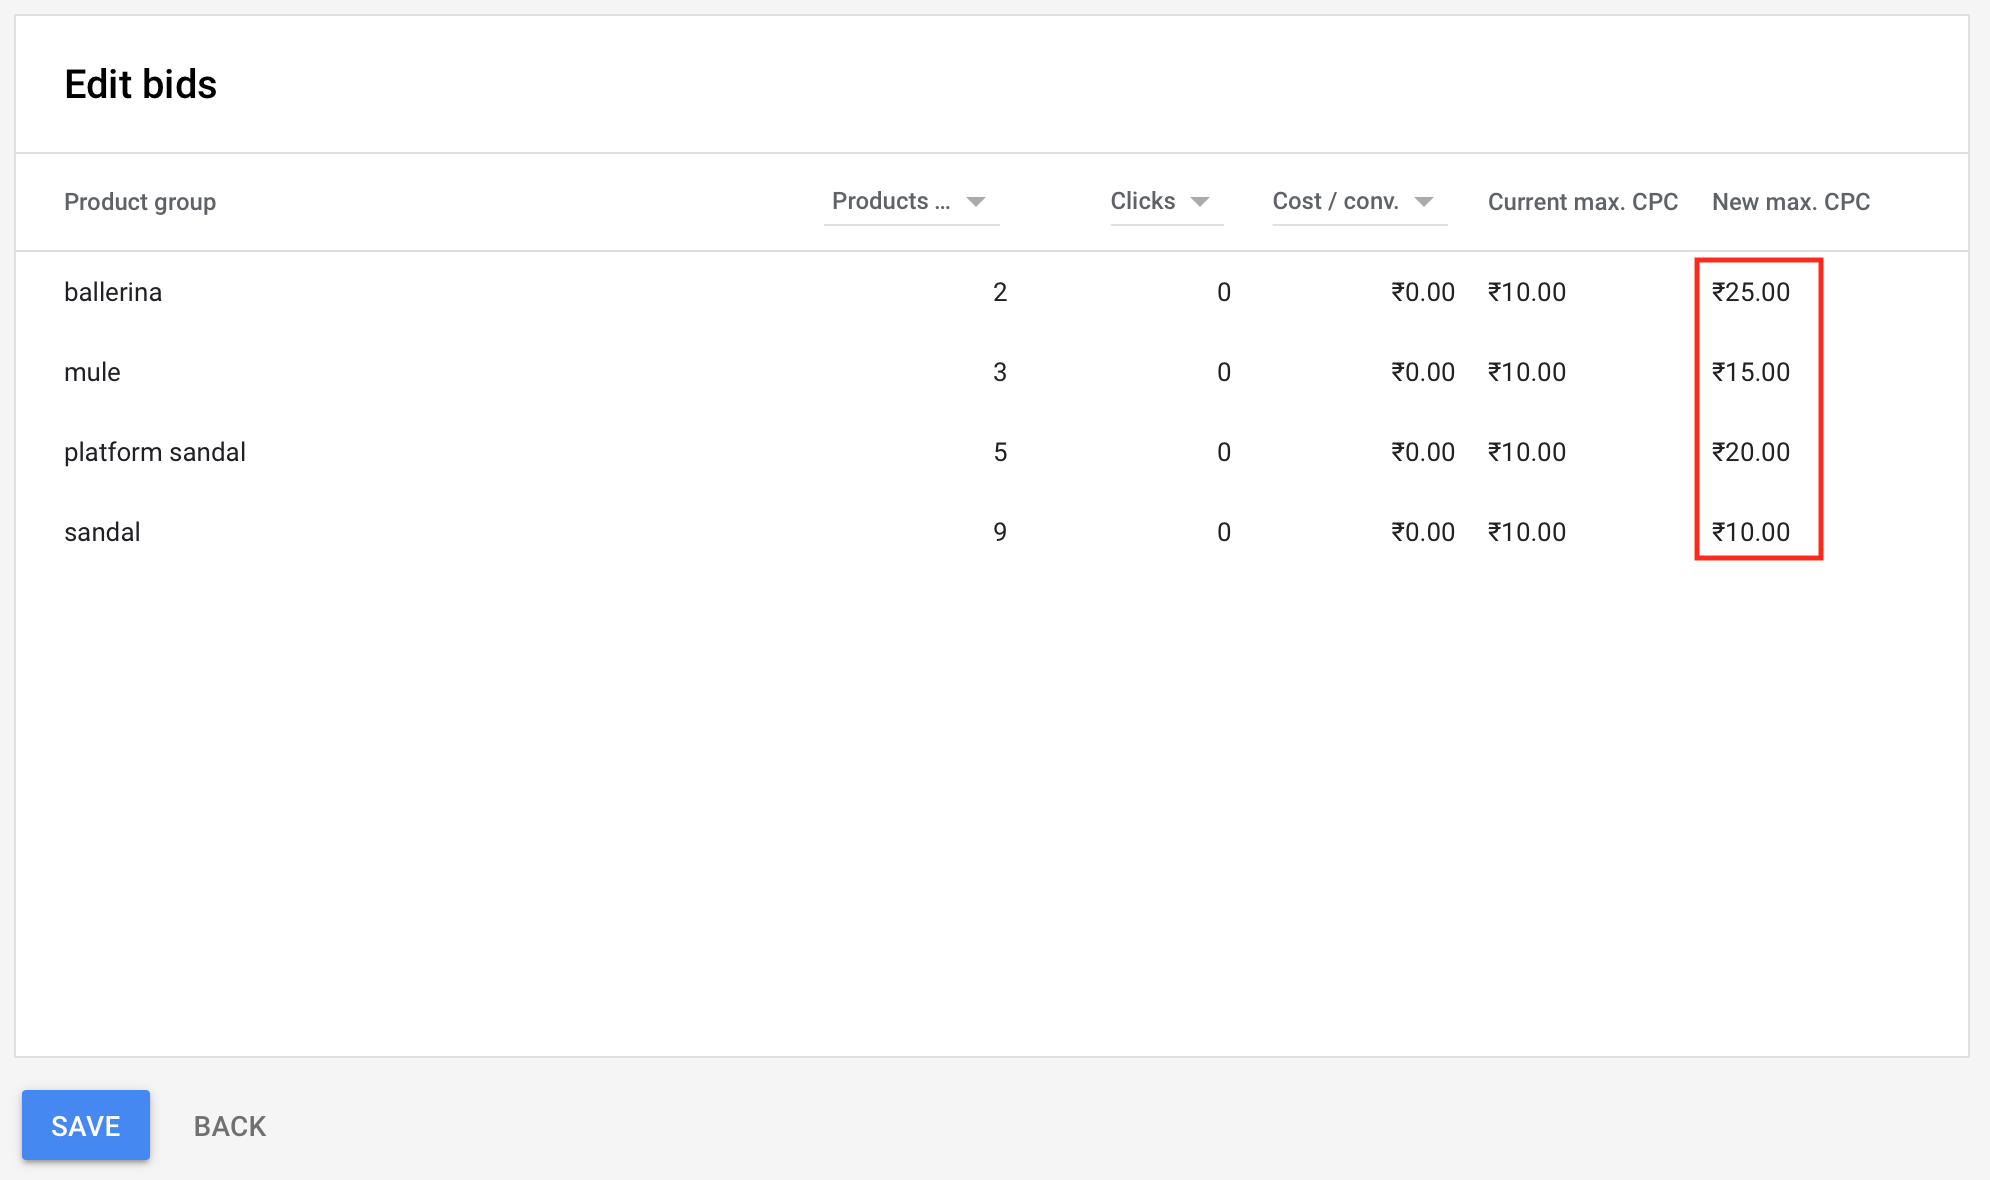
Say save and your campaign is now ready to go live with different bids for product types. Once the feed is approved the campaign will go live in a few hours. If you see that you are not receiving impressions, then do check the merchant center account feed, if it has any errors.
Conclusion:
Shopping ads are very effective for ecommerce store. The success of any shopping campaigns will depend on how you have defined your product feed. Make sure your product feed has the maximum information which helps you to show ads to relevant searches on Google. Create your Google Shopping ads today and let me know how they are performing!

