
Understanding how your Facebook ads campaigns are performing is very important to measure the success of a campaign and further optimize to grow your business, that’s when Facebook pixel comes into the picture!
So What is Facebook Pixel
Facebook pixel is a snippet of code which is used to track conversions, track events, track actions and track audiences.
Facebook pixel code is to be added on the head section of the website. This code works as a conversion tracking code and remarketing code for your Facebook ads.
This guide will help you to understand how to create facebook pixel step by step. So let’s get started!
So How to Create Facebook Pixel?
Step 1
To create Facebook pixel, login to your Facebook business manager account or your Facebook ad account
If you don’t have a Facebook business manager account – Refer article, Master Guide To Facebook Business Manager Account
Step 2
Now click on Pixel from business settings drop down of your dashboard as below
![]()
Step 3
Once you click on pixels, you will see the below screen. Now say create pixel by clicking on the green button.
![]()
Step 4
Once you click on create a pixel, you will see the below screen. Now enter pixel name and your website URL. I have entered as per my business name.
![]()
Step 5
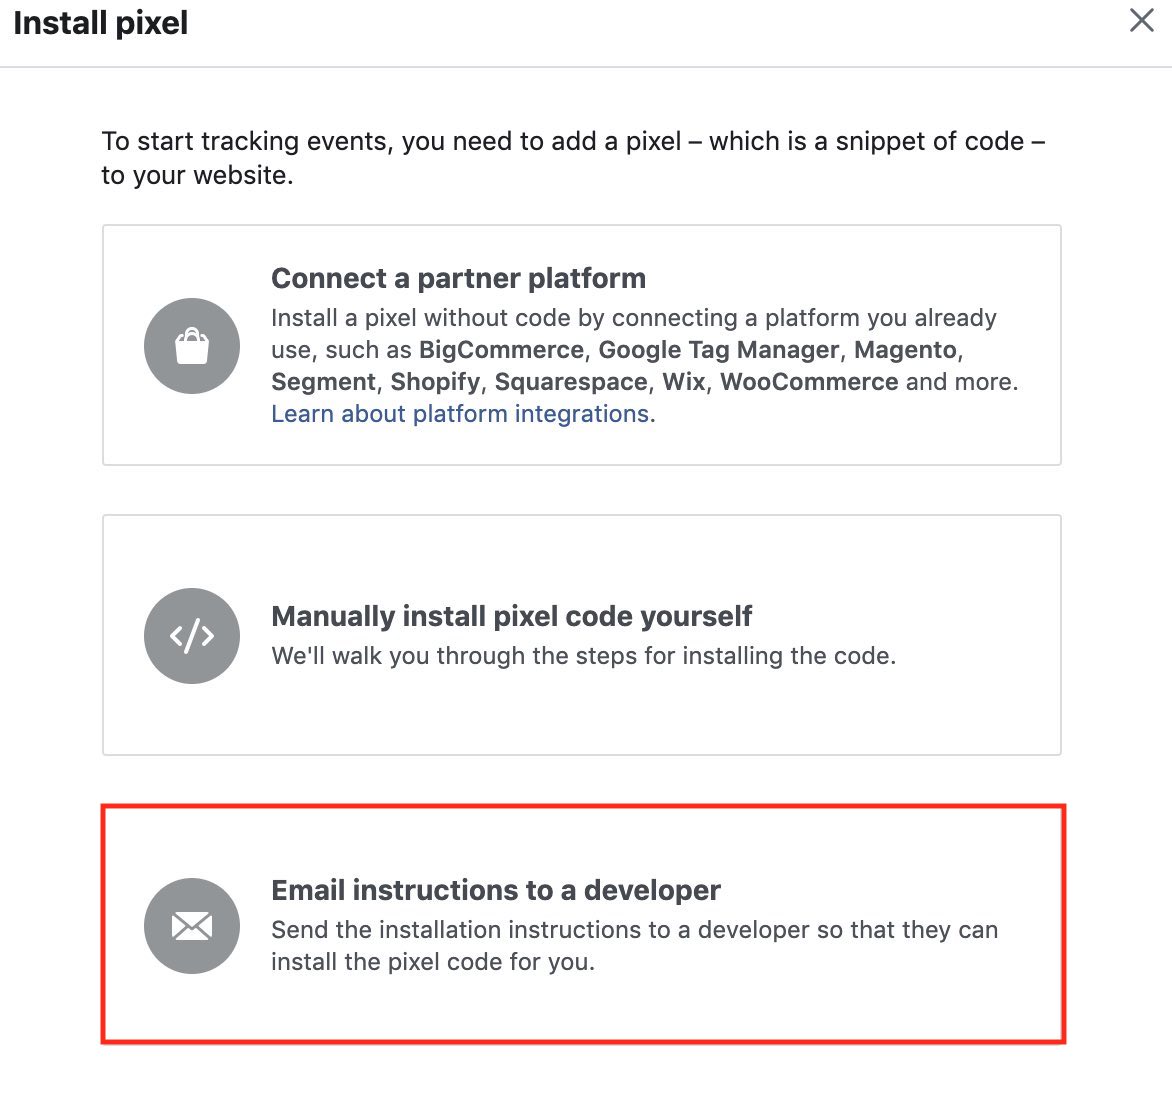
Once you say create, you will see three options as below to install pixel.
-
Connect a Partner Platform
-
Manually Install Pixel Code Yourself
-
Email Instructions To a Developer
![]()
Let’s understand each one in detail.
1. Connect a partner Platform
With this option you can you can install a pixel without a code snippet, by connecting a platform you already use, like shopify, tag manager, wix etc.
Below are the platforms you can connect with Facebook.
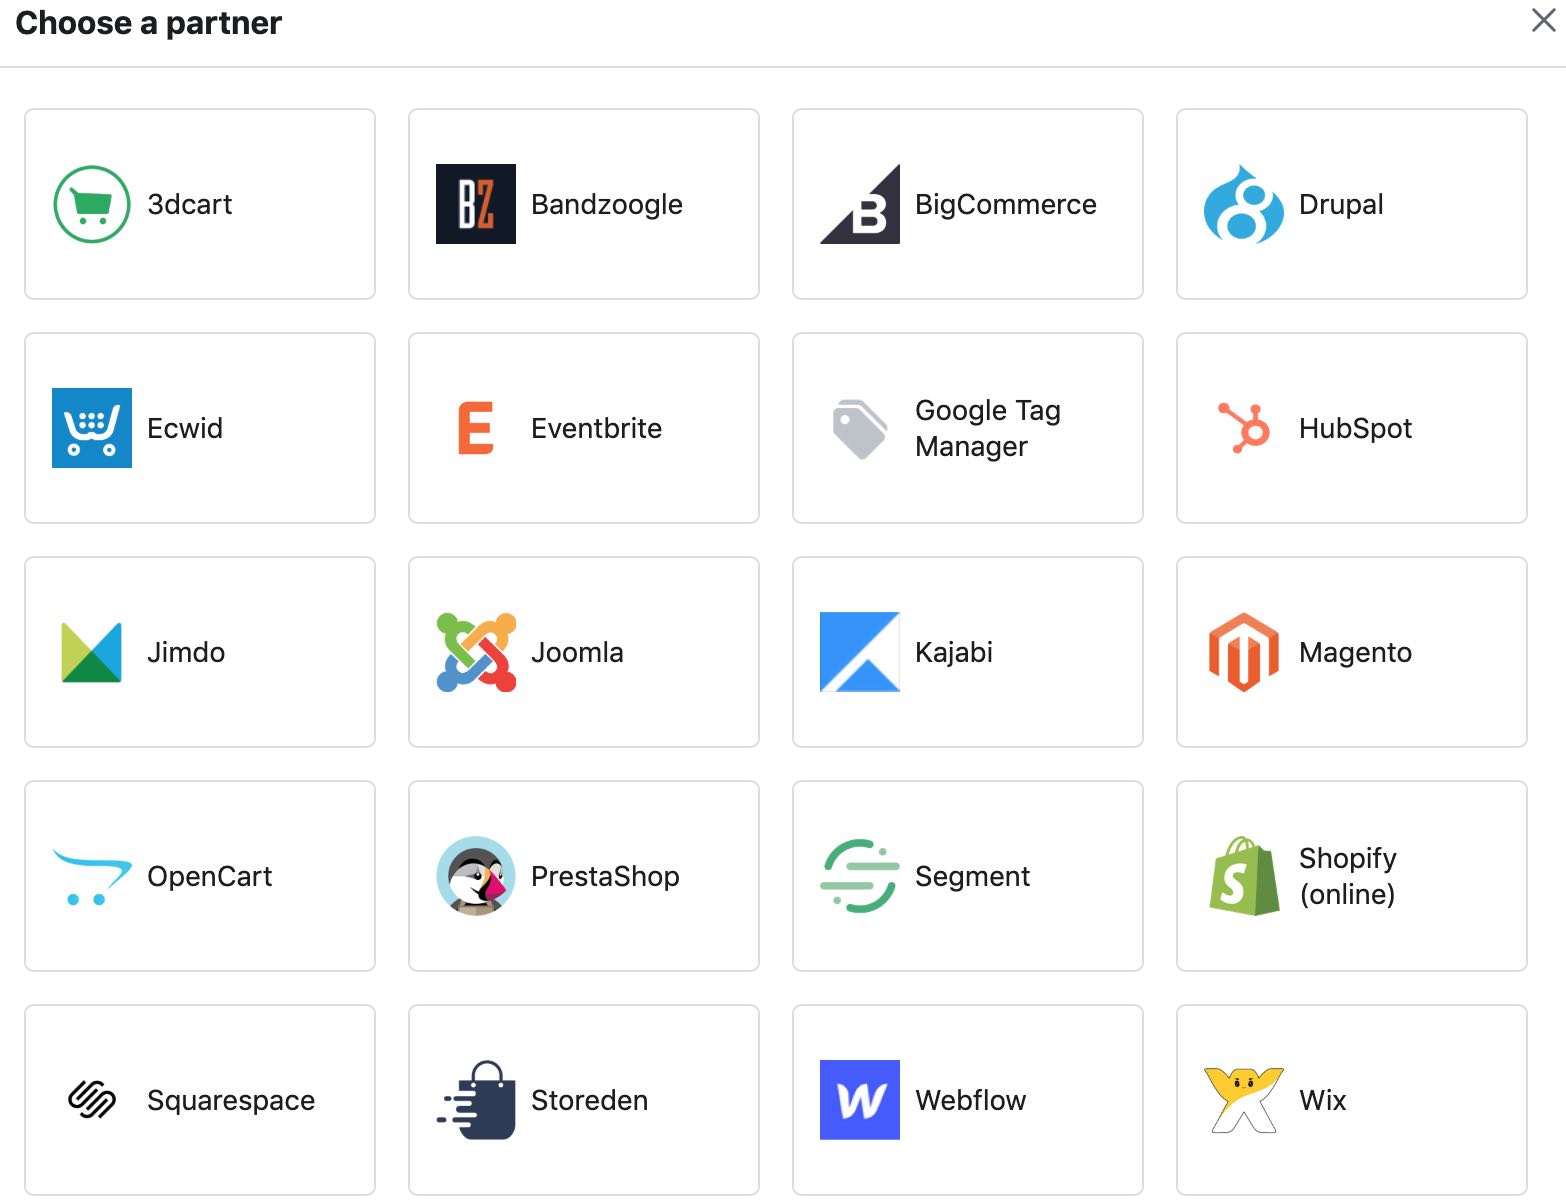
To know more about Facebook partner integrations – Refer article, Facebook Partner Integrations
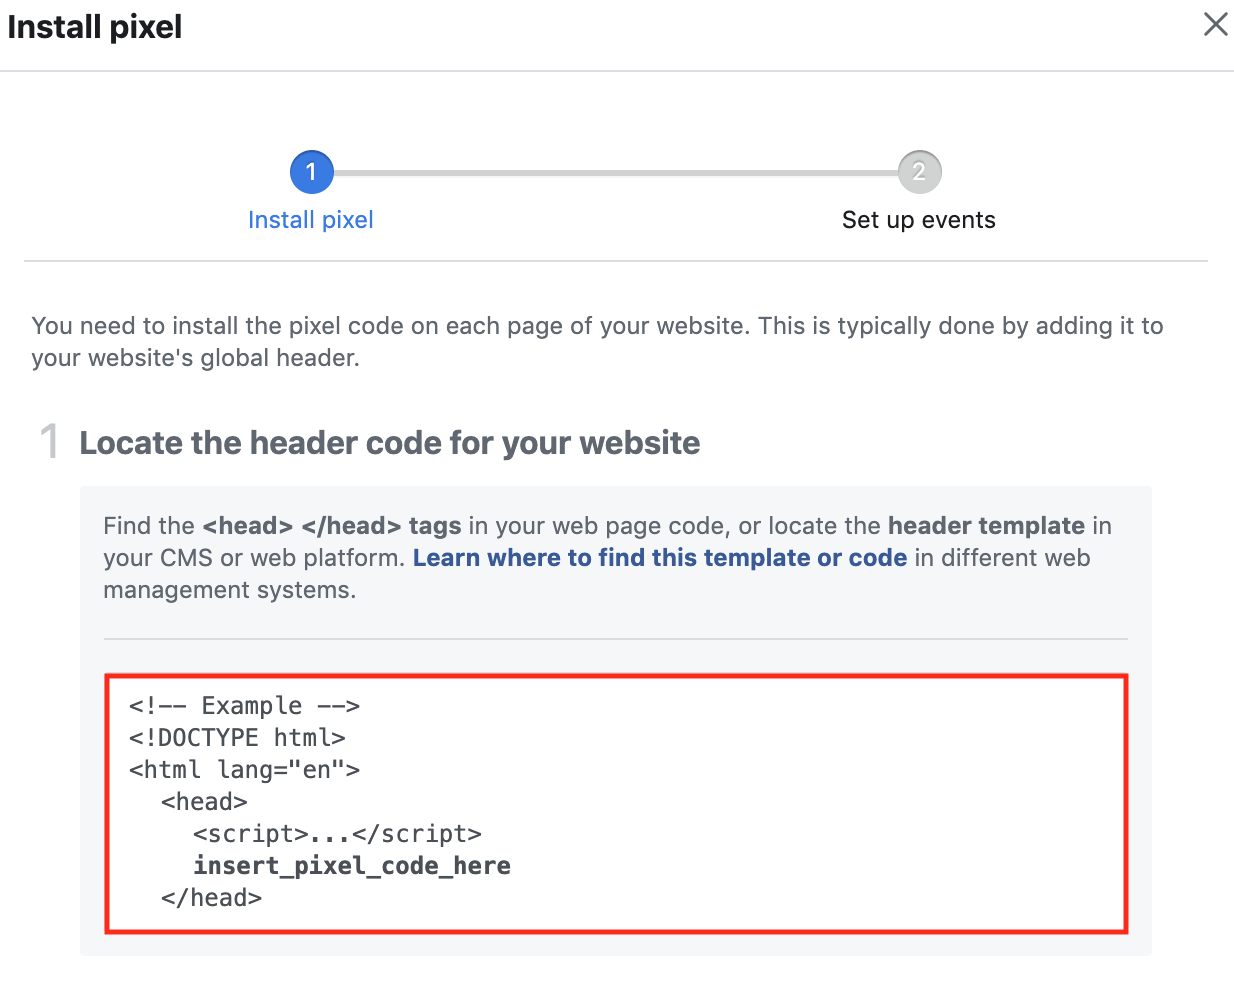
2.Manually Install Pixel Code Yourself
This option is the most commonly used to install pixel. So once you click on manually install pixel code, you will come across below screen.
Install the first code in your head section by just copying the code from the screen and pasting it in your head section.
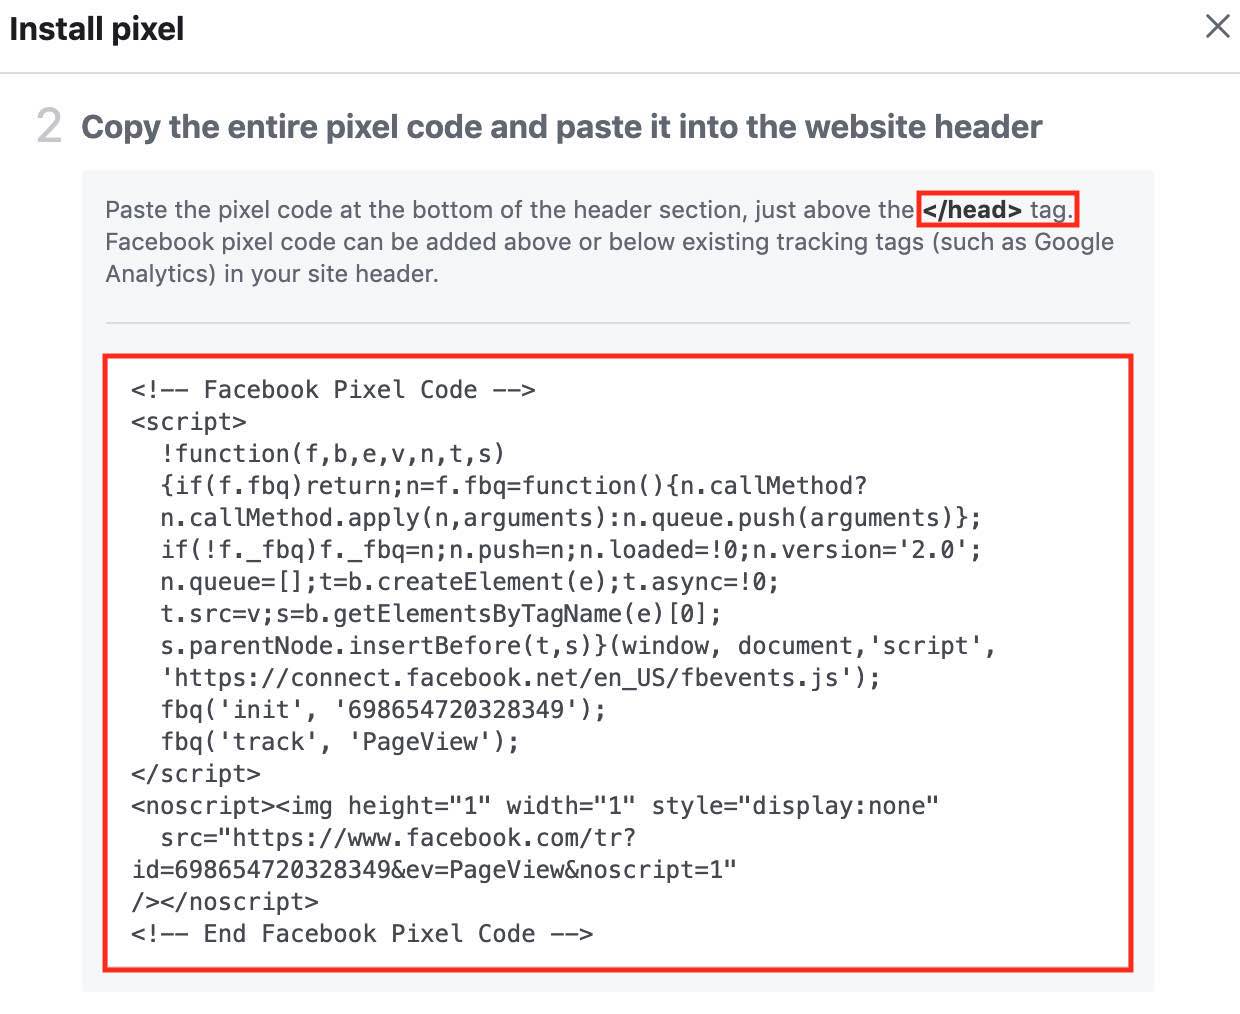
Post that, you will see the second code. You need to again install this code in the head section of your website.
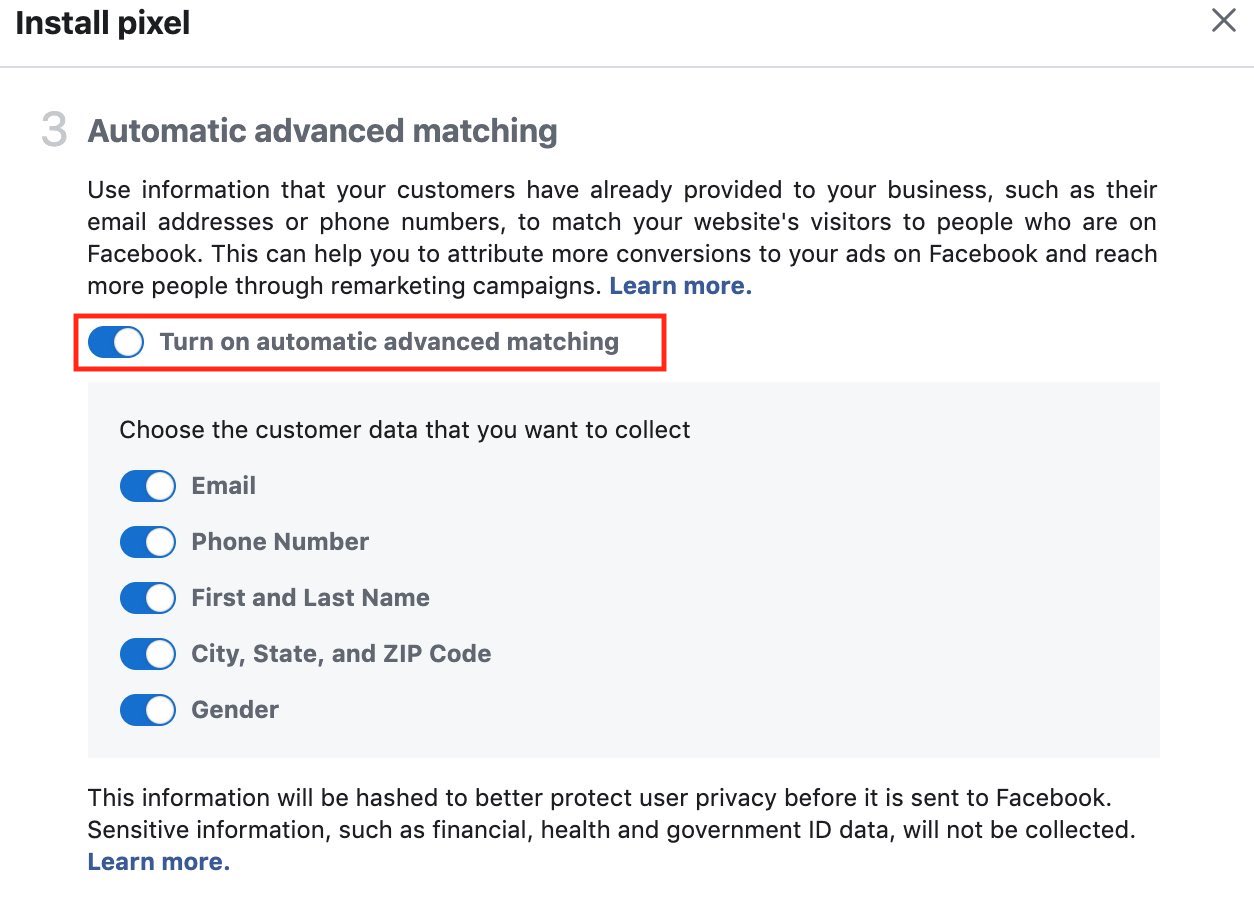
The next thing is to switch on the automatic advanced matching option. If you switch on this option, you can use customers information like email address or phone number, to reamarket them on Facebook network.
The next thing on the screen you will see an option as send test traffic to your pixel. Here you can add your website url and say send test traffic. Always remember, once the code is added, post that only you will be able to track conversions and other events. So once you have added the code the red mark in the below screen will change to green colour, which means the code is activated.
(Note: This process might take few hours)
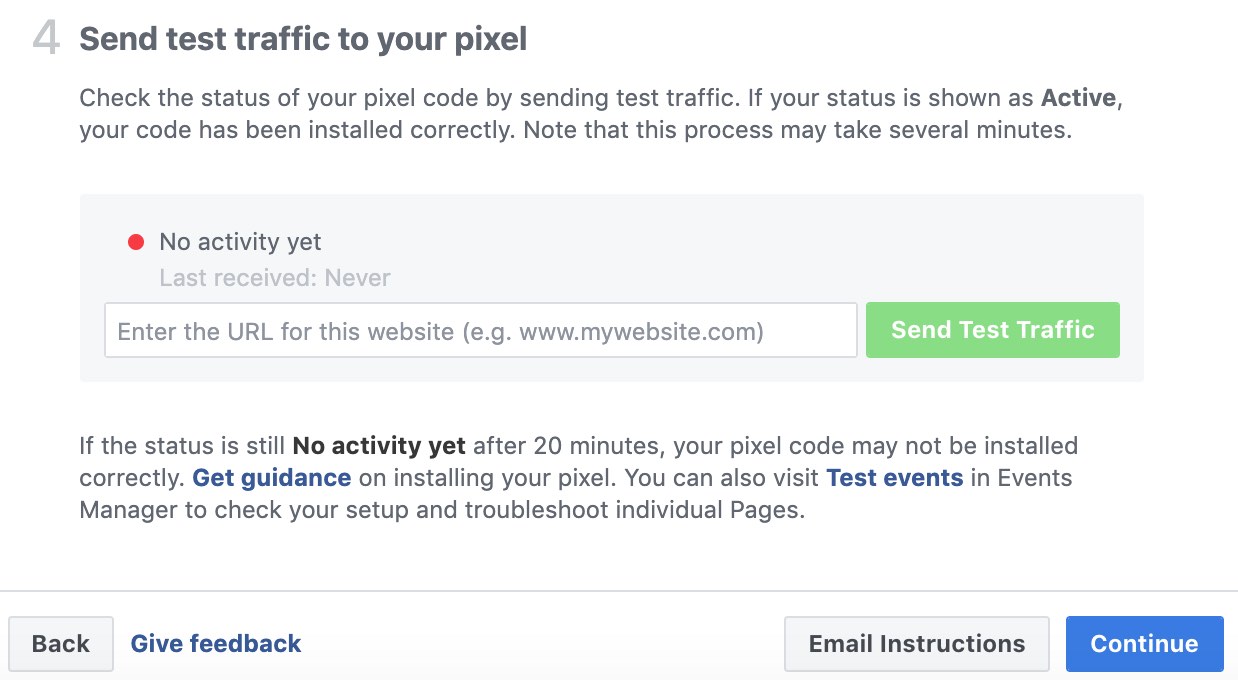
Now say continue. Once you move ahead in the process, you will come across the next step as Set Up Events.
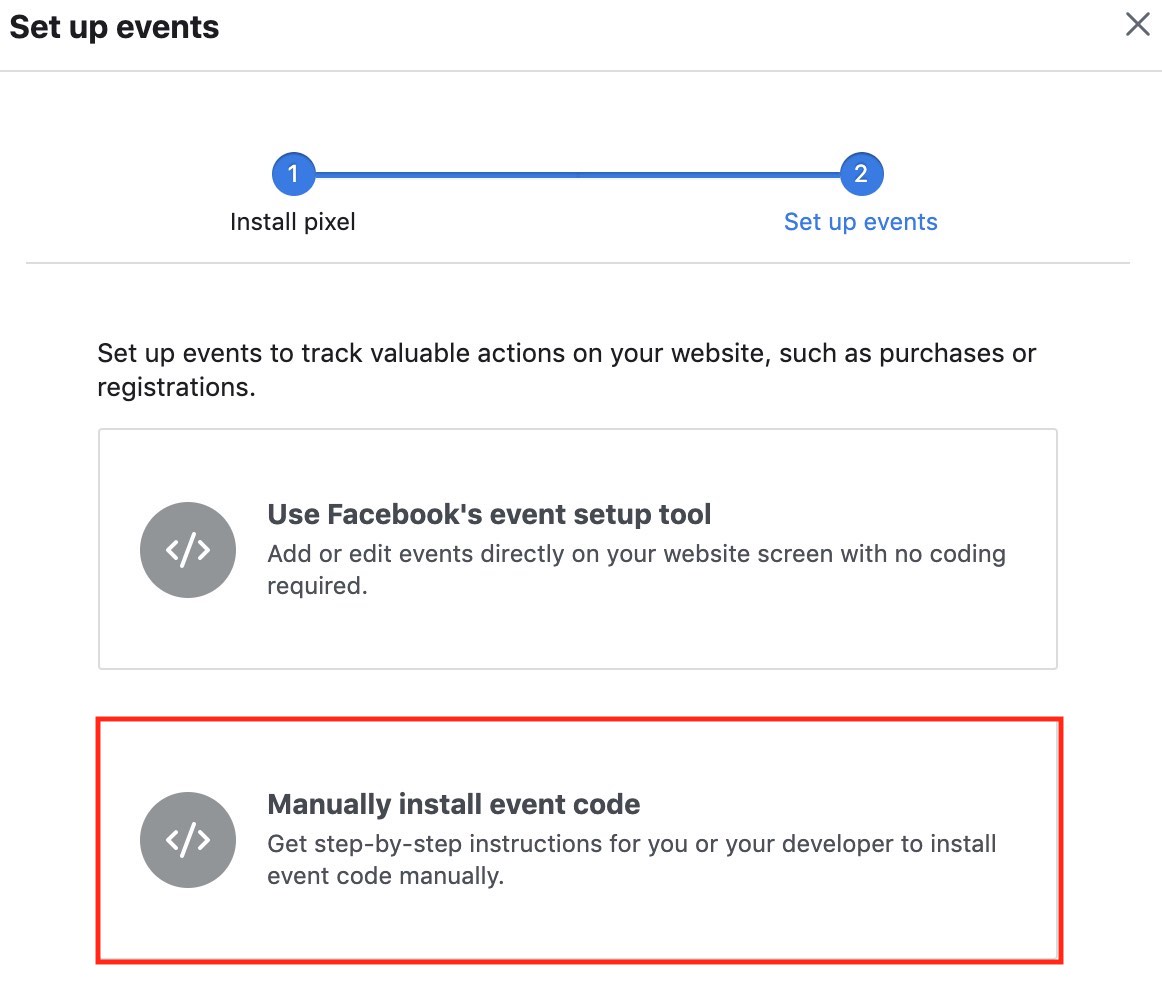
In set up events, you will see two options as below
- Use Facebook’s event setup tool
- Manually install event code
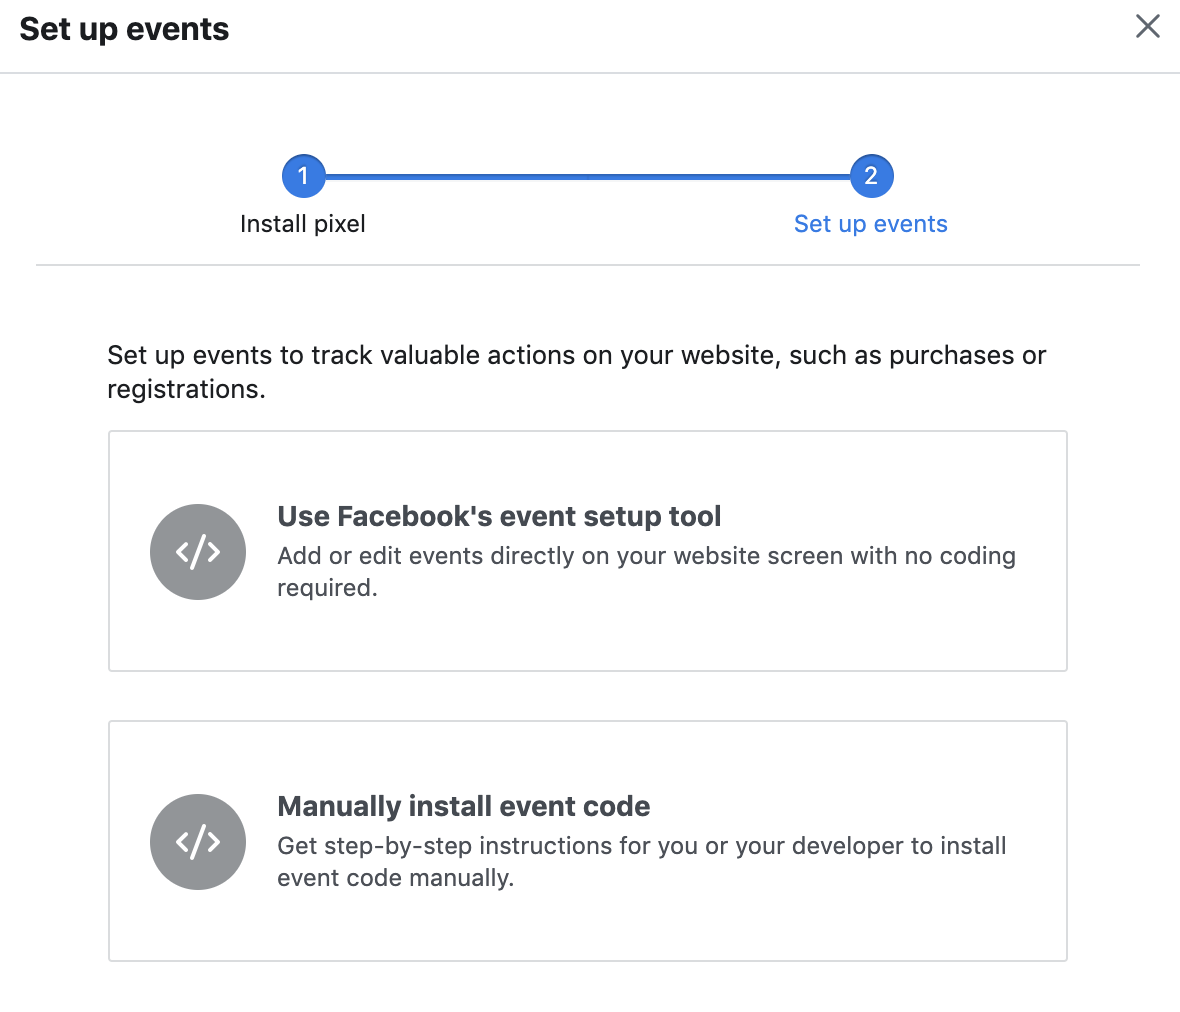
Let’s understand each one of them!
Use Facebook’s event setup tool:
With this option, you can add or edit events directly on your website screen with no coding required at all.
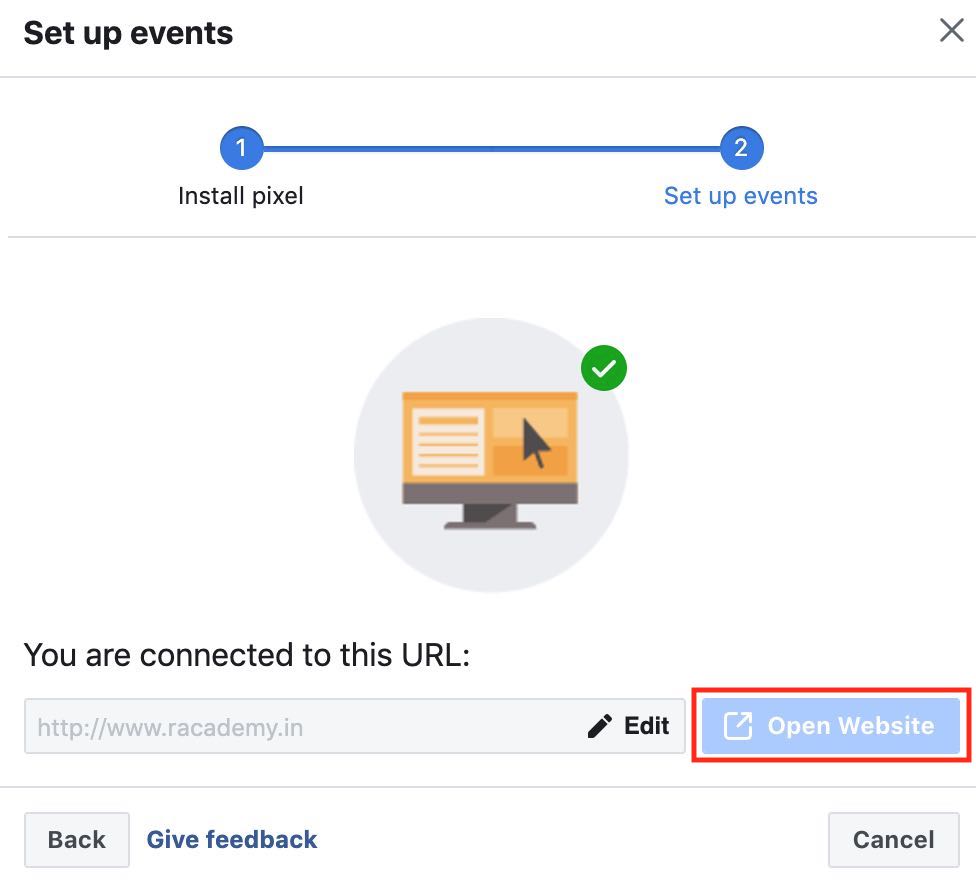
Once you click on use facebook’s event set up tool, you will come across below screen. Enter the website URL and then click open website.
Once you have clicked open website button. You will come across below screen.
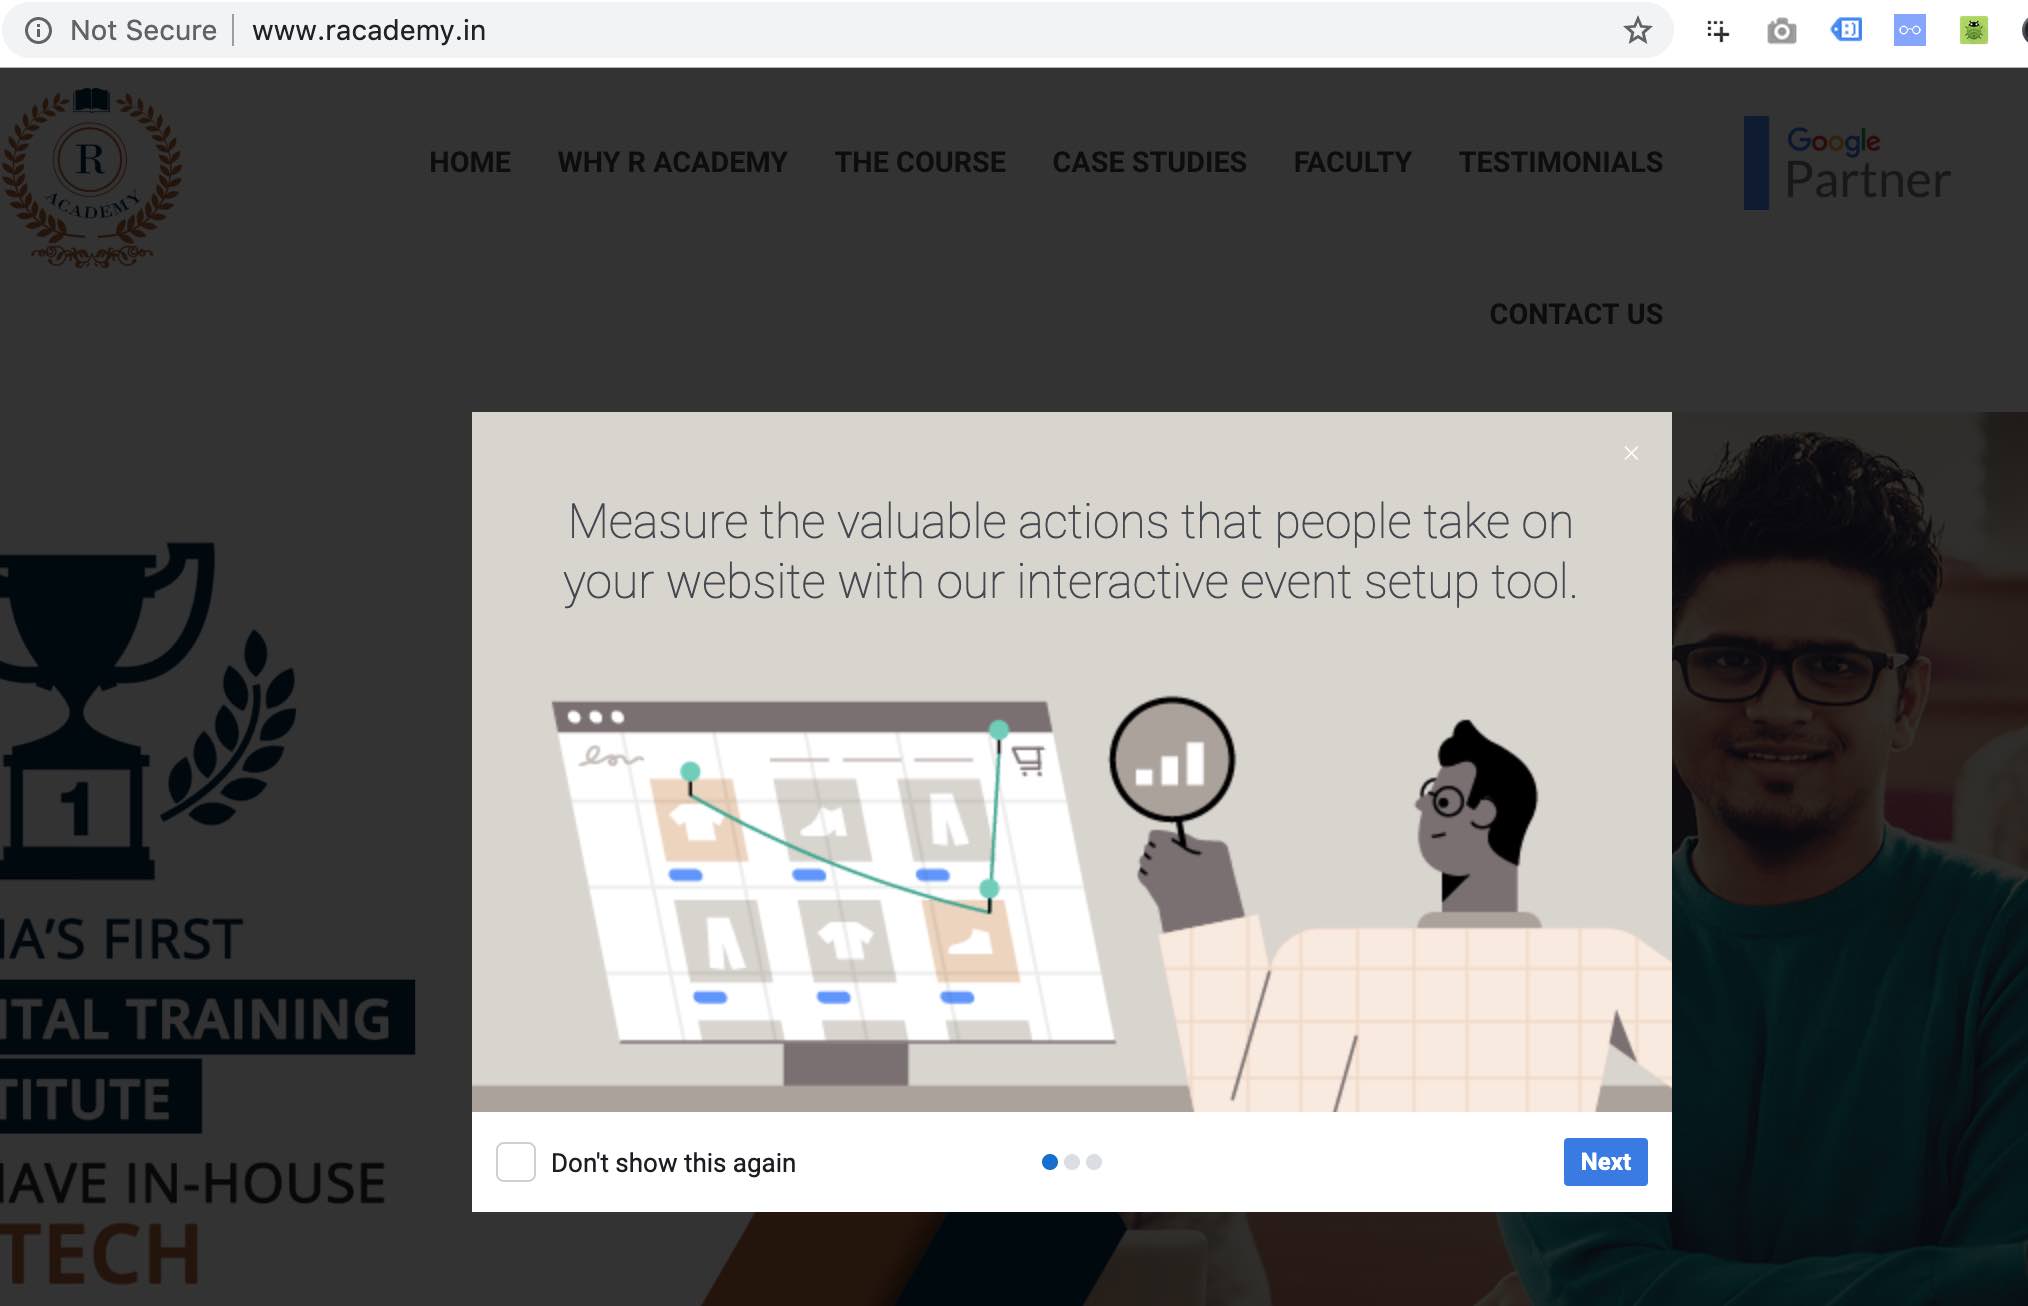
Once you click on next button, you will see the below option on your left hand side of the screen.
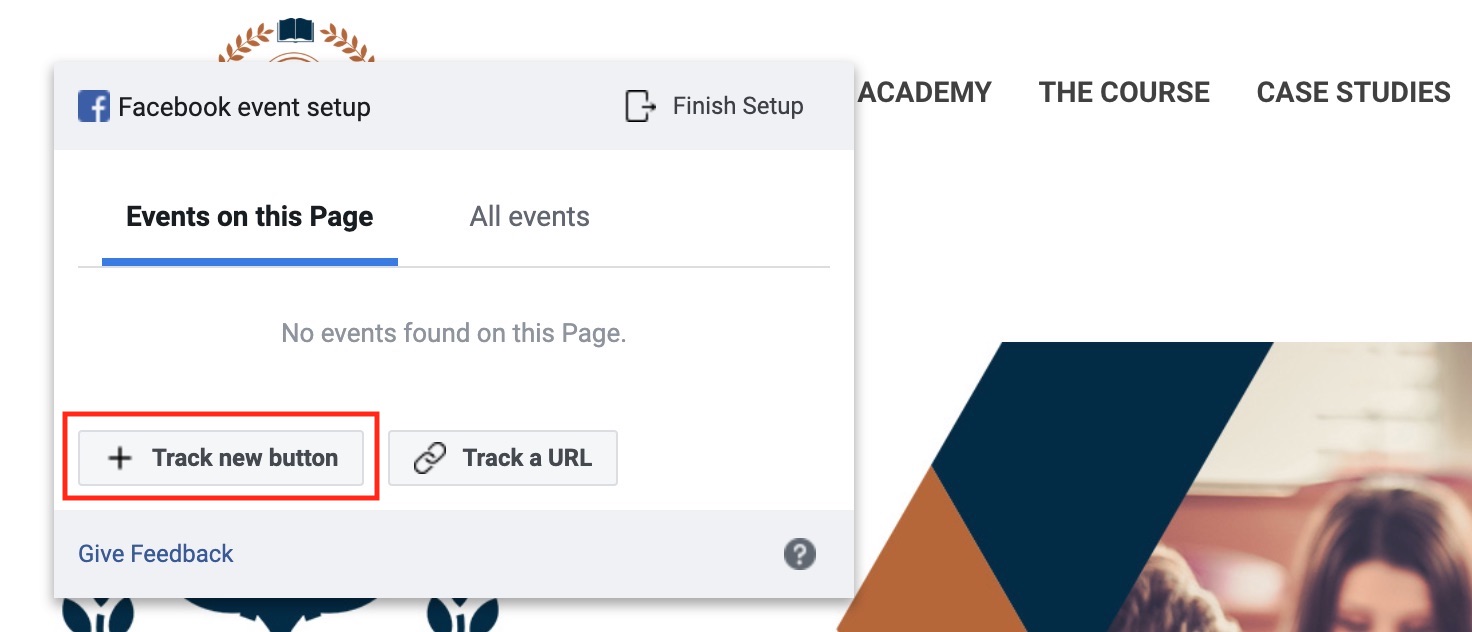
Once you click on track new button, you will see the below screen. Here you can click on the highlighted button to set up your event.

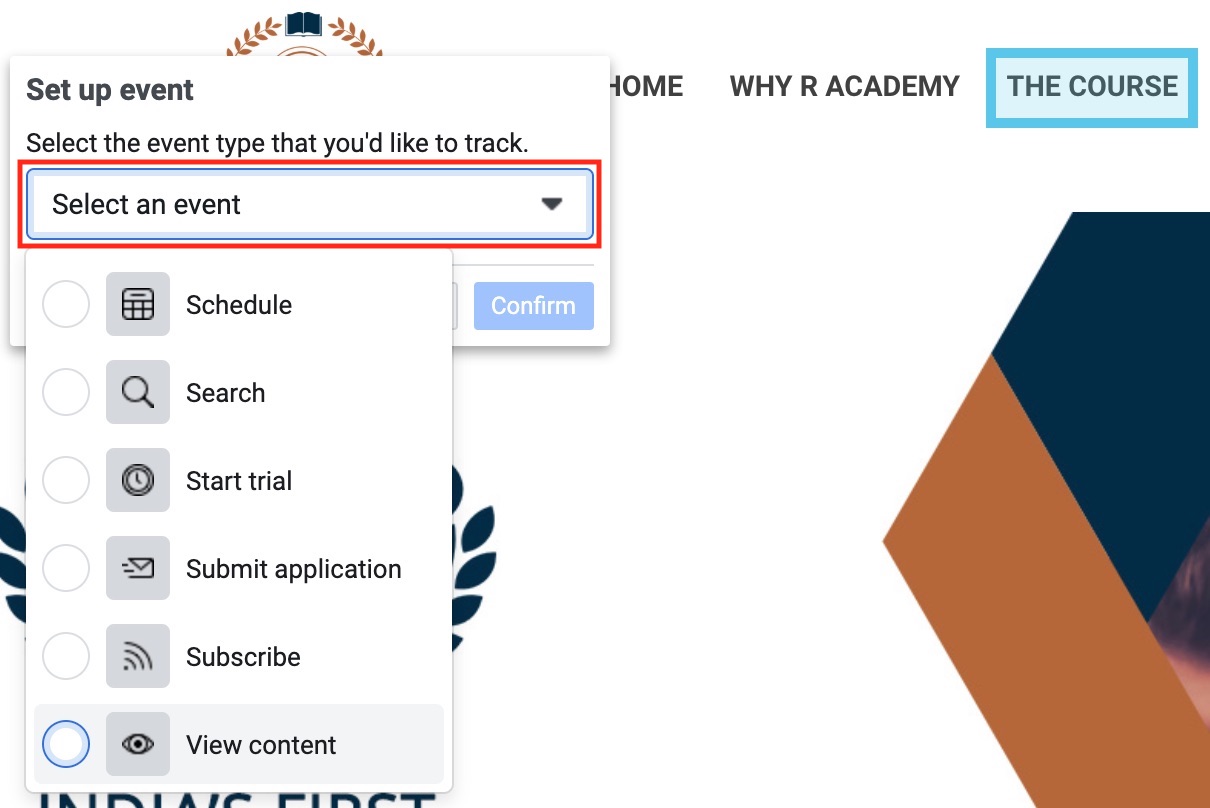
So for example, I am clicking on the course button, because I want to understand how many users are viewing my content under course tab. Once I click on the course, I can see an option with a drop down on the left hand side.
As I want to understand users who have viewed my content under the course tab, I am selecting view content option in the drop down. You can also select basis your requirements from the available options in the drop down.
Once you have selected an event say confirm. I have selected view content, so I am confirming the same as below.
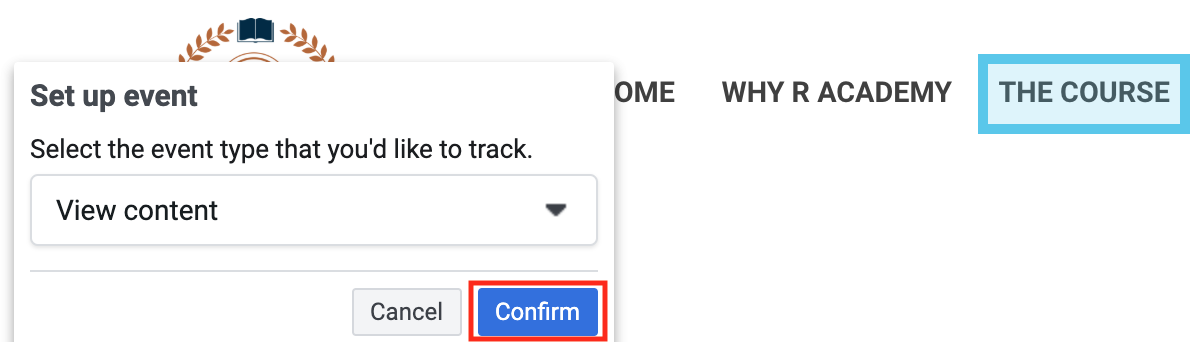
Once you have confirmed you will see the below screen with green tick mark on the button who have defined the event on.
Now you can further set up additional events for different buttons on your website.
Manually Install Event Code
If you want to do it manually, you can use the codes for each event and then paste it on your website. If you don’t have much understanding of website development, ask your developer to do so.
Once you click on manually install event codes. You will come across each event as below;
- Add payment info
- Add to Cart
- Add to wishlist
- Complete registration
- Contact
- Customise product
- Donate
- Find location
- Initiate checkout
- Lead
- Purchase
- schedule
- Search
- Start trial
- Submit application
- Subscribe
- View content
Below is the description for each event and codes for each event. You can use the code and add it manually to your website.

3.Email Instructions to a Developer
In this option you can directly mail the code to the developer and ask him to add it in the head section of your website.
Step 6
Now after you have added the code in the head section. This code is going to work as a conversion tracking code and remarketing code.
Now the key part here is, the conversion code has to be on the thank you page of the website, whereas our Facebook code which we have added is on the head section of the website, which is common for all the pages on the website. If the code is on the header section, every visitor will be considered as a conversion. So in order to bifurcate conversions, we need to set up custom conversions in Facebook.
So let’s set up custom conversions in Facebook
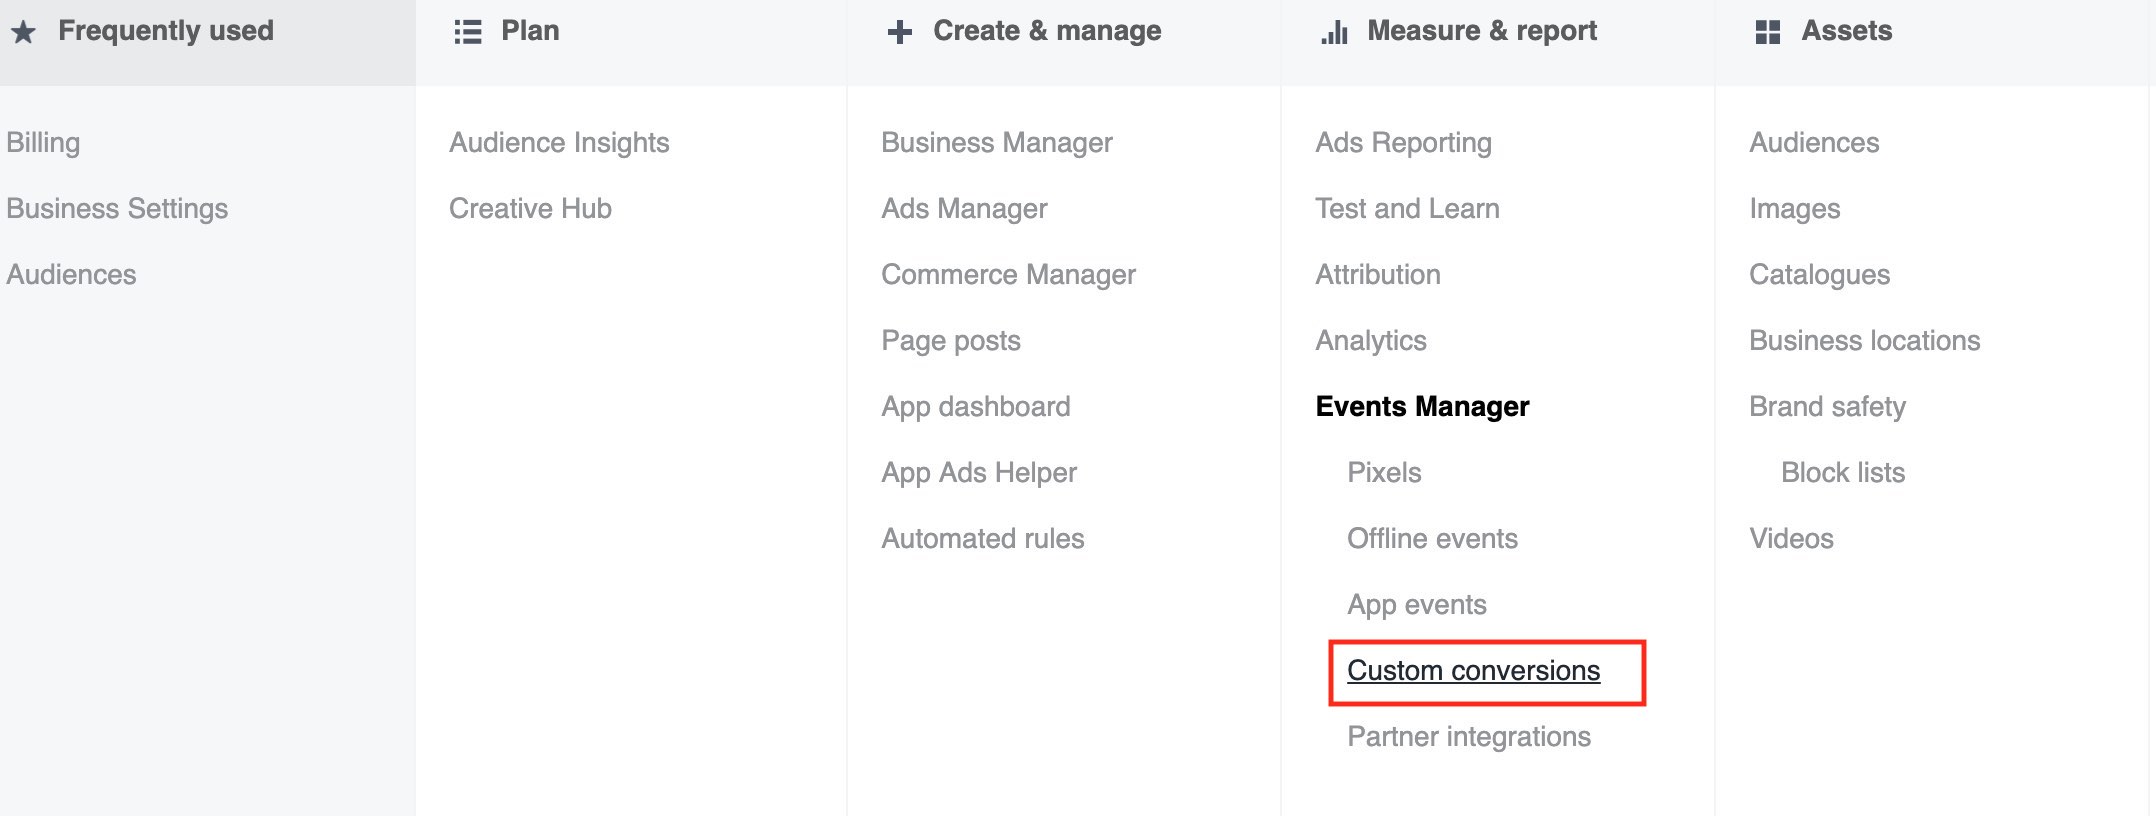
In order to set custom conversions, go to custom conversions by clicking on custom conversions under Facebook settings option in Facebook ads as below
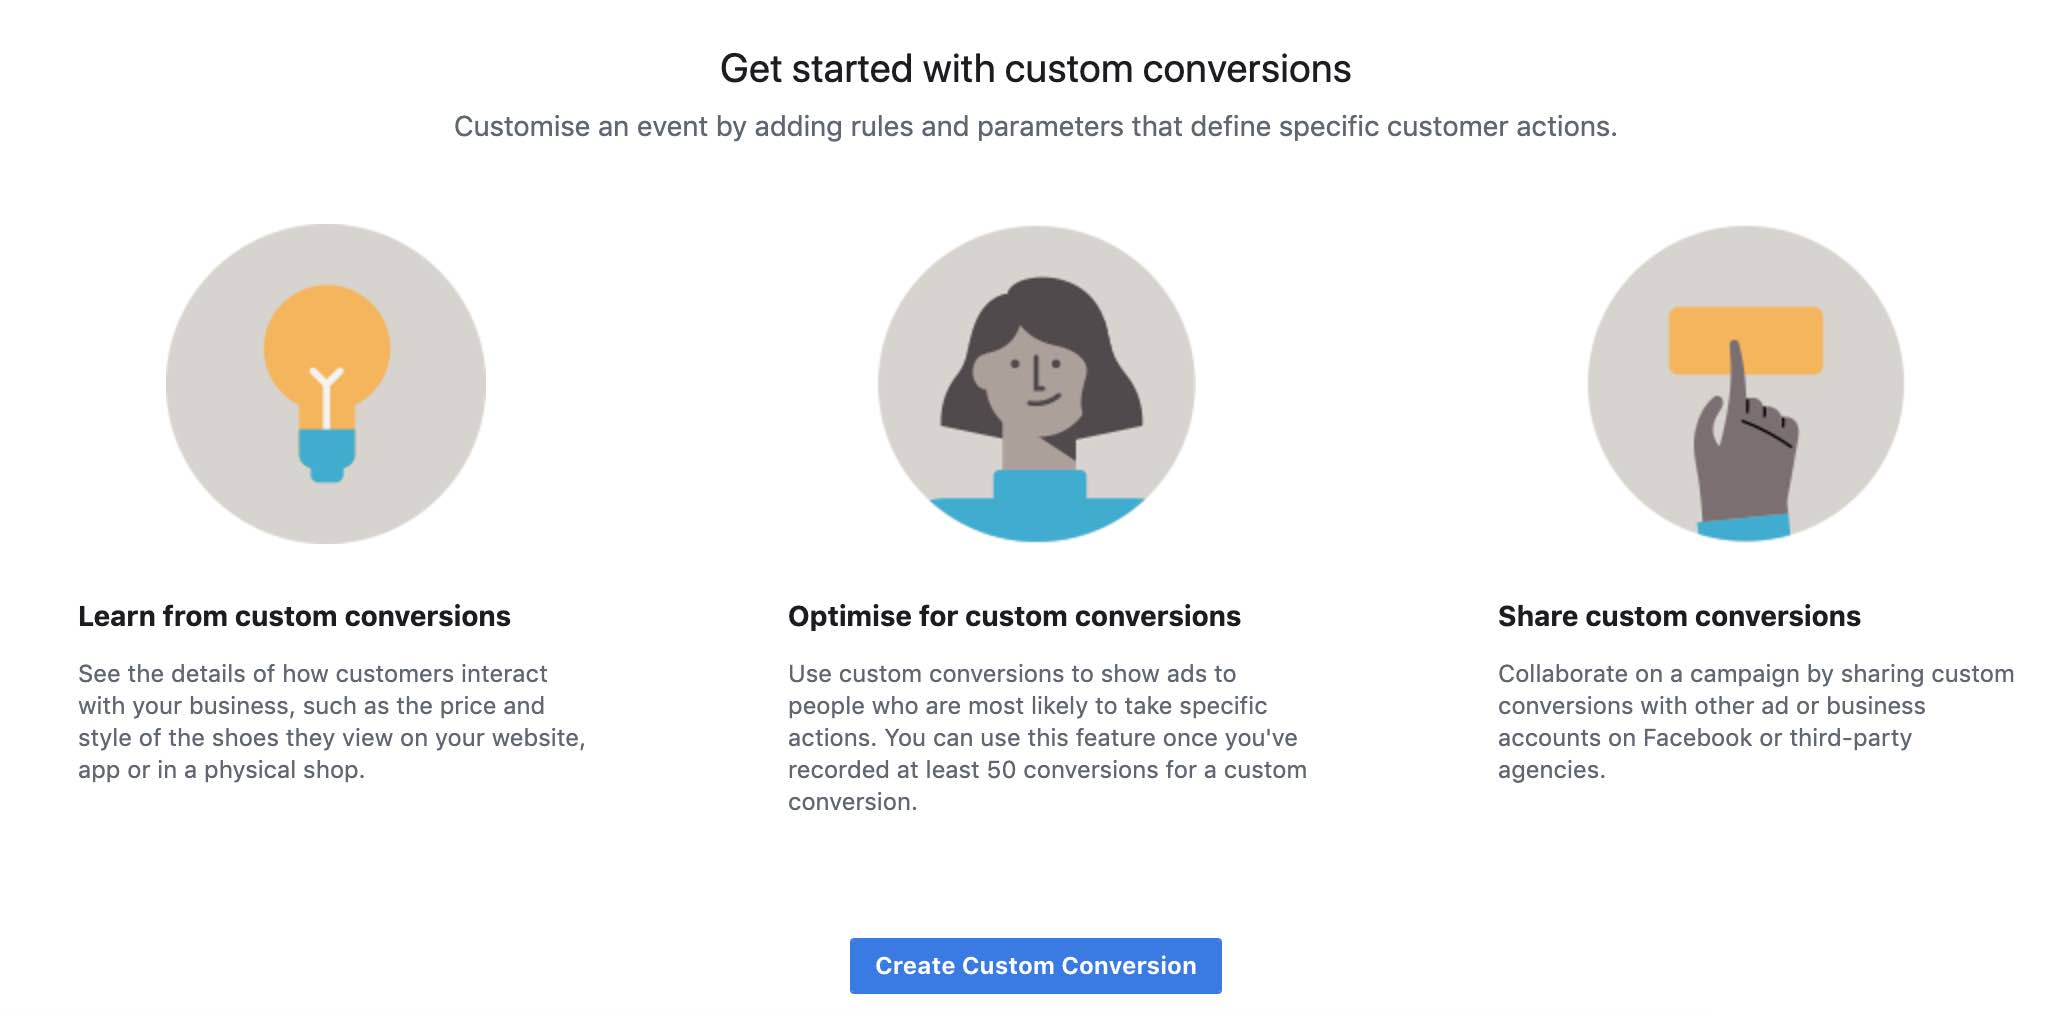
Once you click custom conversions, you will see the below screen. Now click on create custom conversion
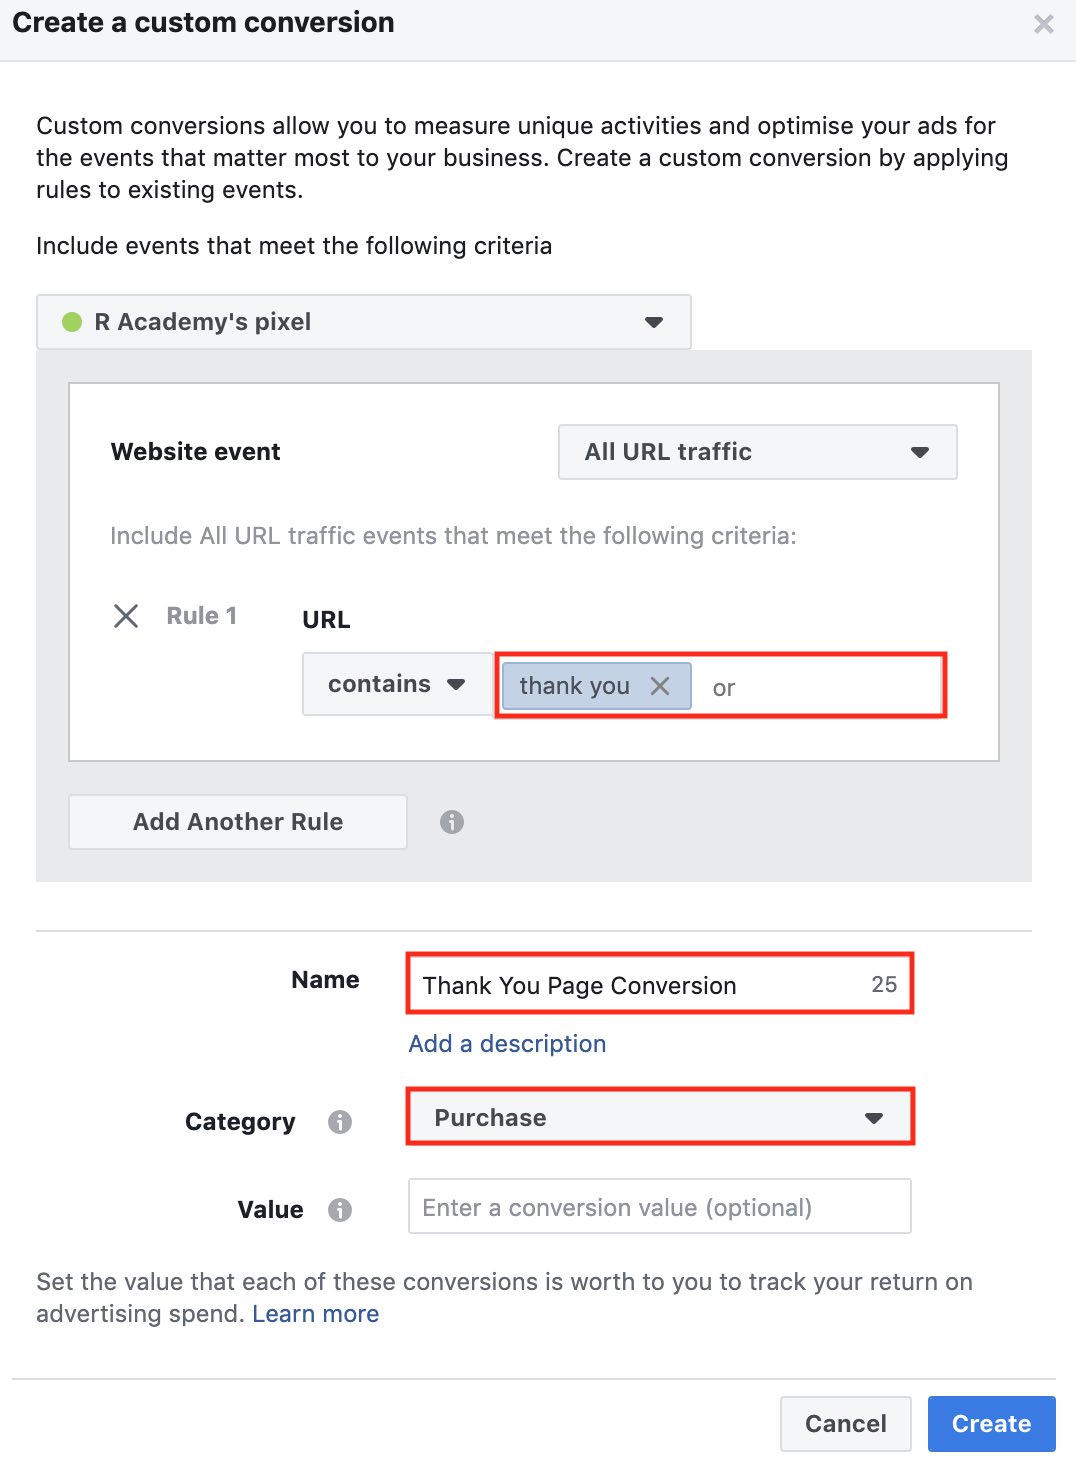
Once you click on create custom conversion, you will view below options. Now enter the thank you URL as the conversion URL, then define the name of the conversion and post that define the category. Once you have defined all these, click create.
If you have a purchase option on the website, do make sure that you sure that you set up the purchase event as defined in step 5
Once you click create, you can see that the custom conversion is now created. This will help you to track conversions for your Facebook advertising campaigns.

That’s it, you Facebook pixel set up is done, now you can start measuring your conversions and events on your website.
Step 8
If you are using wordpress website, you can add Facebook pixel using a plugin called PixelYourSite.
Go to your wordpress account and in the plugin section, search for Facebook pixel and you can view the first plugin as PixelYourSite.
![]()
Once you install the plugin, it will first ask you for your Facebook pixel id, which is available on your pixel dashboard. Now enter your Facebook pixel id in the below option.
![]()
Once you have entered the pixel id, the next thing is to go to the events tabs on the right hand side of the screen (refer above screenshot), and under Facebook say, enable on Facebook. Once you say enable on facebook, you will see all the event options which we discussed in step 5, follow the same process on your wordpress plugin pixelyoursite.
![]()
Post setting up the events say save event.

That’s it, you Facebook pixel setup is done with wordpress plugin pixelyoursite.
Step 9
Adding conversions on your ad reporting dashboard.
Once you have added the code and your ad campaigns are running. It’s important to view those conversions on dashboard to measure the performance of the campaign. To add conversions reporting to your dashboard, go to ads manager under business settings.

Now click on customize columns under custom.
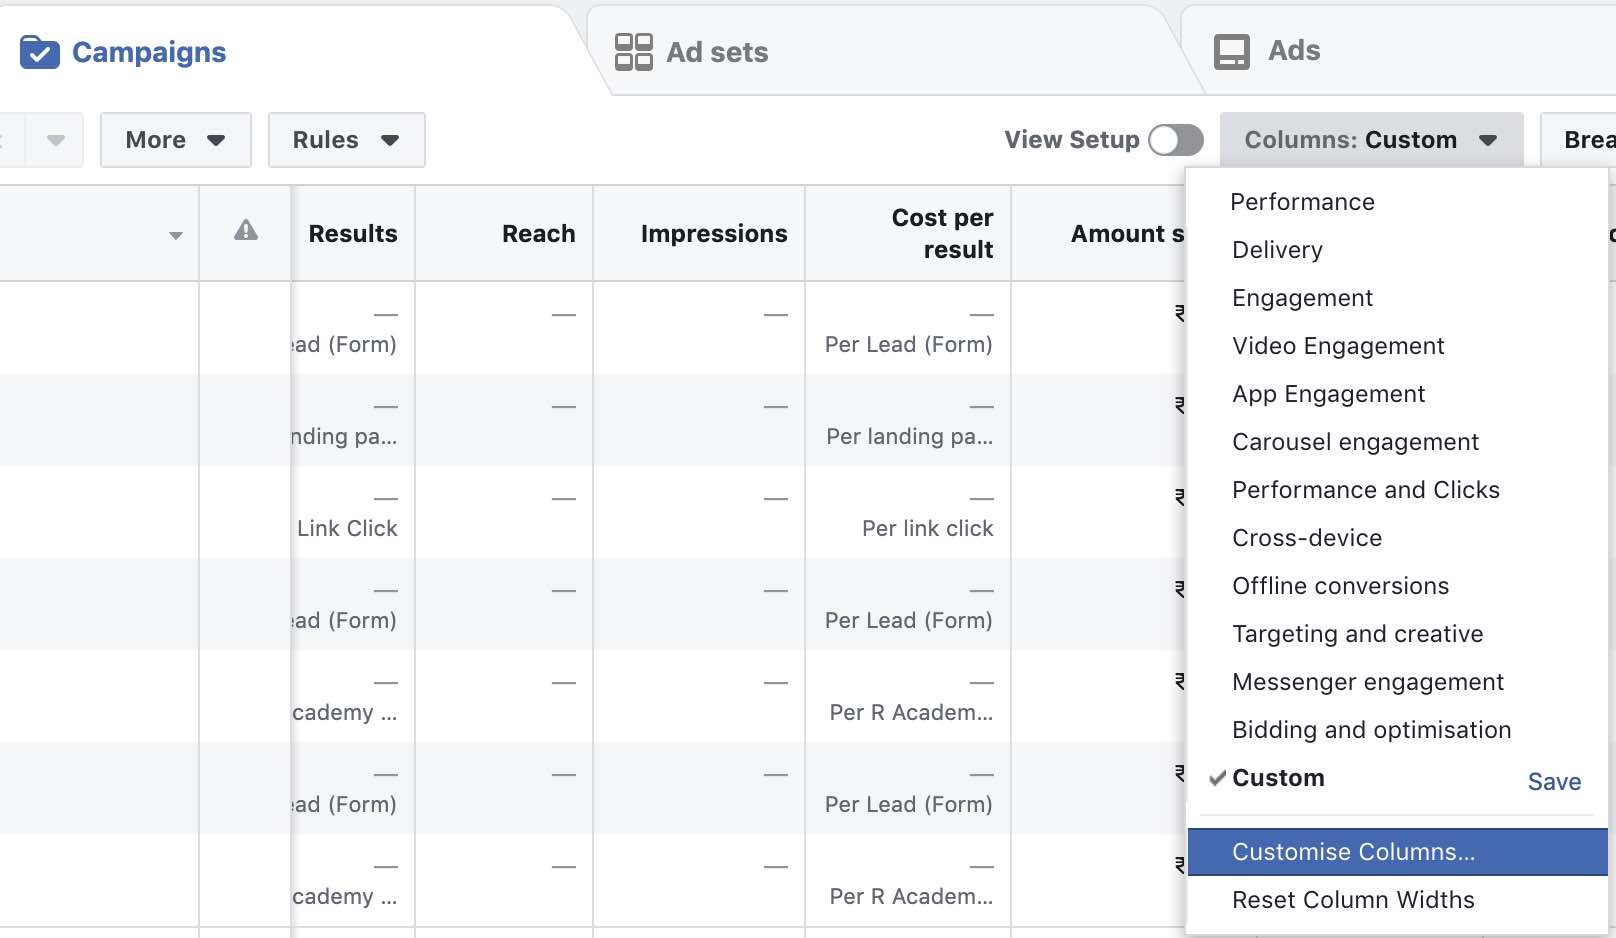
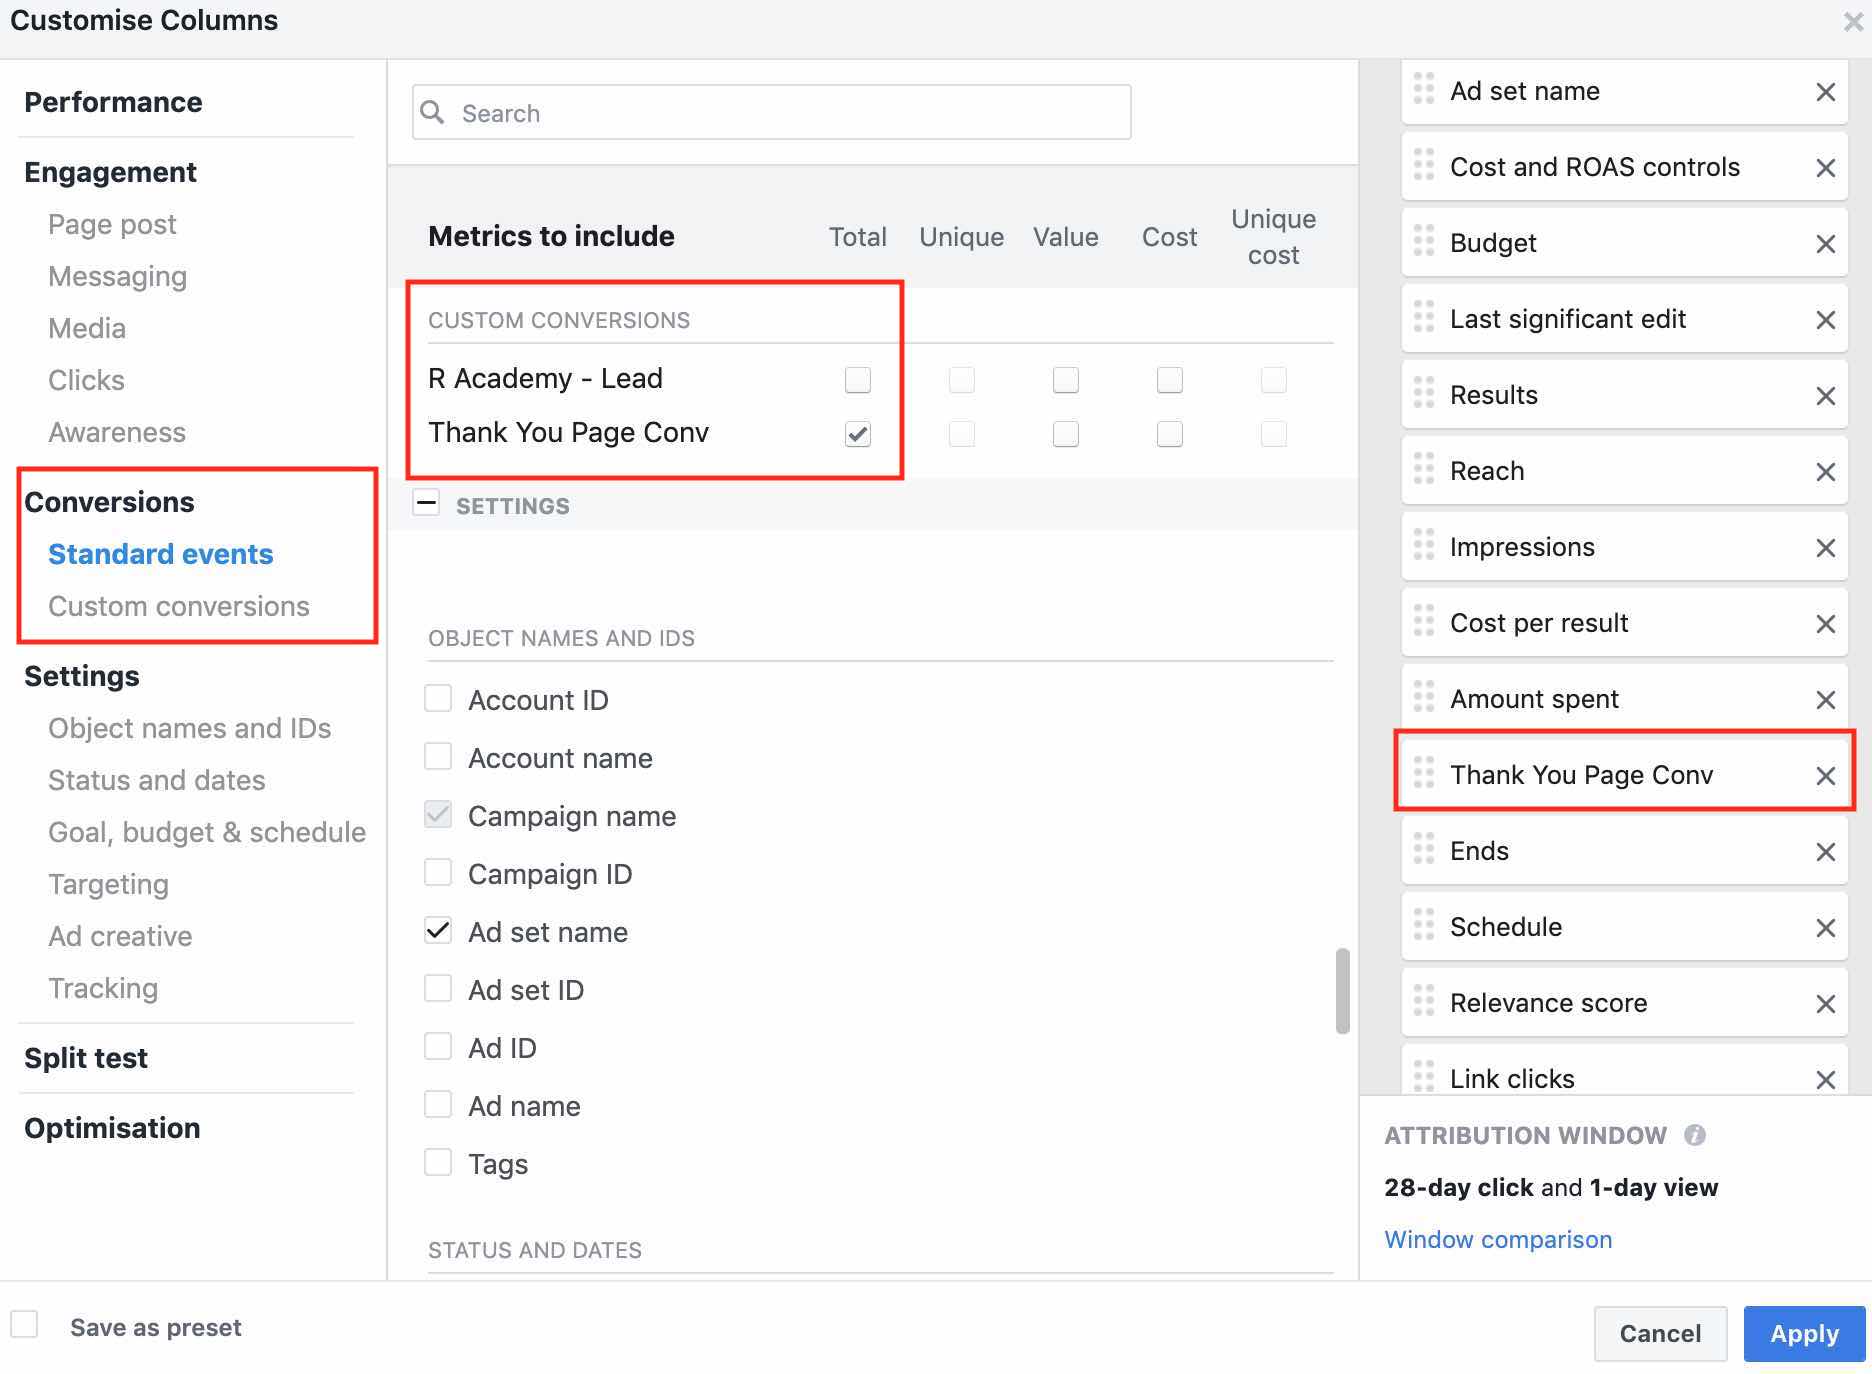
Now under conversion, you will see standard events and custom conversions. Click on custom conversions and add the custom conversion you created as below. You will see on the right hand side that the conversion you created is now added in the reporting dashboard.
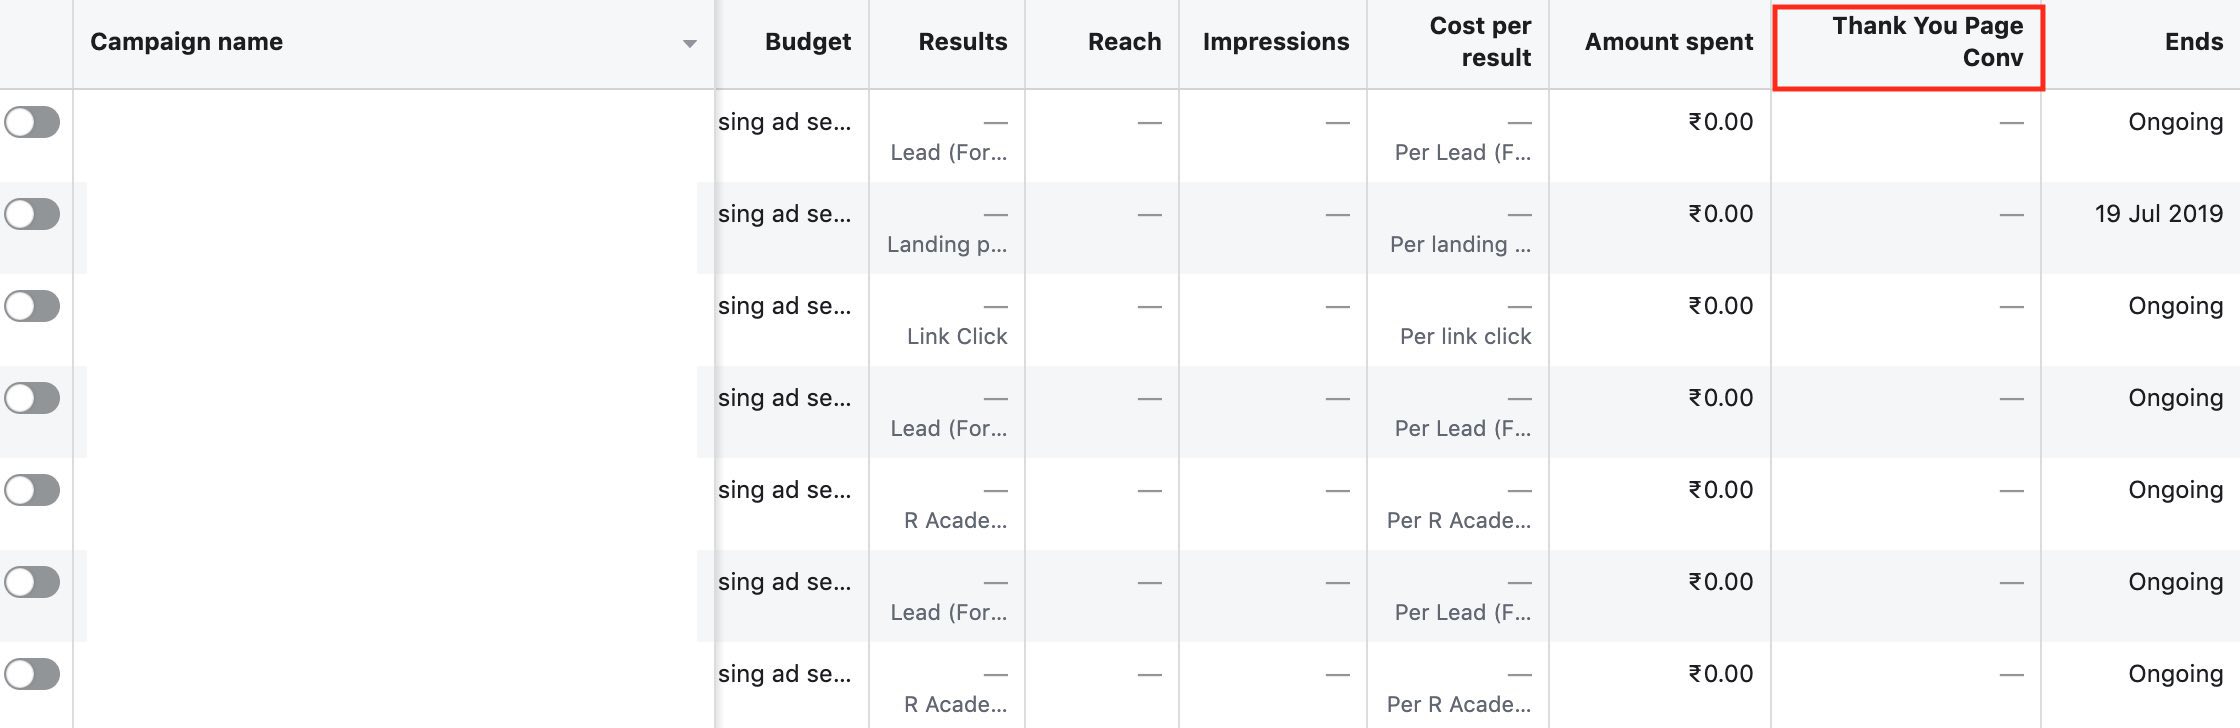
Now say apply and view your reporting dashboard, you will see the new custom conversion metrics added to your dashboard. Refer below screenshot.
Conclusion
Facebook pixel helps you to measure the return on your ad spends from your Facebook ad campaigns. Also it helps you to measure different actions that users take on your website, this further helps you to optimize different events on your website. Set up Facebook pixel today and start measuring the return from your ad campaigns!
Related Articles:

