

You have a website and your are running Search & Display ads which are generating impressions, clicks, calls, purchases etc, but you don’t know how many people are actually enquiry because of your ads or how many people are actually transacting on your website. In order to do so, you need to setup conversion tracking with Google Ads!
So What is Conversion Tracking in Google Ads?
Conversion Tracking in Google Ads help you to understand what users do after they have interacted with your ads. If users fill up a form, or buy a product, which is a valuable action to you, then the action is termed as conversion.
Complete tracking of the conversion is termed as conversion tracking in Google Ads!
Conversion Tracking helps you to understand what returns are you generating on your ads spends!
So How to Set Up Conversion Tracking in Google Ads?
Below is a step by step guide to set up conversion tracking in Google Ads
Step 1:
Login to your Google Ads account – Login
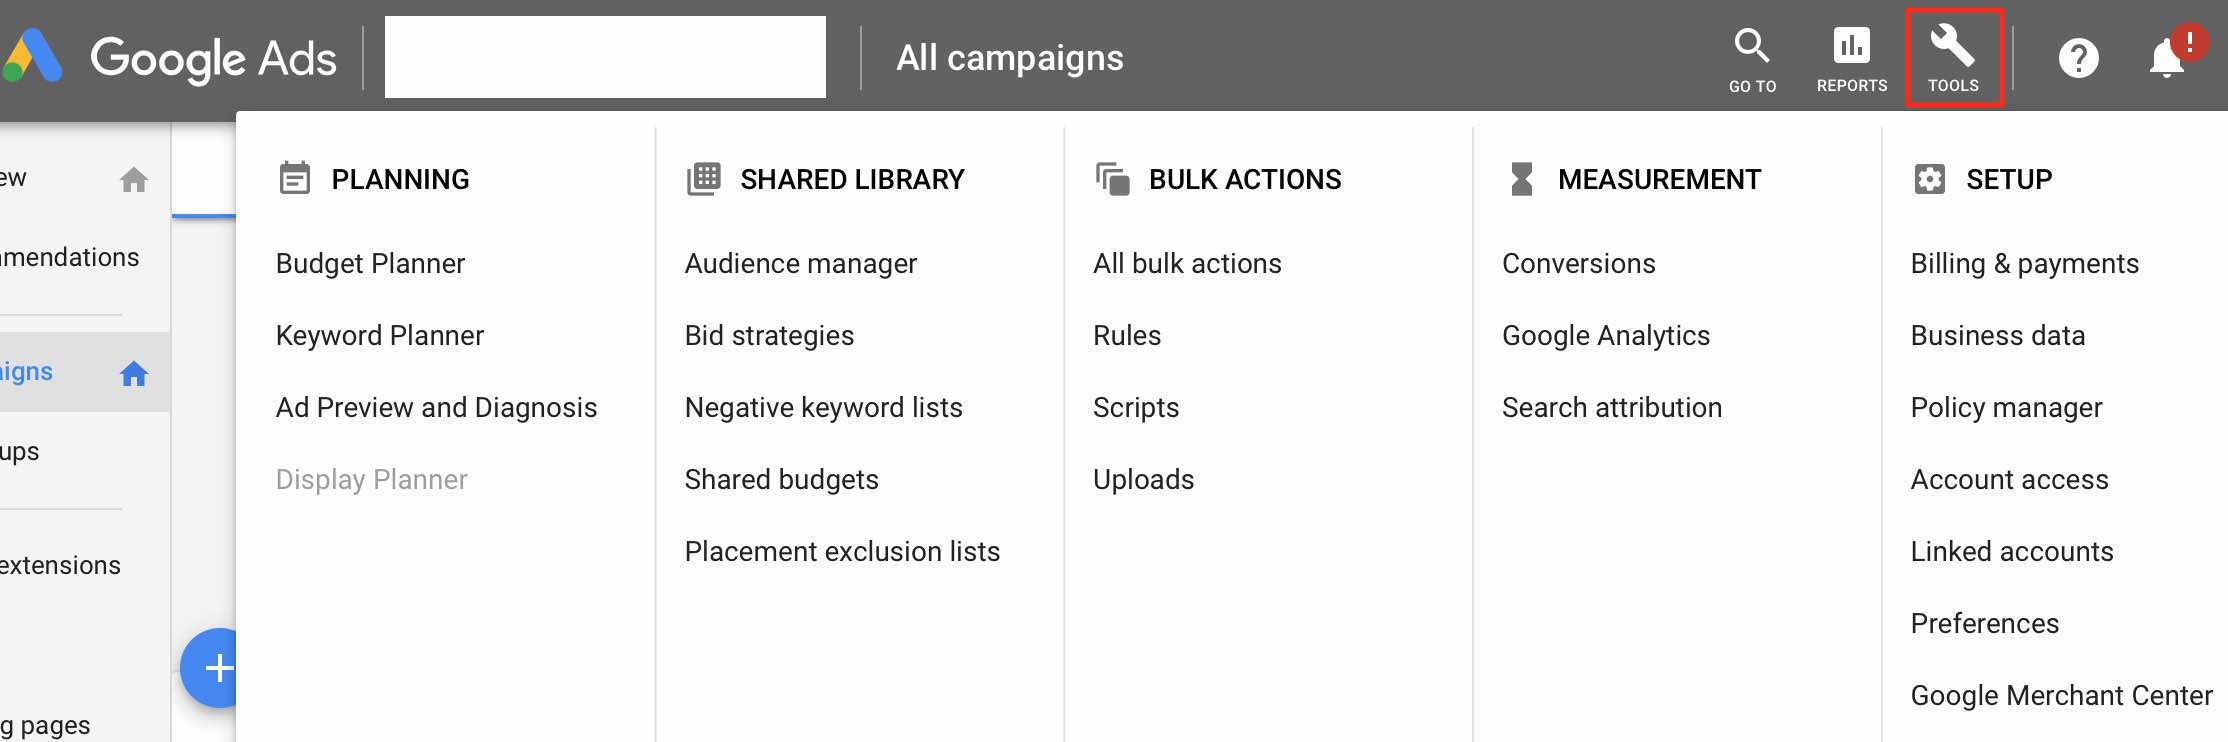
Step 2:
Click on the tools option on the top right hand side of the bar
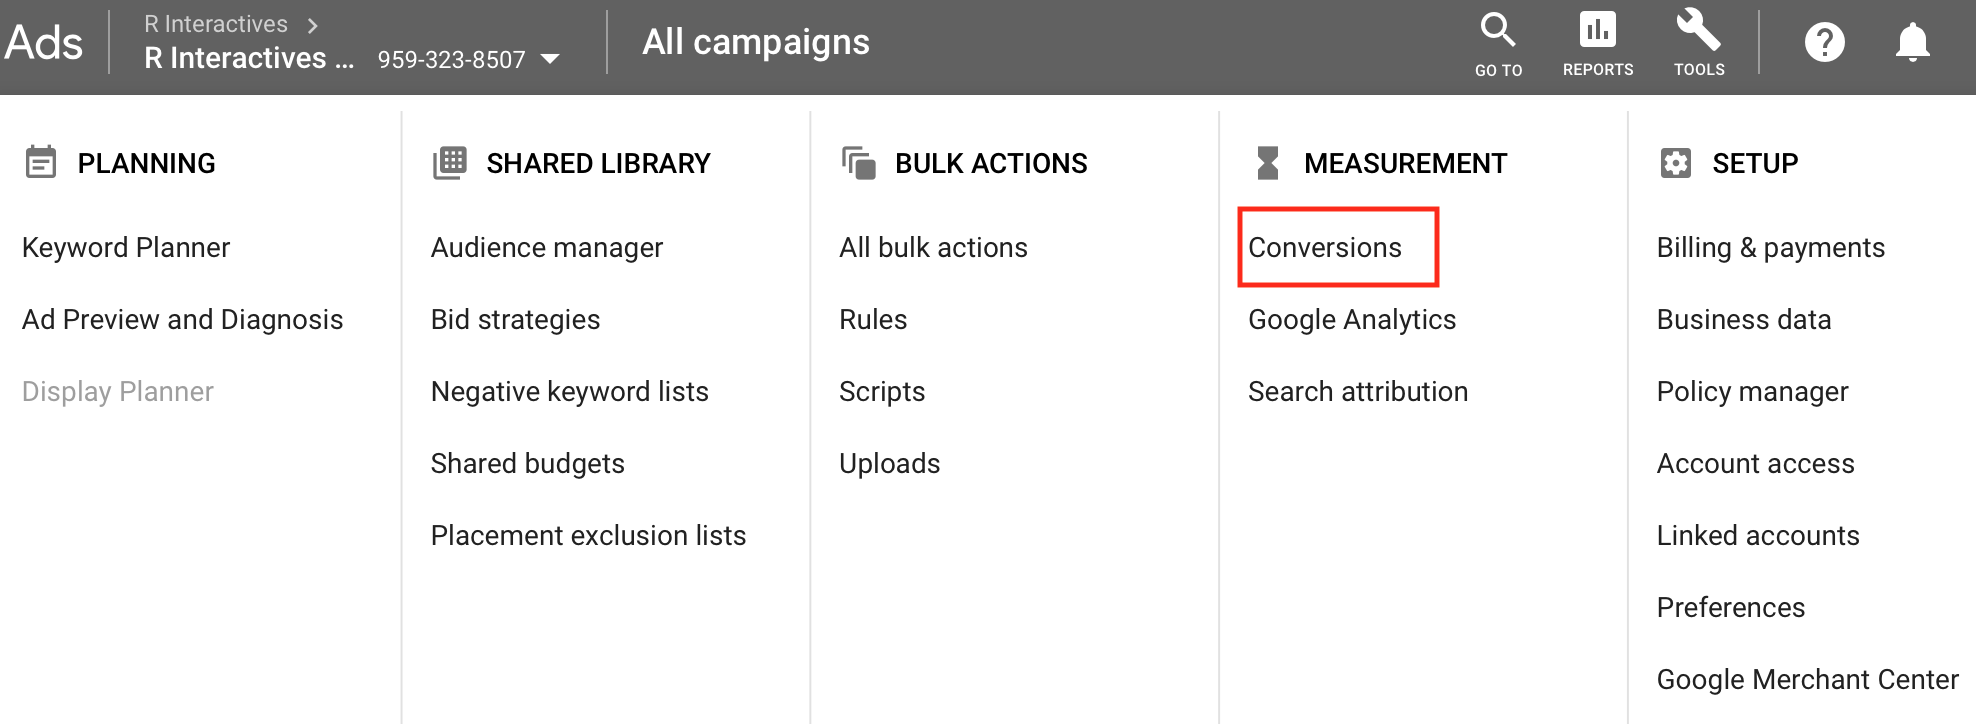
Step 3:
Now click on conversions under measurement section as below
Step 4:
Once you click on the conversion option, you will see the below screen
Now click on the +CONVERSIONS blue button to move ahead
Step 5:
Once you click on conversions, you will see the below screen
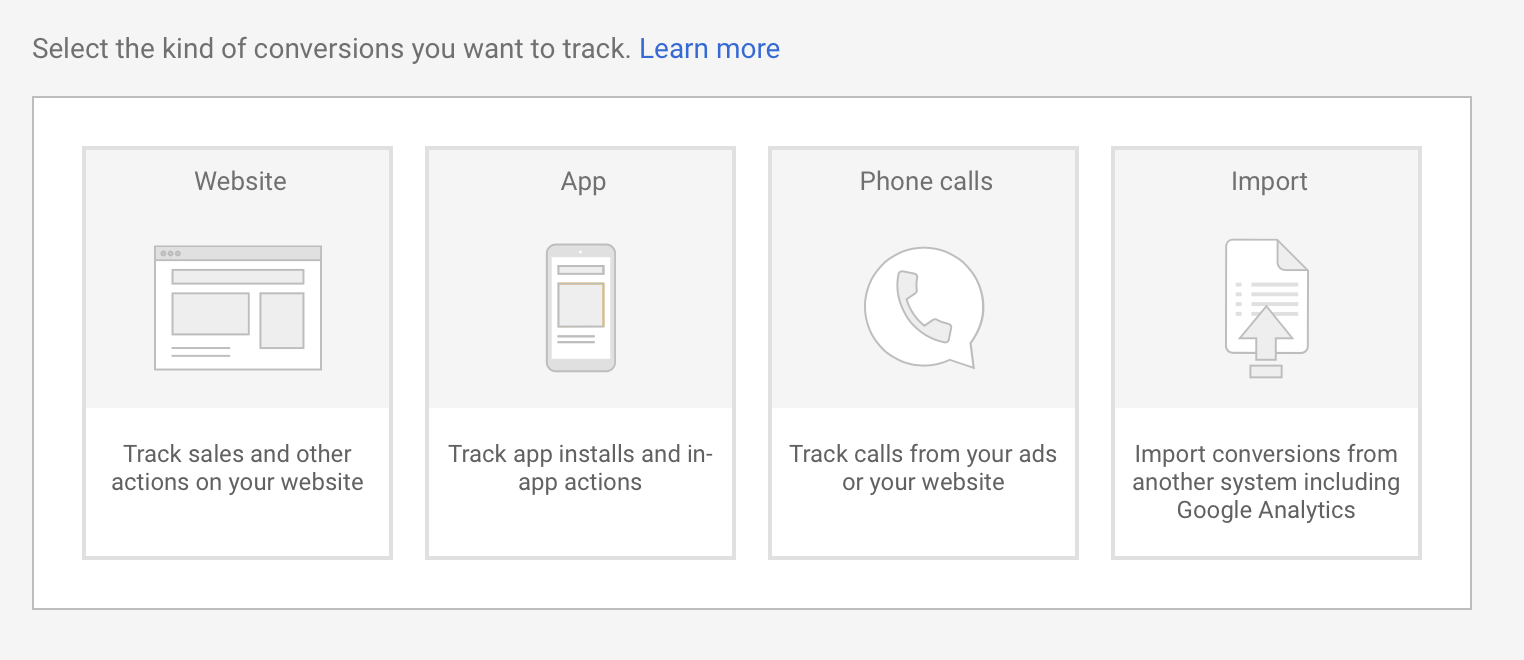
There are 4 options to select for different conversions you want to track:
- Website
- App
- Phone Calls
- Imports
Website Conversion Tracking – This option will help you to track sales, form fills, page visit, new subscribers added etc
App Conversion Tracking – This option will help you to track app installs and in app actions/purchases for your mobile app
Phone Calls Conversion Tracking – This option will help you to track no of users calling on the phone no on your site from a mobile device
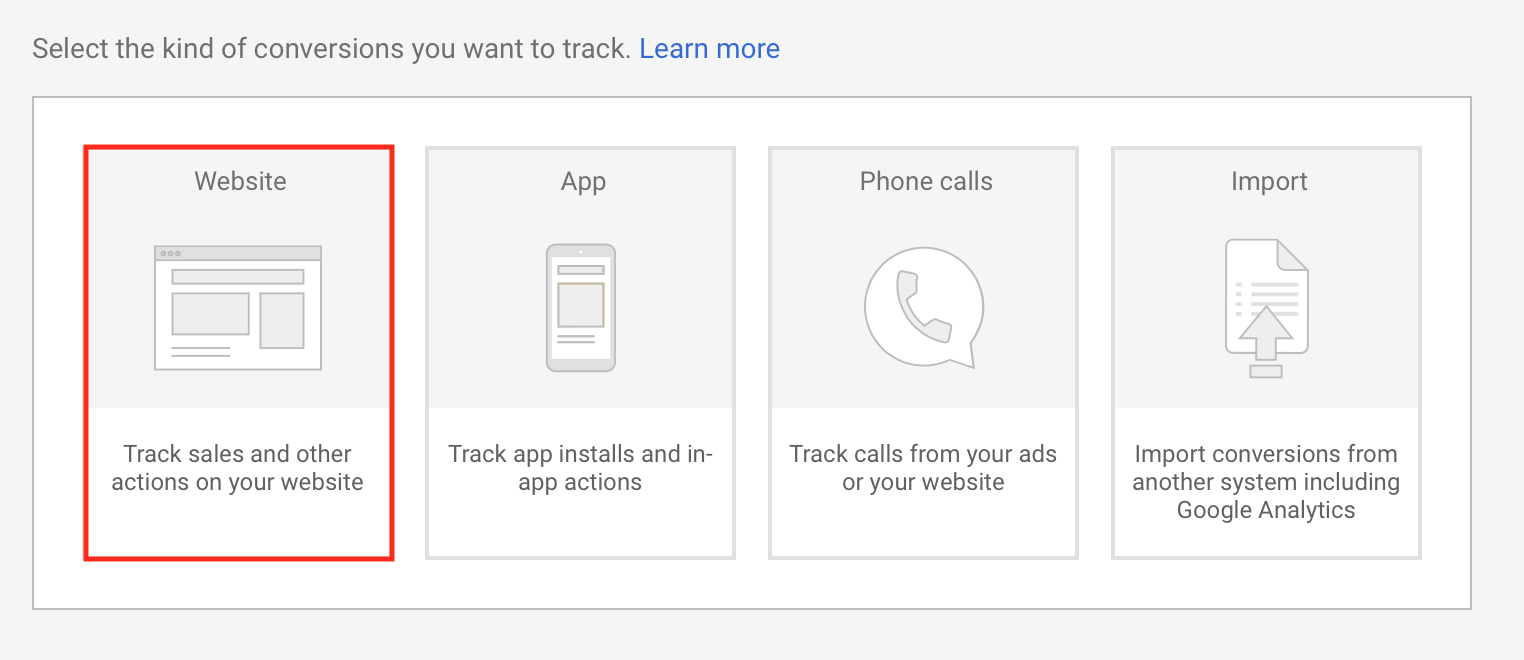
Step 6:
Let’s now setup website conversion tracking for a business whose objective is to track no of leads generated from their Google Ads campaign
So, I am selecting first option which is Website
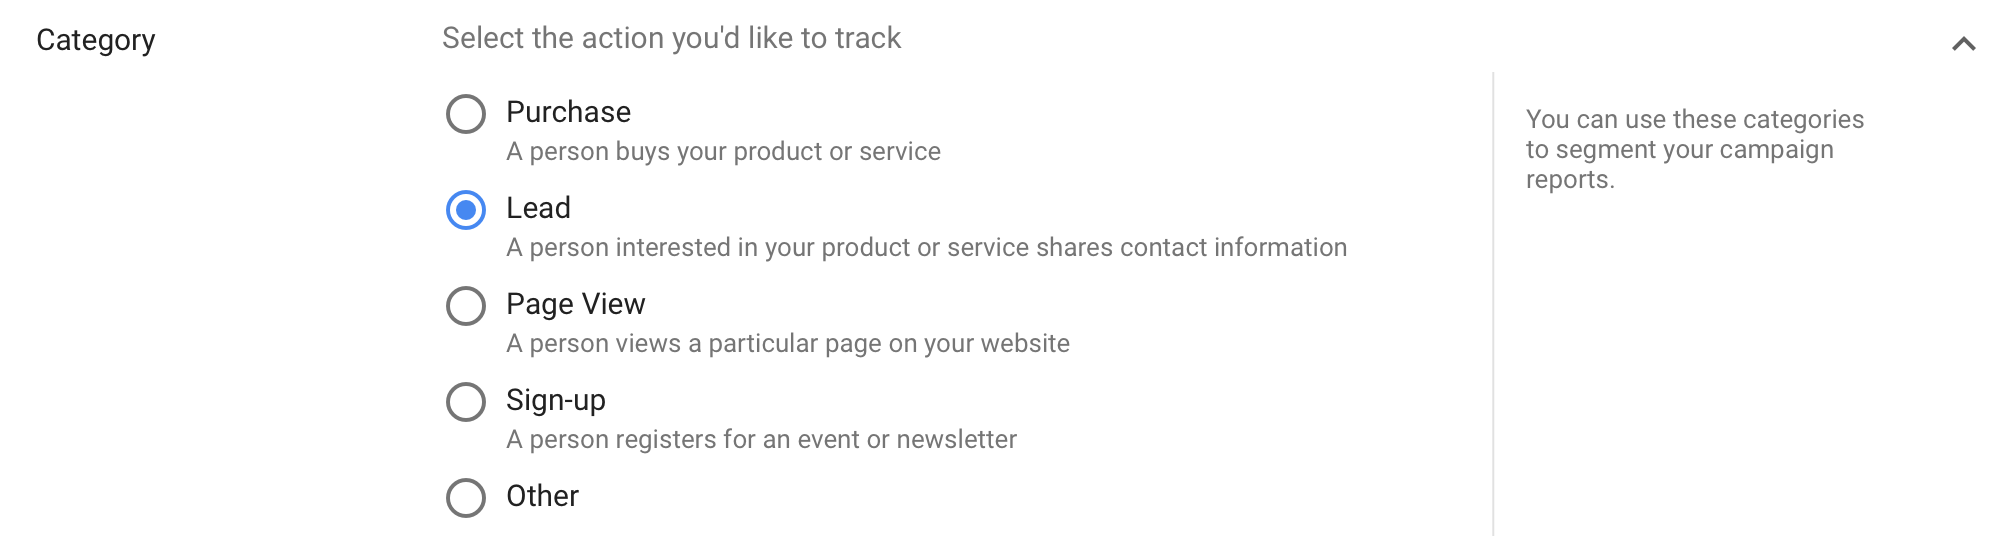
Step 7:
Once I select website, I am taken to a new page, where I am supposed to select “Category” for which I want to setup the conversion, so I am selecting lead, as my objective is to generate leads from Google Ads and track the no of leads generated
Step 8:
Once I have selected Lead option, I need to define the conversion name. I have defined “Website Leads” as below, you can define the text as per your requirement, which helps you to understand the conversion.

Step 9:
The next step is to define the value of a conversion. Now this is not applicable for a business who objective is to generate leads, as a lead is a prospect and it does not guarantee that the lead will convert to an acquisition. So, lead for me in this case right now has no value, it might get acquired later (may be offline). So I am selecting don’t use a value for this conversion.
If I am an ecommerce website, in that case I can go with the second option which is use different values for each conversion, as each cart value will different from product to product.

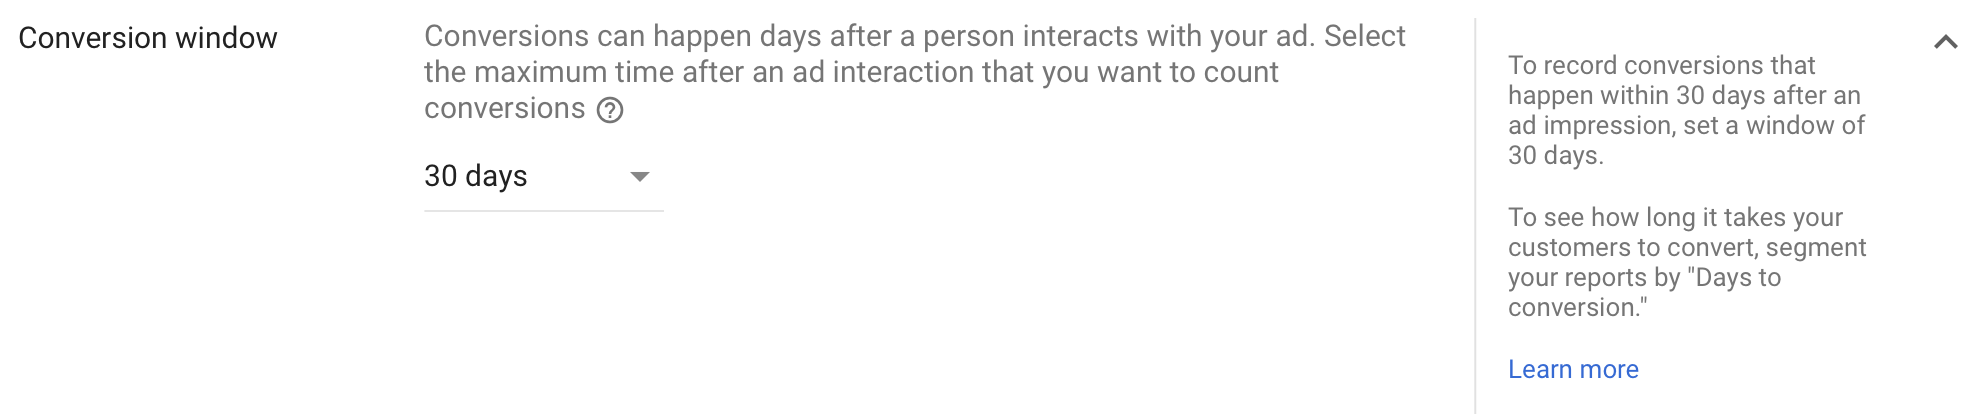
Step 10:
The next step is to setup the conversion window, conversion window is the timeframe for which you want to consider that conversion as unique.
For Eg: Mr. Thomas fills in a form on the website twice within a period of 30 days, in that case only 1 conversion will be considered.
But if Mr. Thomas fills in form today and also fills a form on the 35th day, then 2 conversions will be recorded as per Google
Step 11:
The next step is to define view-through conversion window. View-through Conversion means if a conversion happens without any interaction of the user, but he has viewed the ad in the past, in that case it would be considered as a view-through conversions.
Chances of view-through conversions are very low, but Google can still track these conversions through their algorithms. You can set a window of 30 days for the same.

Step 12:
The next option is to Include In Conversions, you can see by default the option is checked, you can keep the box as checked because you want the conversion data to appear in the conversions column of your reporting dashboard.

Step 13:
The next step is to select an attribution model for your conversion. Attribution model is basically to whom you want to give credit for the conversion. There are 5 different attribution models, which are as below
- Last Click
- First Click
- Linear
- Time Decay
- Position Based


Right now I am going with Last Click model. To know more about different attribution models in Google refer article here : Attribution Models in Google Ads
Step 14:
Say create and continue to move ahead. Once you click create and continue, you will come across three options including
- Install the tag yourself
- Email the tag
- Use Google Tag Manager
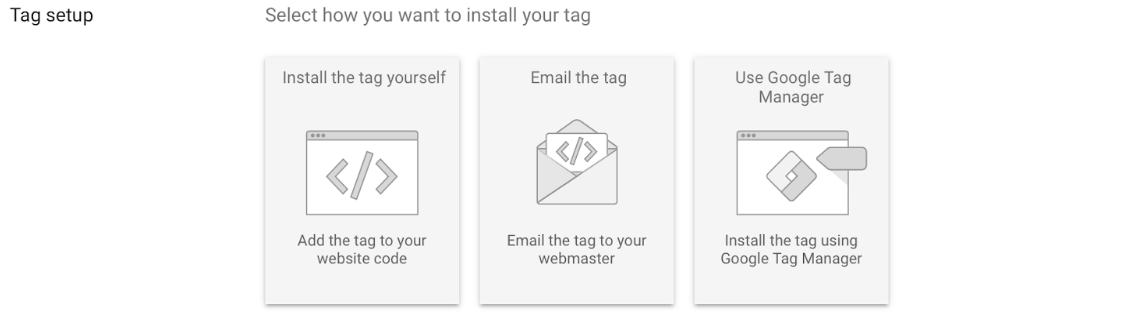
Install the Tag Yourself
If you go with this option, you will have to manually insert the tag yourself on website backend
Email The Tag
If you go with this option, the tag will go to your webmaster on email, you can ask them to add the tag on your website backend
Use Google Tag Manager
If you are using Google Tag Manager, you need to select this option to setup the tag.
Step 15:
I am going with Install the tag yourself option, as I will also take you guys through installation of the code for a wordpress site.
Once I click, Install the tag yourself, I can see the below options
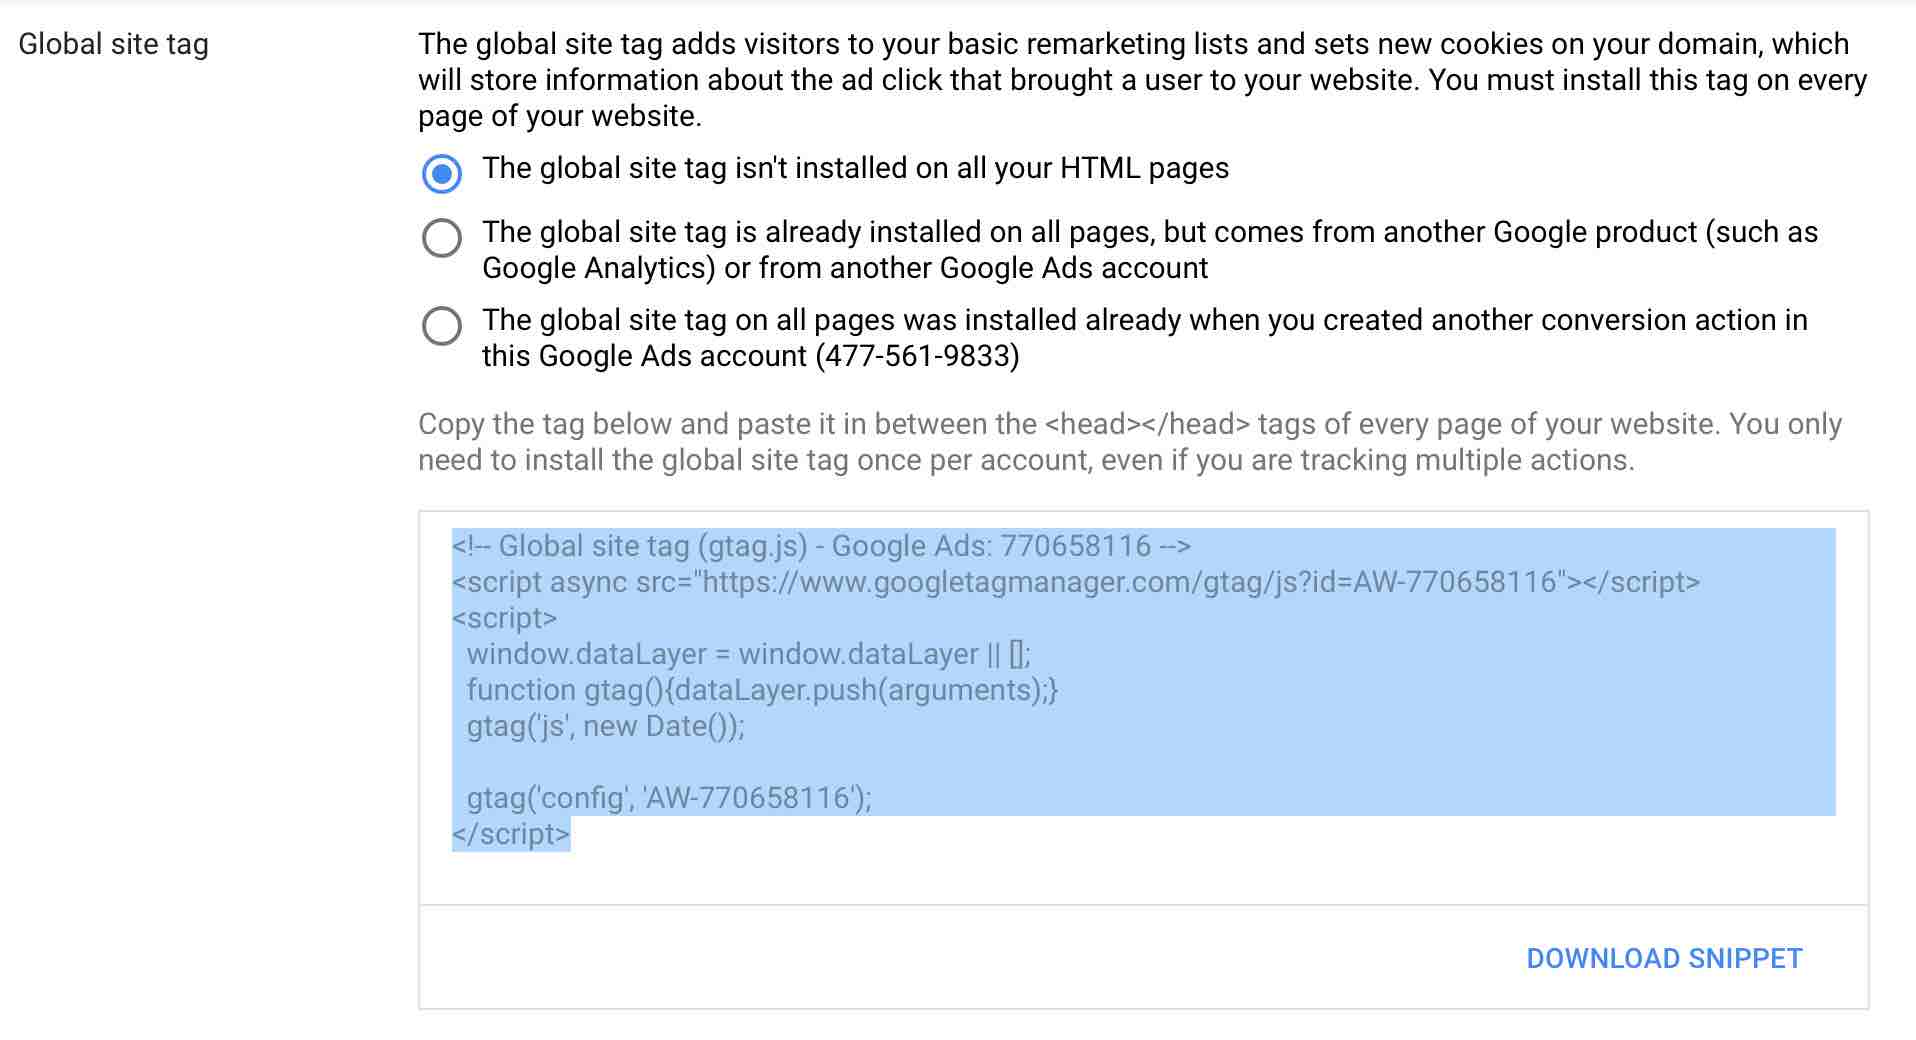
As I am installing the code for the first time, so I am going ahead with the first option which says, The global site tag isn’t installed on all your HTML pages.
You can see there is a code snippet in the box (marked in blue), we need to add this code on our website in between the <head> </head> tags of all the pages of our website.
So let’s see how to add this code on the wordpress website.
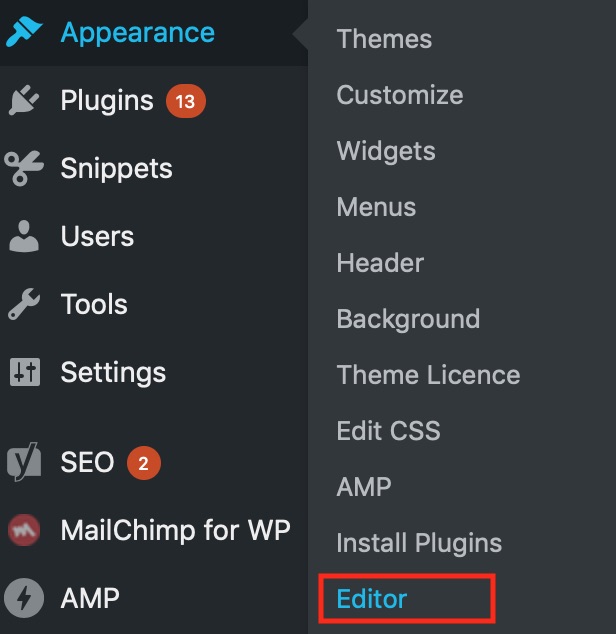
- Log on to Your WordPress Account
- Click on the Editor option under appearance as below on the left hand side bar
3) Once you click on the editor option, you will come across below screen. So now click on the theme header which is on the right hand side.

4) Once you click on the theme header, add the code (which is in step 15), before the </head> section, the way I have added as below.
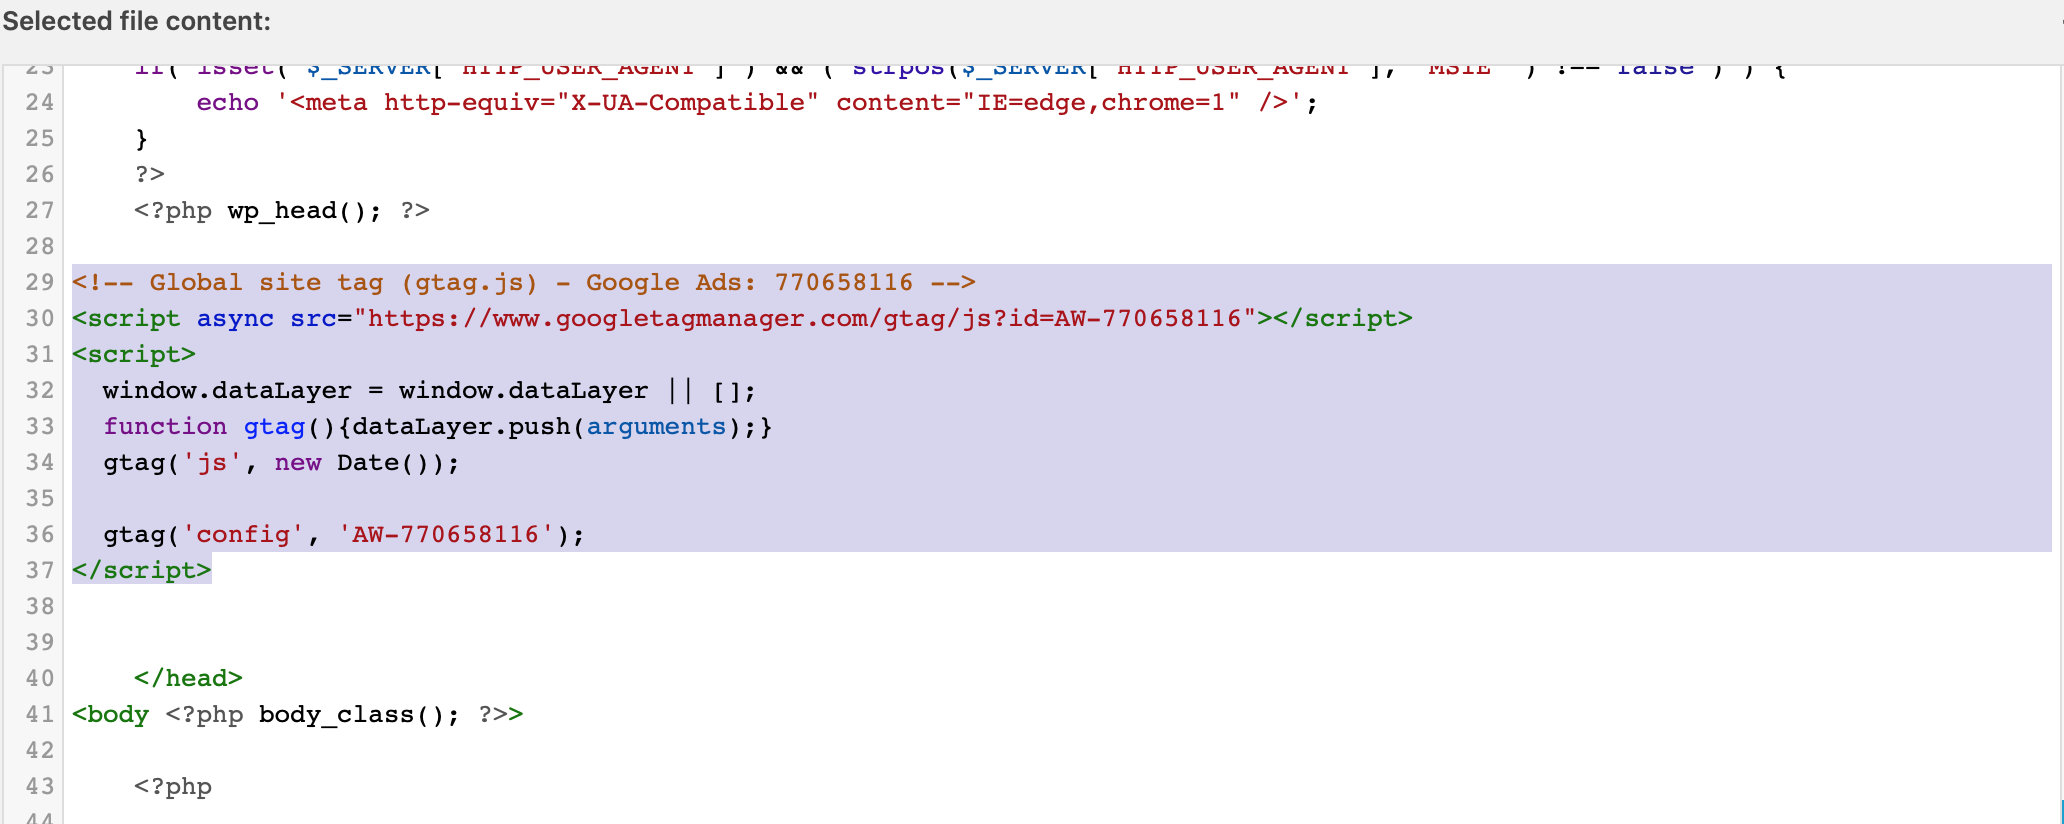
5) Now say update file.
Step 16:
The next step is to add the event snippet, which you will see as below
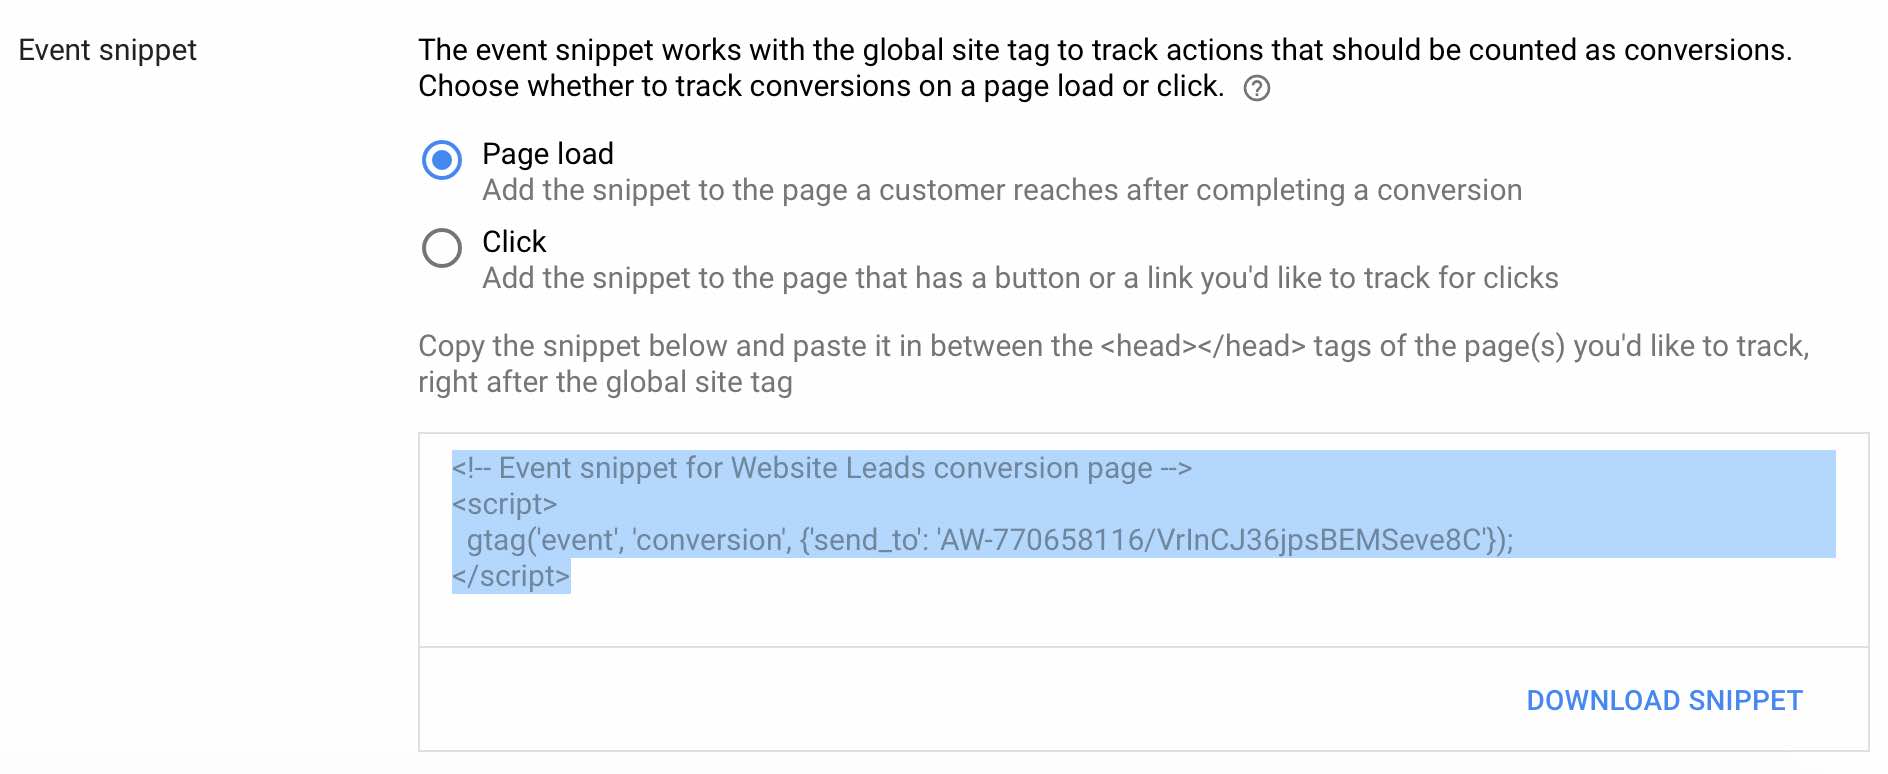
This event snippet has to be added on the Thank You page in the body section.
Step 17:
Click on next and you are have setup the conversion tracking successfully! On the next screen you will see the below message 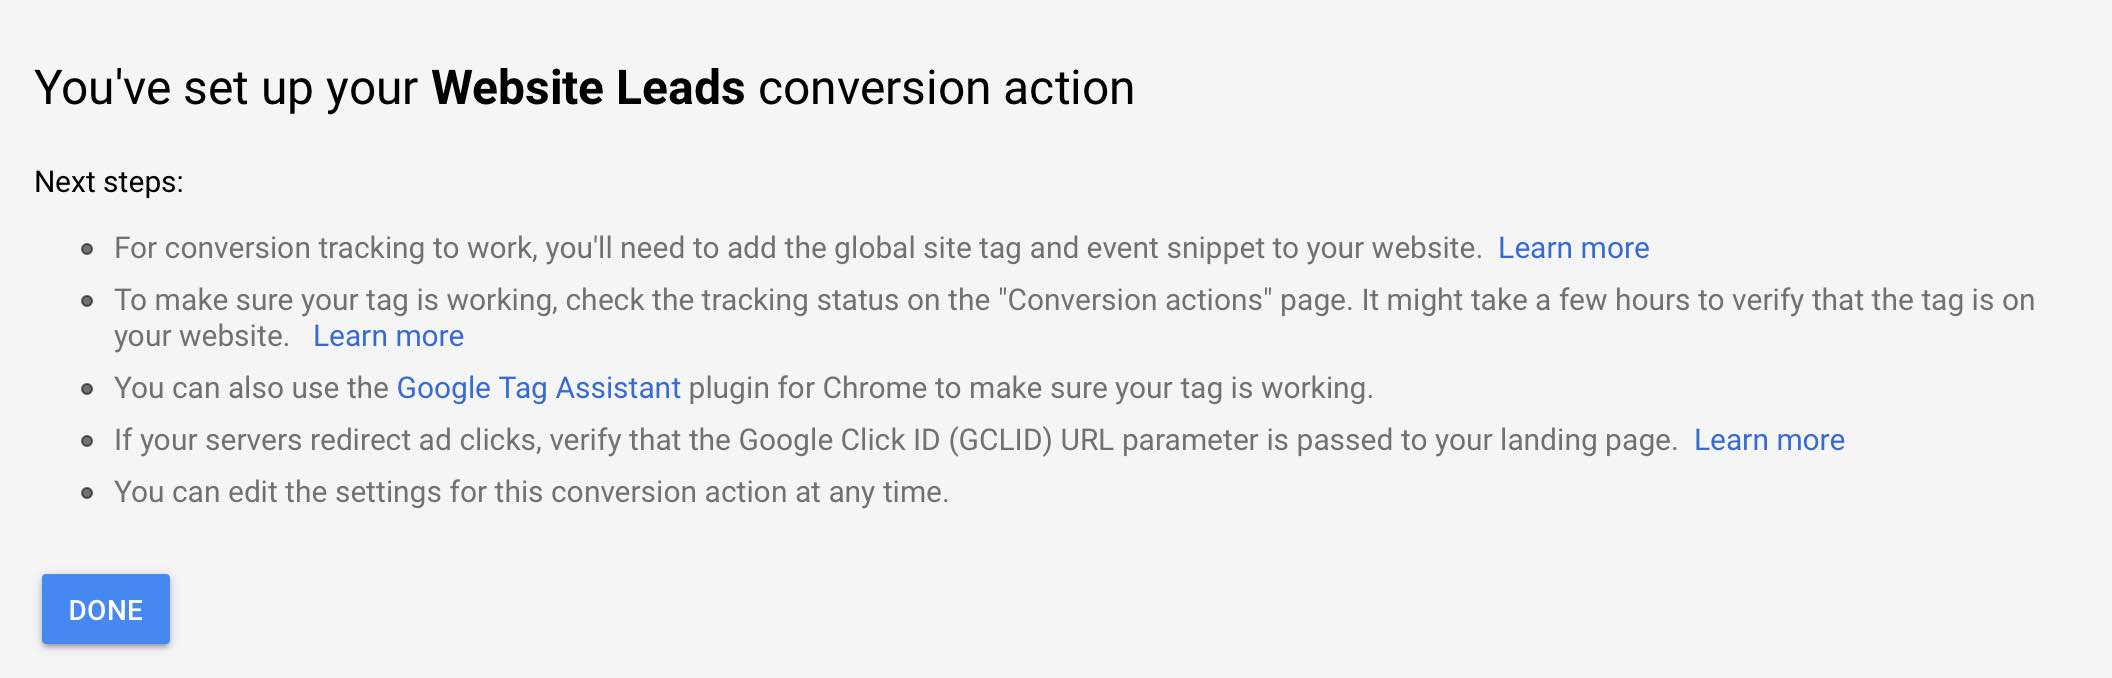
Step 18:
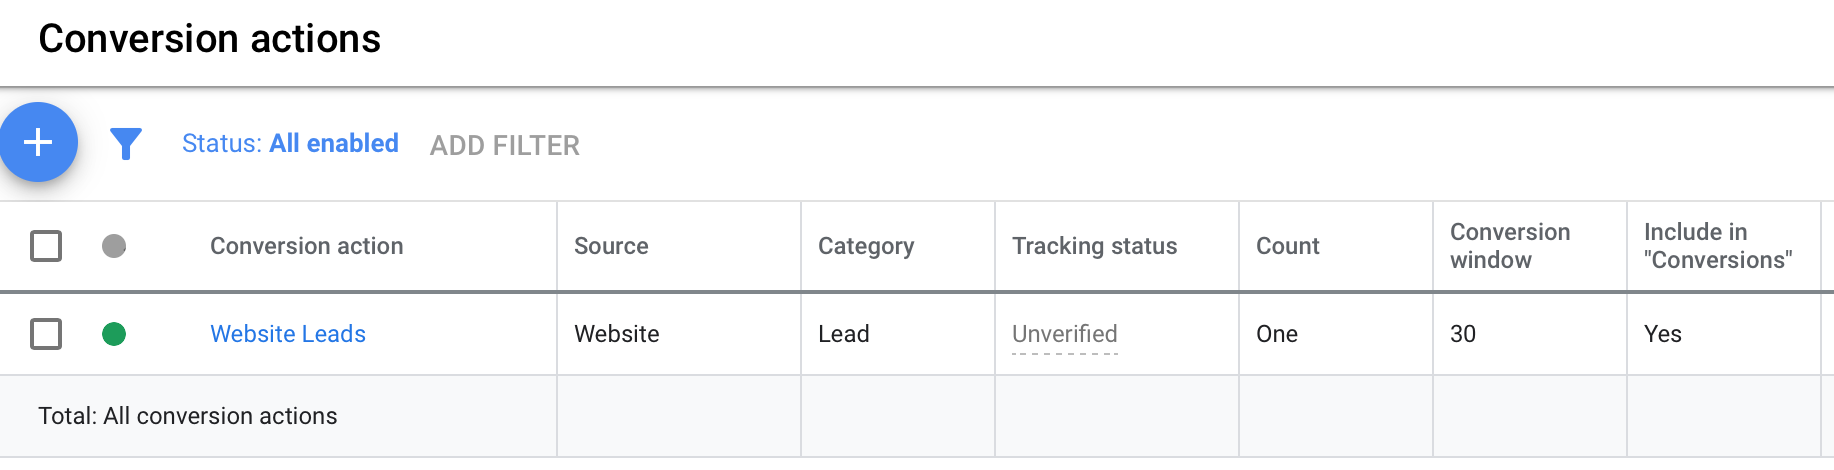
Click on done and you will see the conversion tracking setup name which you defined earlier. The tracking status will be unverified, as it takes a few hours to verify the tag by Google.
Post verification of the tag, you can also use Google Tag Assistant plugin to make sure your tag is working!
Conclusion:
Google Ads conversion tracking is an effective way to understand how your campaigns are performing for search, display, video & shopping. This also helps you to further optimize your campaigns helping you achieve higher ROI from Google Ads

