

As we know that Remarketing is one of the effective ways to increase conversions by showing ads to users who have visited your website. We have seen Display Remarketing in our previous article (Refer here – Display Remarketing Campaign) which focused on showing ads to users who visited our website on Google Display Network. Today we are going to look at remarketing on search network.
This guide will help you understand What is RLSA, benefits of RLSA, how it works and how to create RLSA ads in Google Ads.
RLSA is also known as Remarketing Lists for Search Ads!
So What are Remarketing Lists for Search Ads (RLSAs)?
Remarketing Lists for Search Ads (RLSA) is a Google Ads feature which allows you to remarket users on Google Search network to users who have previously visited your site.
So How Does Remarketing Lists for Search Ads (RLSAs) Work ?
Let’s say you are marketing a real estate residential project in balewadi (Pune, India). The user has visited your website and is still searching on Google with different combinations of keywords matching “properties in balewadi”, your ads will be shown to them with the audiences lists defined in the RLSA campaign.
So what is actually happening in the RLSA process?
- A cookie is dropped on the users browser once the user visits the website which has a remarketing code
- The user again goes back to Google Search and searches for a similar term which is related to the business he/she visited
- Basis the audience list used by the advertiser, the user is able to see the search ad, which is a remarketing search ad
So How To Create Remarketing Lists for Search Ads?
Here is a step by step guide to create Remarketing Lists for Search Ads (RLSAs)
Let’s get started!
Step 1:
Login to your Google Ads account – Login
Step 2:
The first step in remarketing is to add a remarketing code and add it on the header of the website. The remarketing code in Google ads in part of the conversion code, to understand the setup process for remarketing code, refer article – Google Ads Conversion Tracking Guide (the code which has to be added in the header of the website, acts as the remarketing code).
Always remember, once you add the code, users who visit your website from that day, will be a part of the RLSA.
Step 3:
Once you have added the remarketing code on your website, the next step is to go to audience manager, which is in tools, under shared library. Follow the screenshot as below

Step 4:
Once you click on audience manager, click on the plus blue button to create a new remarketing list (if you have already created a list, you can use this same). I am creating a new one because I want to show you from the beginning. Remarketing lists is also called as audience lists in Google Ads.
Once you click the blue button, you will see below 5 options including Website Visitors, App Users, YouTube users, YouTube Users, Customer List & Custom Combination. We have discussed this in our regular display remarketing campaign, you can follow the same here to know more – Display Remarketing Campaign
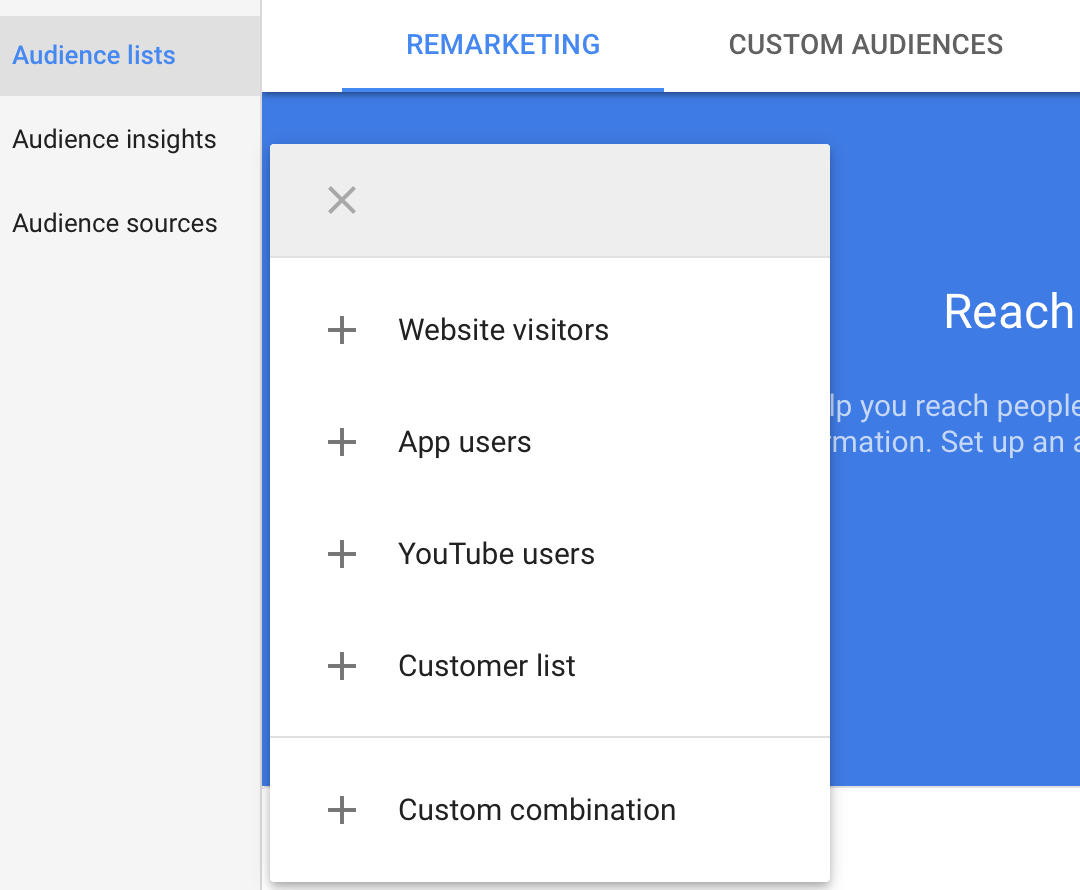
Right now, I am going with website visitors, as my objective is to remarket users who have visited the website and are still searching for my business.
Now let’s take an example of a brand who wants to create a RLSA campaign and understand how to set up RLSA. So here I am taking an example of a brand who have a real estate project in balewadi (Pune, India) and wants to remarket users who are still searching for similar set of keywords on Google search.
Step 5:
Once you have selected website visitors, the next step is to define the remarketing lists name. So I am defining the name as below

Step 6:
The next step in the process is to define list members who you want to add to the list which you are creating. In Google Ads, you have 5 options to choose from list members option as below
- Visitors of a Page
- Visitors of a page who also visited another page
- Visitors of a page who did not visit another page
- Visitors of a page during specific dates
- Visitors of a page with specific tags
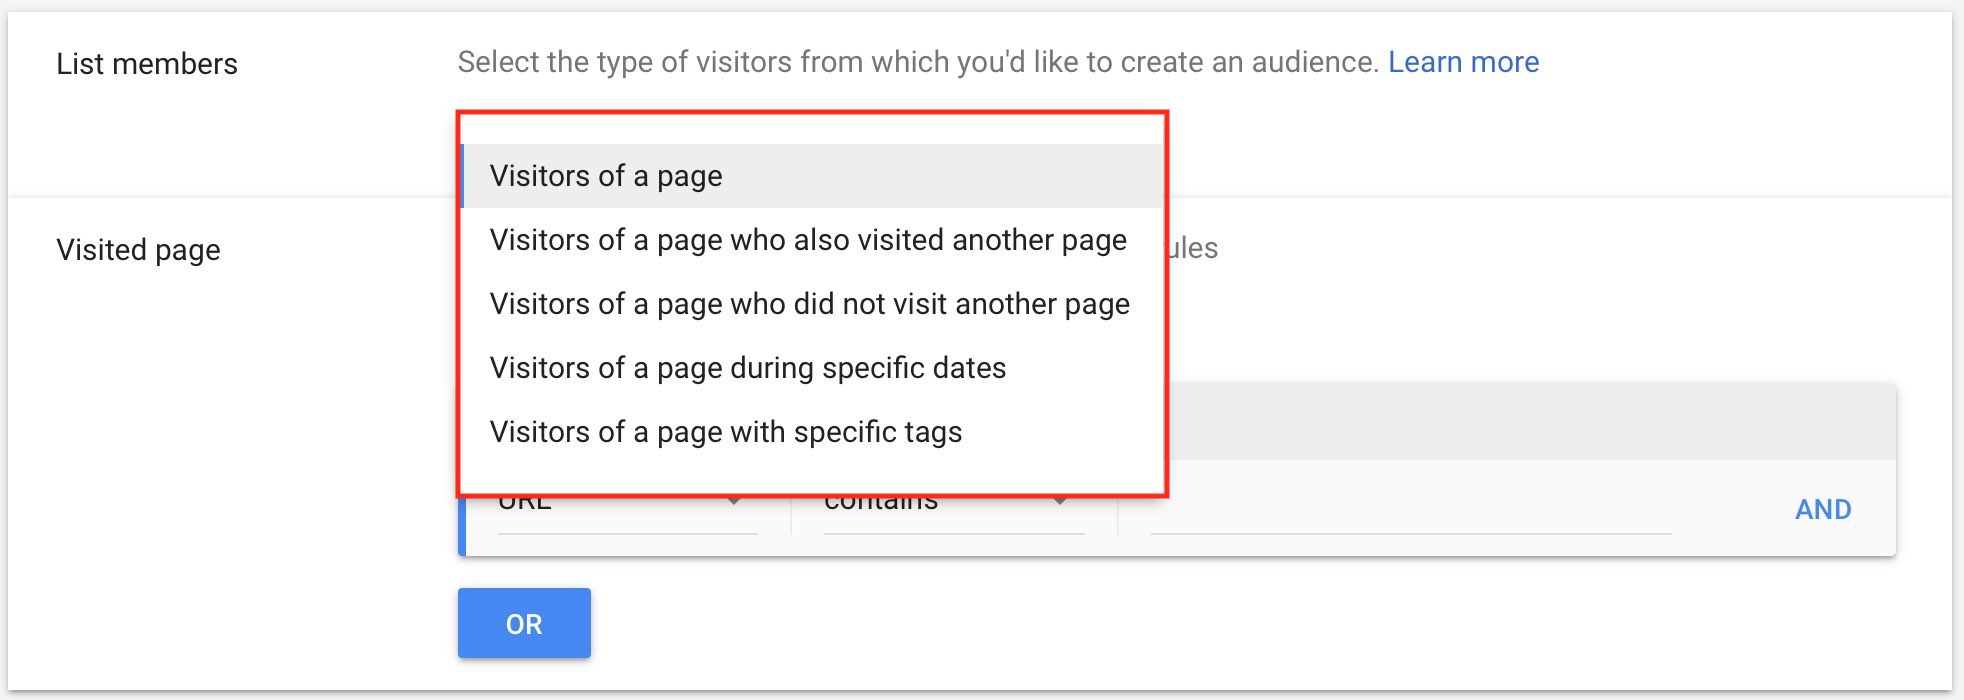
To understand each option in detail, refer step no 6 of article Google Display Remarketing Campaign
For this campaign, I am going with the third option which is “Visitors of a page who did not visit another page”. I am going with this option because I want users to remarket who have not filled up enquiry form on the website. So below is how I have setup the options post selecting list members.
Visited Page is the page which is my landing page.
Unvisited Page is the page which is the Thank You page.

Step 8
The next step is to setup the initial list size. In this step, if you go with Include people from the past 30 days, then Google will try to add visitors from previous 30 days to your list. You can go with this option as you are starting from today, so the visitors will start adding to your list from today and Google will try to include visitors from previous 30 days.

Step 9
The next option is to select membership duration. Membership duration is the no of days for which you would like to remarket users on search. I have kept 60 days because, buying a property is a high involvement product and it takes time to make decisions, hence keeping it 60 days to remarket.

Step 10
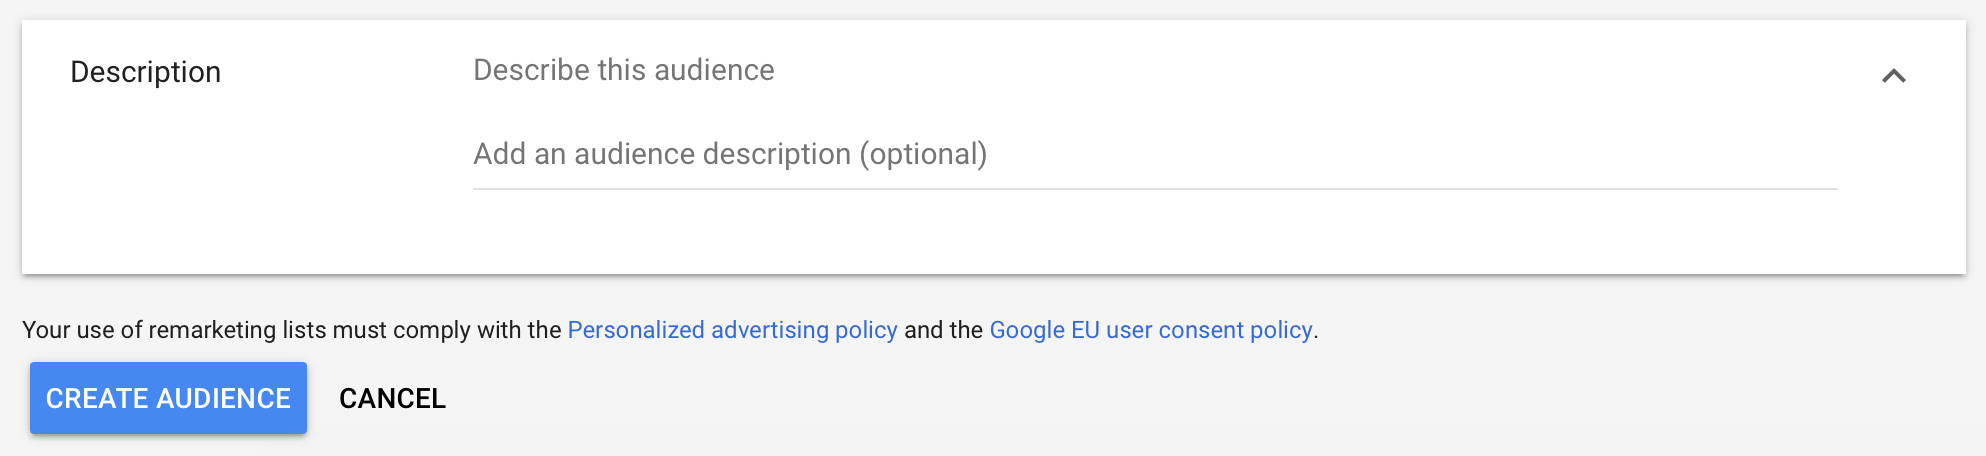
The next step is description, which is optional. This is to describe the list in detail so that if multiple users are using your ads account, then it would be easy for them to understand in detail. I am keeping it blank as there are few projects on the website, so it’s easy for me to understand what the list is about by just reading the name of the list.
Once you are done with selecting all the options, say create audience.
Step 11
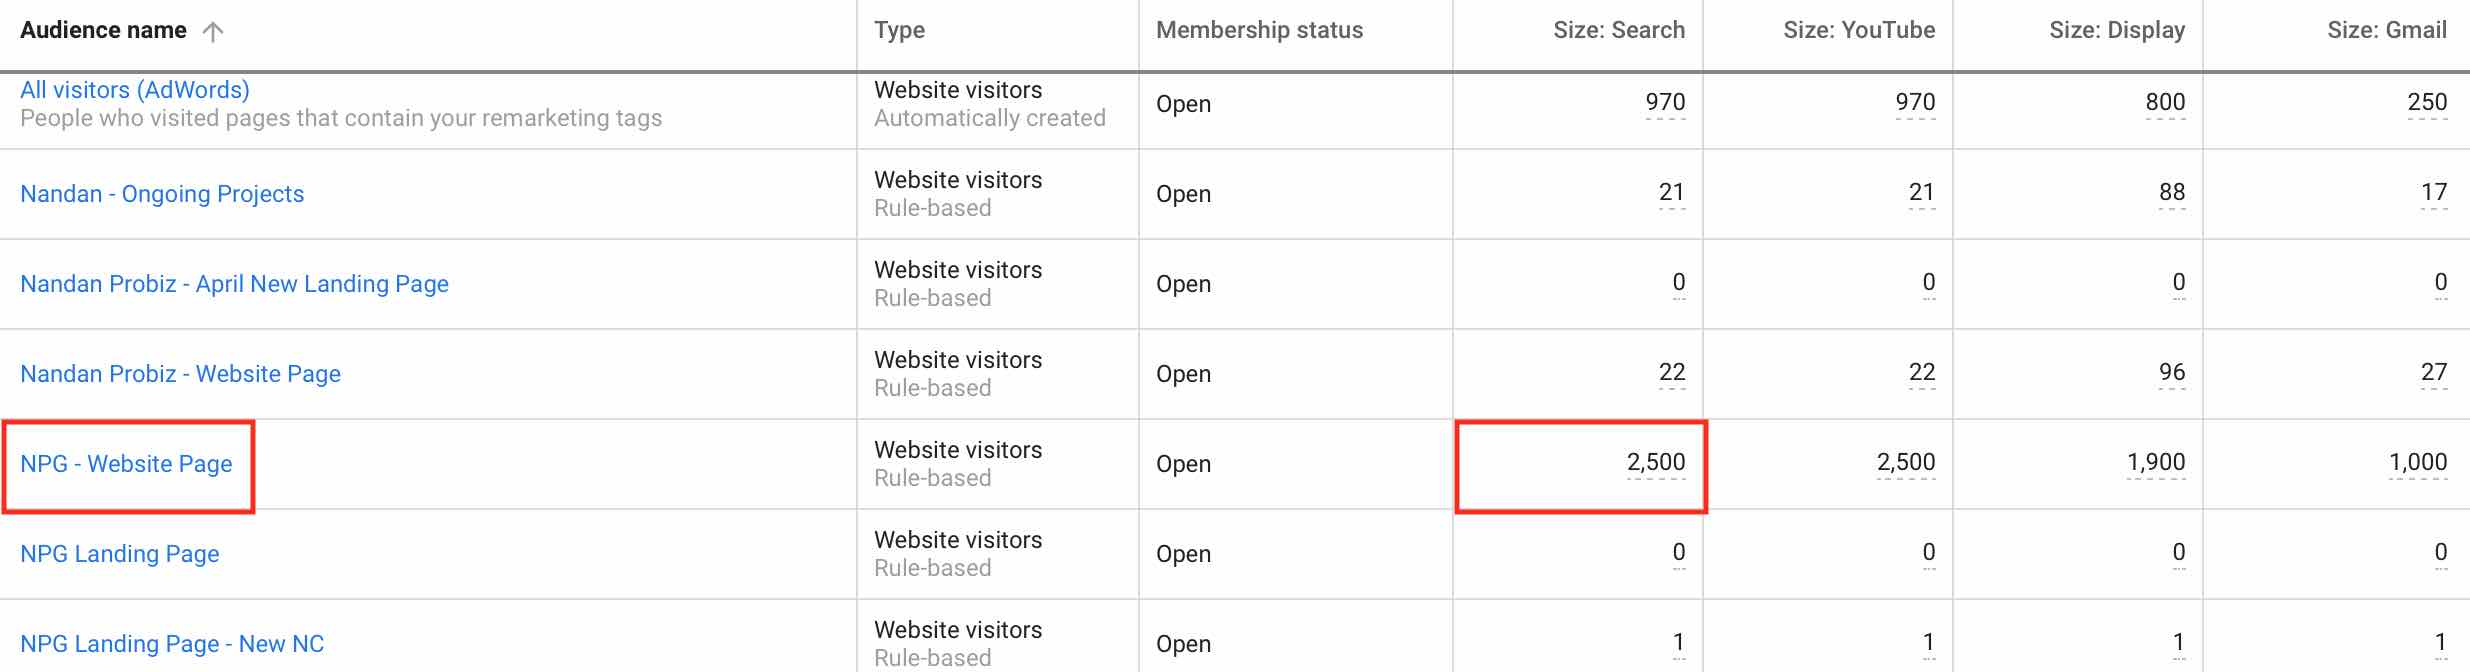
Once you create the audience list, the list can be viewed on the dashboard. I have created the list and after a week, I can see visitors on my list as below.
One important aspect to remember in RLSA is that, you need at least 1000 visitors in your list to start with the campaign.
You can see that I have 2500 visitors under search list.
Step 12:
The next step now is to create remarketing lists for search ads (RLSA) campaign. So let’s create a fresh RLSA campaign.
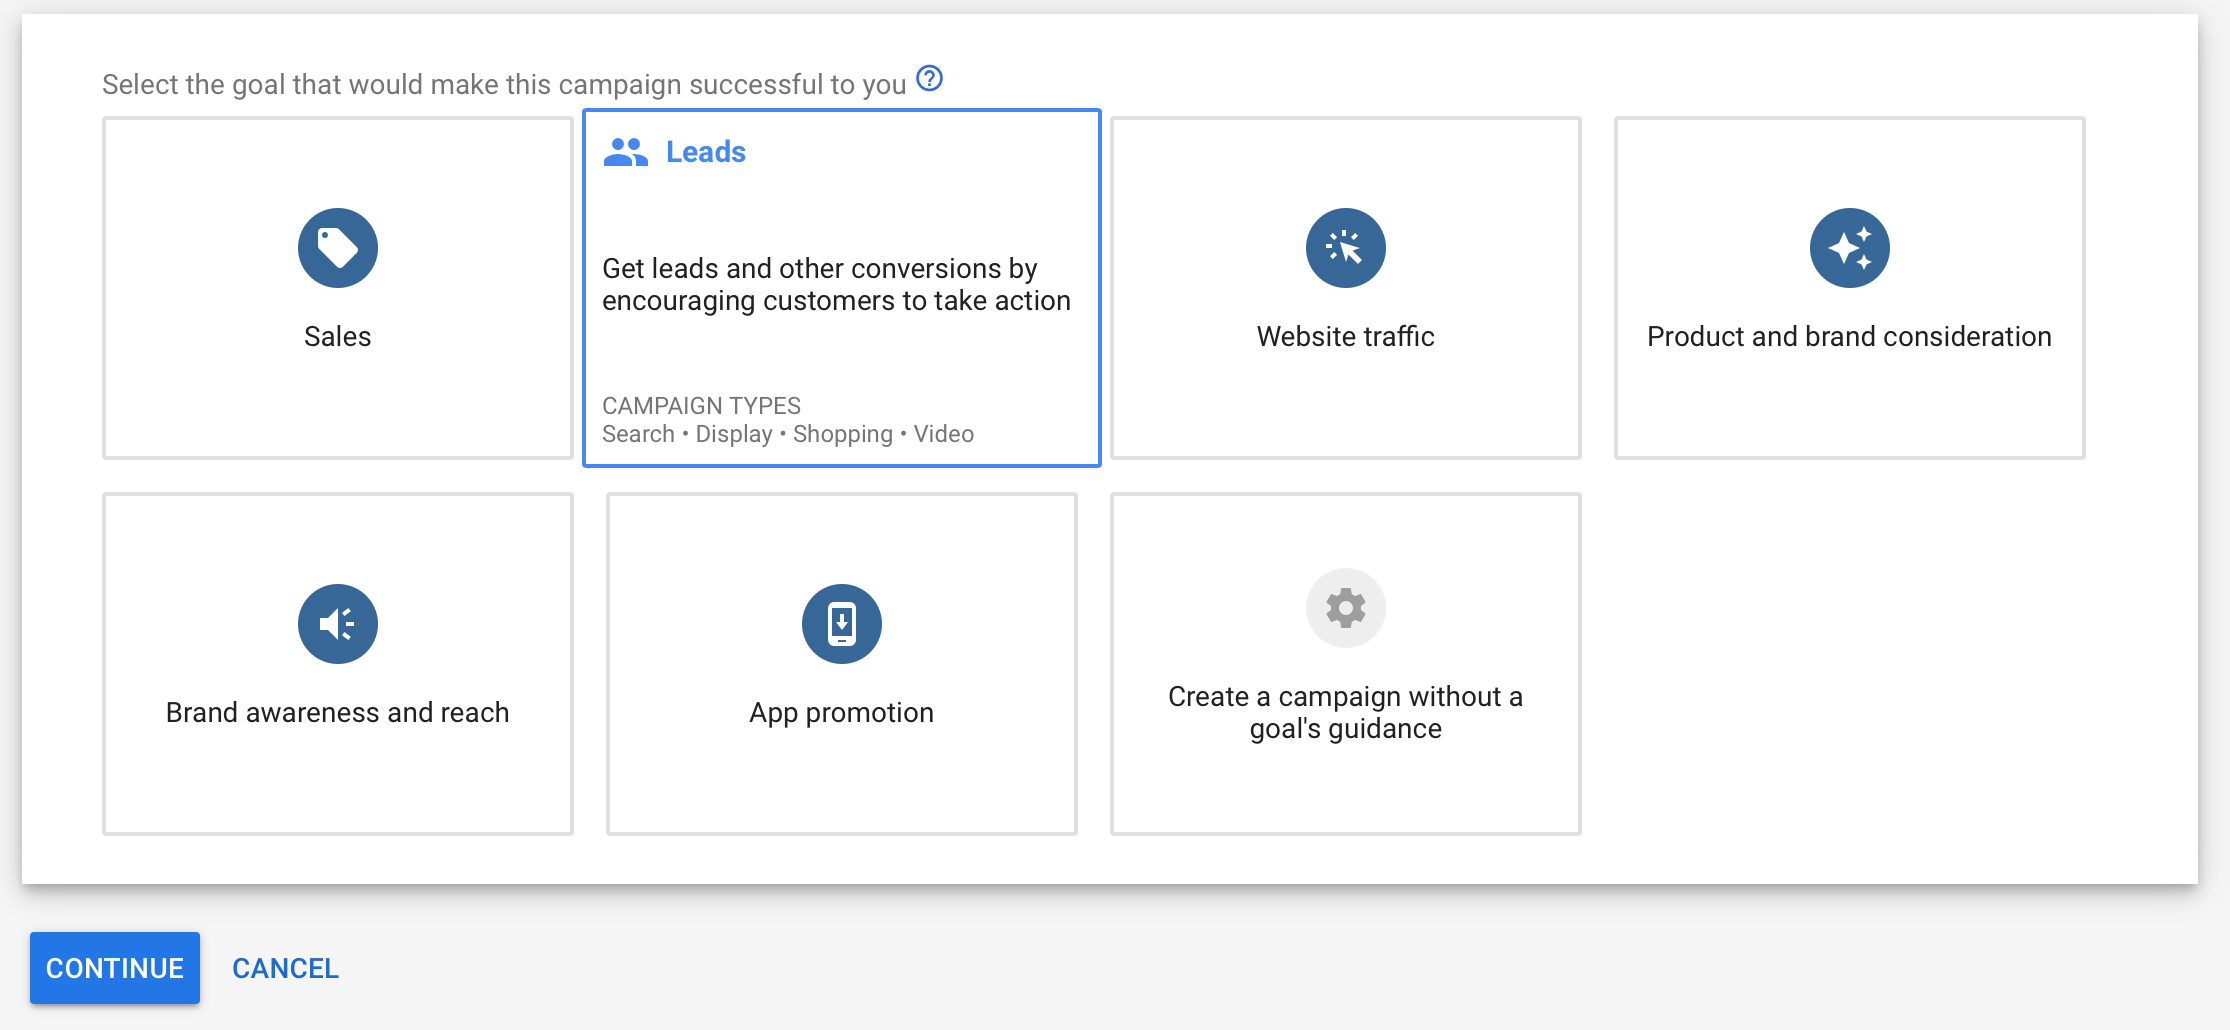
So select the goal for your RLSA campaign. As my objective to generate leads, I would go with leads option as below
Step 13:
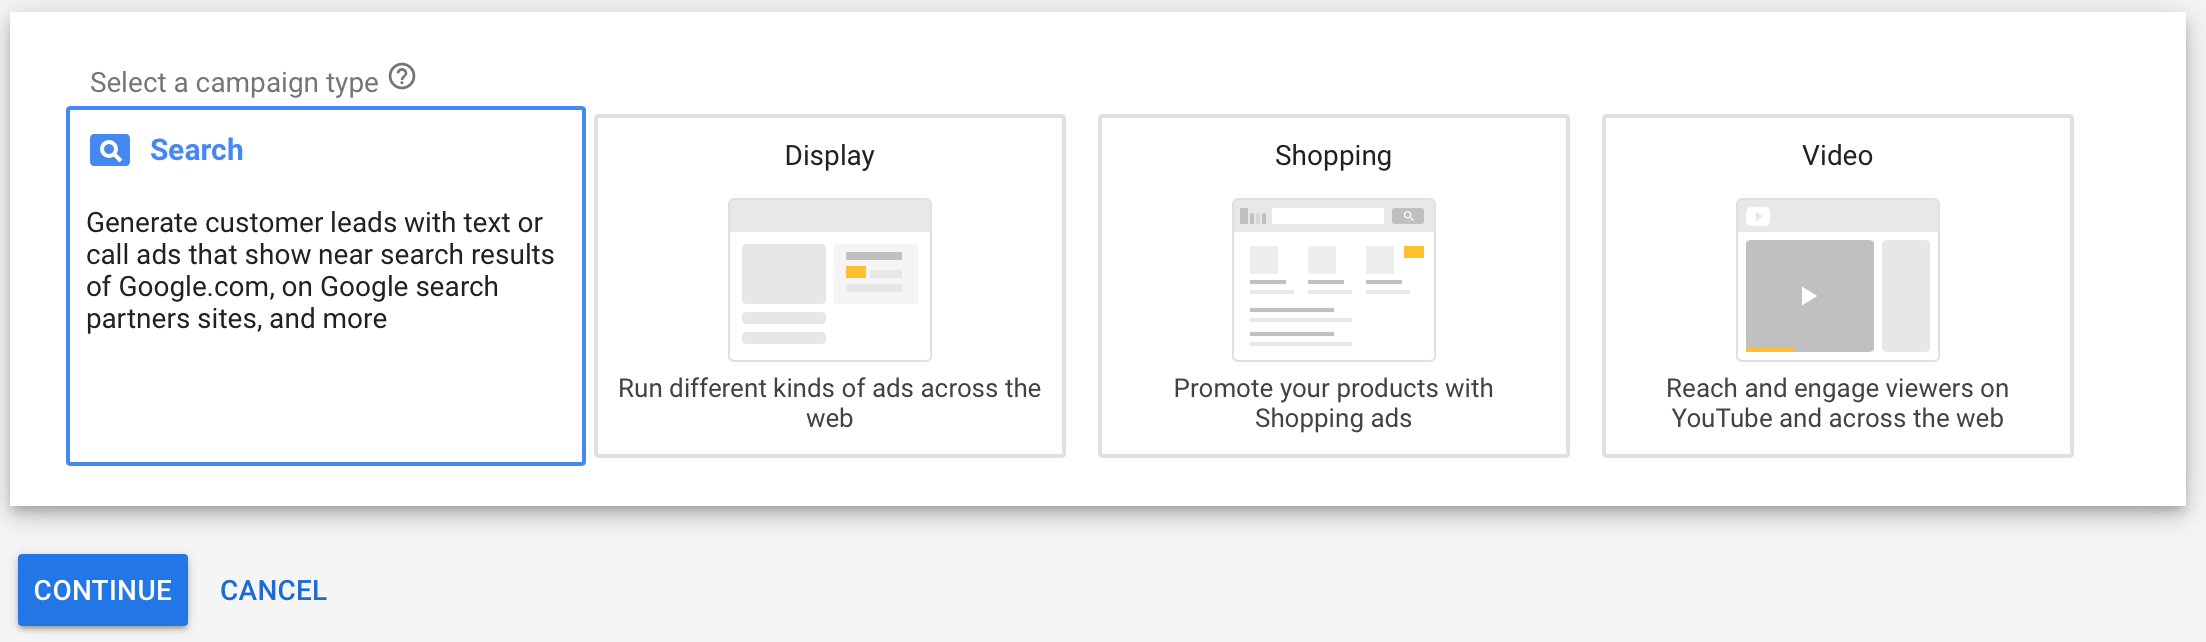
Once you have selected the Goal, the next step is to select the campaign type. Campaign type, I am selecting as Search, as I want to remarket users on search.
Step 14:
The next step in search campaign is to define campaign name, so I am defining campaign name as below

Step 15:
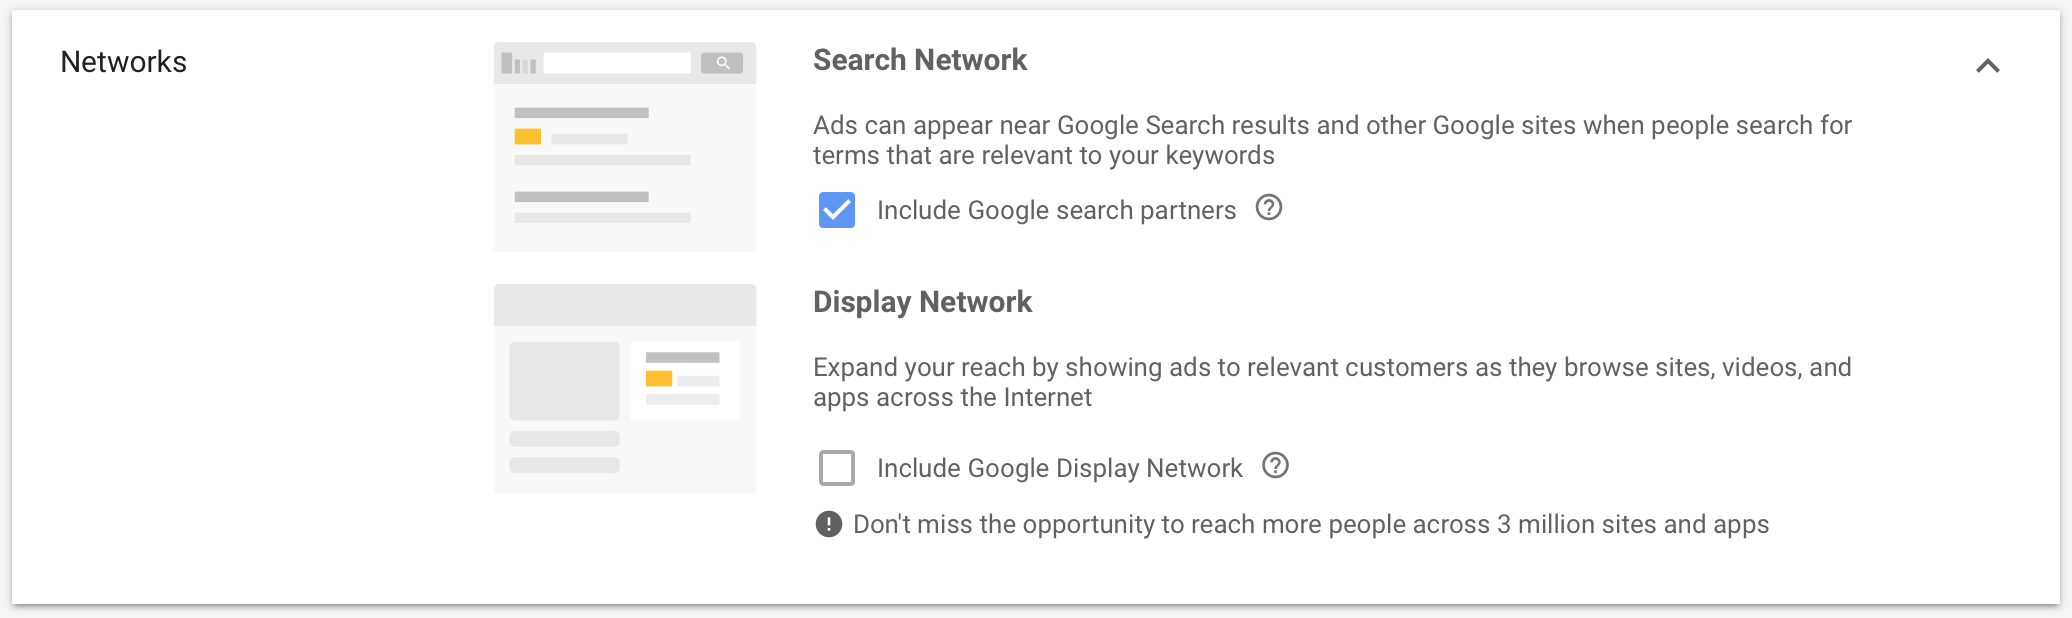
The next step is to select networks. As we are targeting users on search, so I am going with search.
Step 16:
The next step is to define location for your campaign. I am selecting India as the location because I am only targeting users who have visited my website.

Step 17:
The next step is to select languages. I am keeping English as a language because my target audience is users who are speaking english and using Google’s english user interface for search.

Step 18:
The next step is to select bidding strategy. There are different types of bidding strategies available for RLSAs including
- Target CPA
- Target ROAS
- Maximize Clicks
- Maximize Conversions
- Target Search Page Location
- Target Outranking Share
- Enhanced CPC
- Target Impression Share
To more in detail about the different types of Google Ads bidding strategies, you can refer article – An Ultimate Guide to Google Ads Bidding Strategies
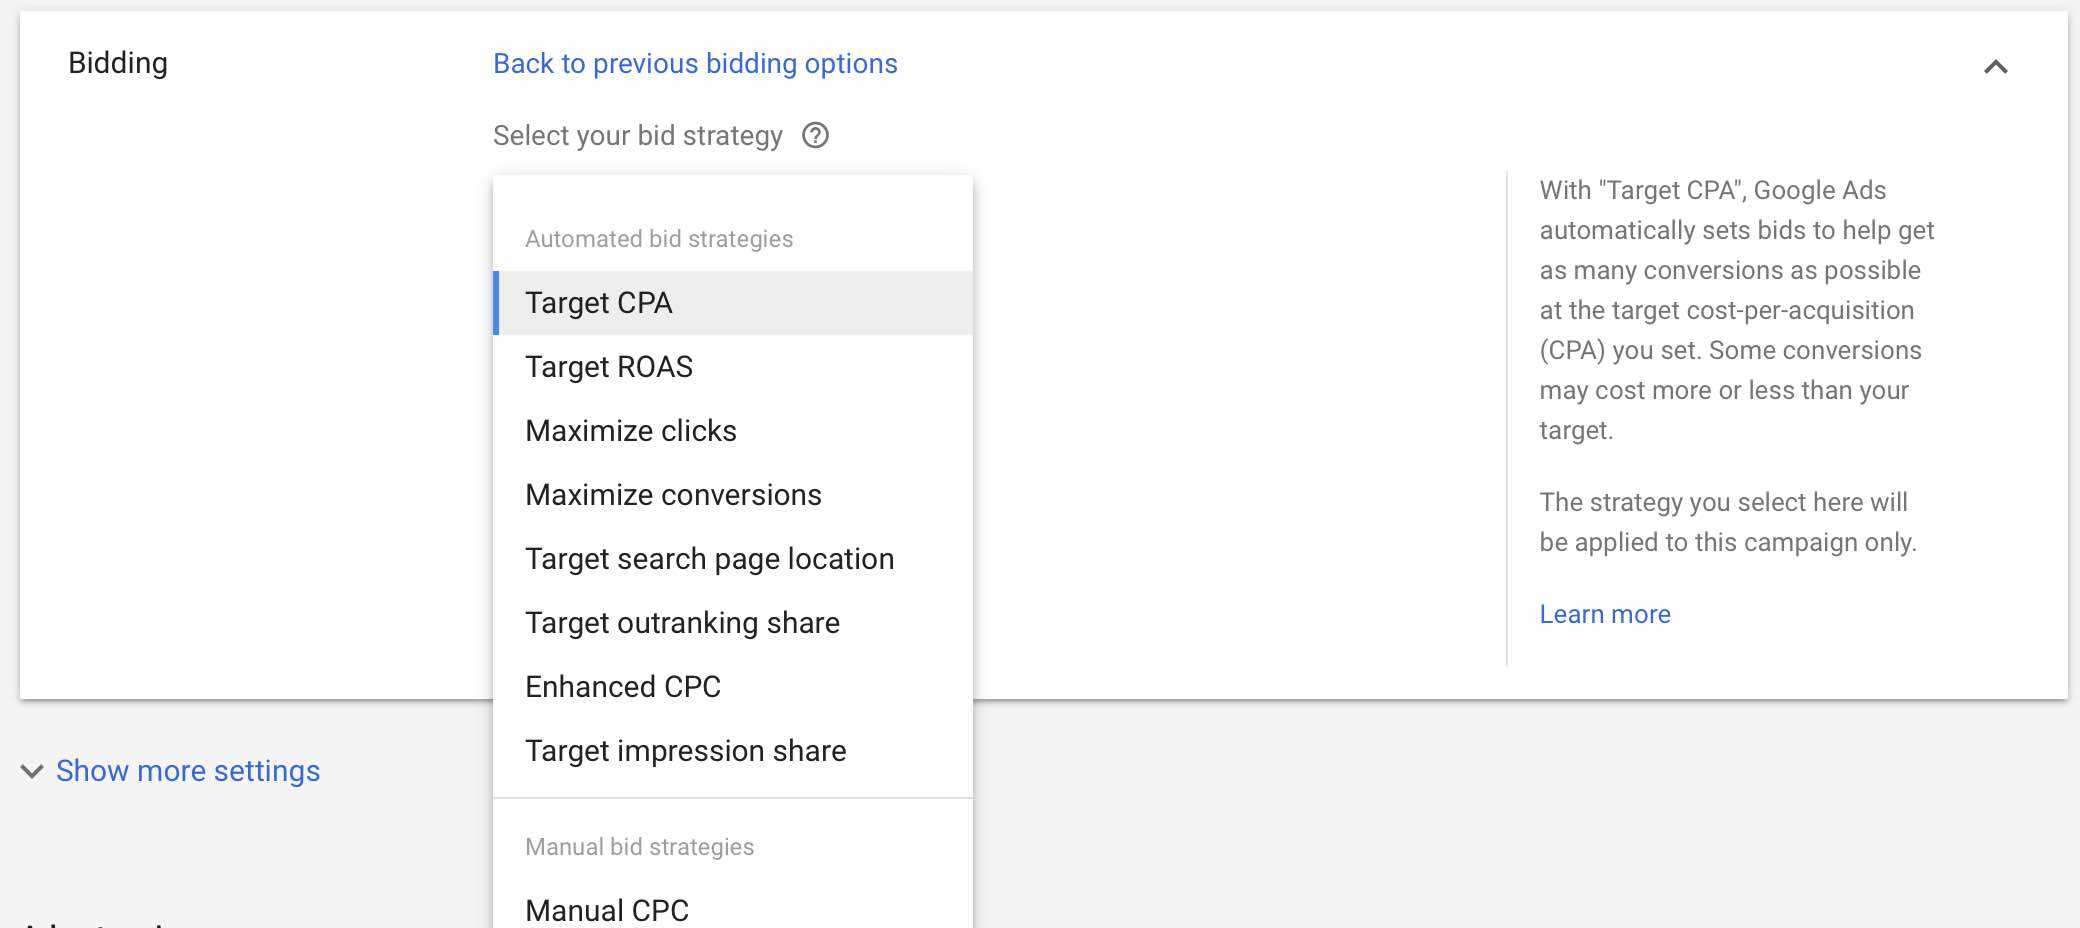
For my campaign, I can go ahead with CPA strategy or manual cpc strategy as our objective is to generate leads. So I am going ahead with manual CPC strategy with a higher bid for RLSA campaign, which will help me to rank higher in the auction to the users searching again on Google.
Step 19:
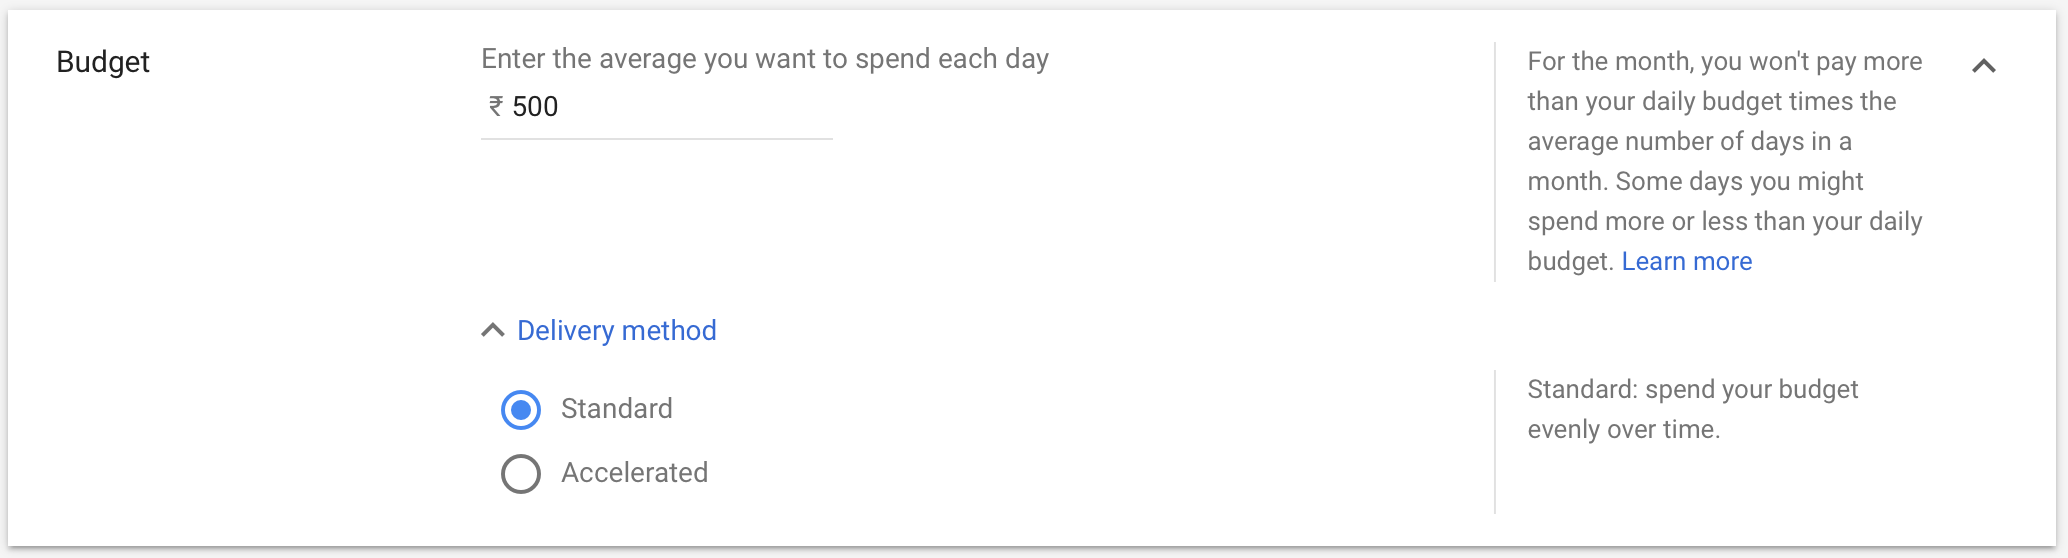
The next step is to define budget. You can start with a minimum budget of Rs. 500 or $10. I am defining Rs. 500 as the budget.
Step 20:
The next step in the settings option is Ad Rotation. Ad rotation is how you want to rotate your ads. Two types of ad rotation are available in Google Ads.
Optimize Best Performing Ads
Do Not Optimize: Rotate Ads Indefinitely

I am going with the first option, Optimize, prefer best performing ads because in this case Google will trigger those ads often which are getting maximum clicks.
Step 21:
The next step in the process is Ad Scheduling. For RLSA, would recommend to keep the scheduling open because your ad will only be served to the users who have visited your website and are still searching, so scheduling should not be a problem.

Step 22:
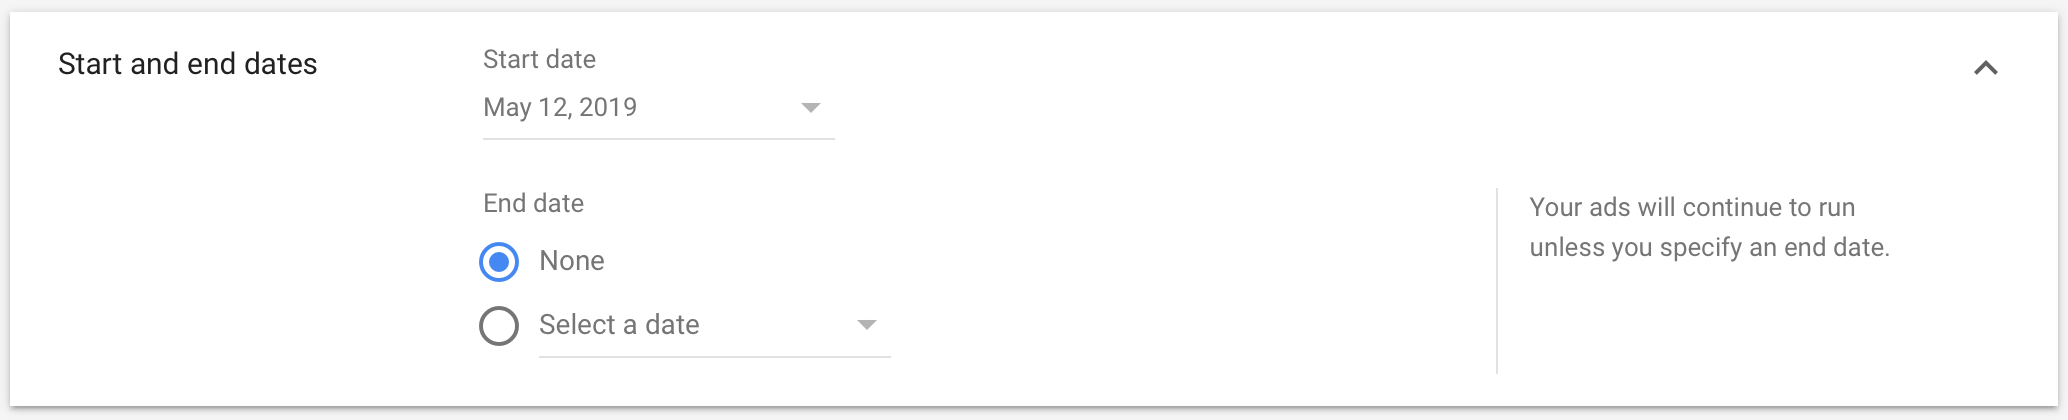
Now you need to define the start and end dates of the campaign. You can define the date, upto which you want to keep the campaign active.
Step 23:
The next thing is to select the devices which you want to target for your campaign. I am selecting devices as shown on all devices as I want to target users whenever they are on any device, as they have visited the site.

Step 24:
The next thing is to define audiences for your search campaign. So go with the last option in audiences which says Remarketing and Similar Audiences.

Now select the audience list which you want to target for RLSA. I am selecting the one which I created (refer step 11). You can select website visitor lists as per your requirement, plus you can also select multiple visitor lists.

Step 25:
Once you select the audiences option, the next thing is to define audience targeting setting for this campaign. This was earlier known as “Target & Bid” and “Bid Only” in old version of Google Adwords. So let’s understand which one to use and why

Targeting (Target and Bid)
This includes targeting only those things which you have selected. For Eg: I have selected one audience list (refer step 24), so if I go with targeting option, my ads are only targeted to the users who are part of the list and are searching for the terms used in the RLSA campaign, so it’s specific targeting. If you are creating a new RLSA campaign (the way I have done), it’s recommended you go with targeting option for your campaign.
Observation (Bid Only)
This includes reaching out to users who are part of the list, plus reaching out to users who match other parameters you have targeted individually. Eg: You can create a search campaign and target users who are again searching for your business, plus from the same campaign you can target fresh users, so through this setting, your campaign can act as fresh users campaign and RLSA campaign as well. As my campaign is a separate RLSA campaign, I am not going with this option.
Step 26:
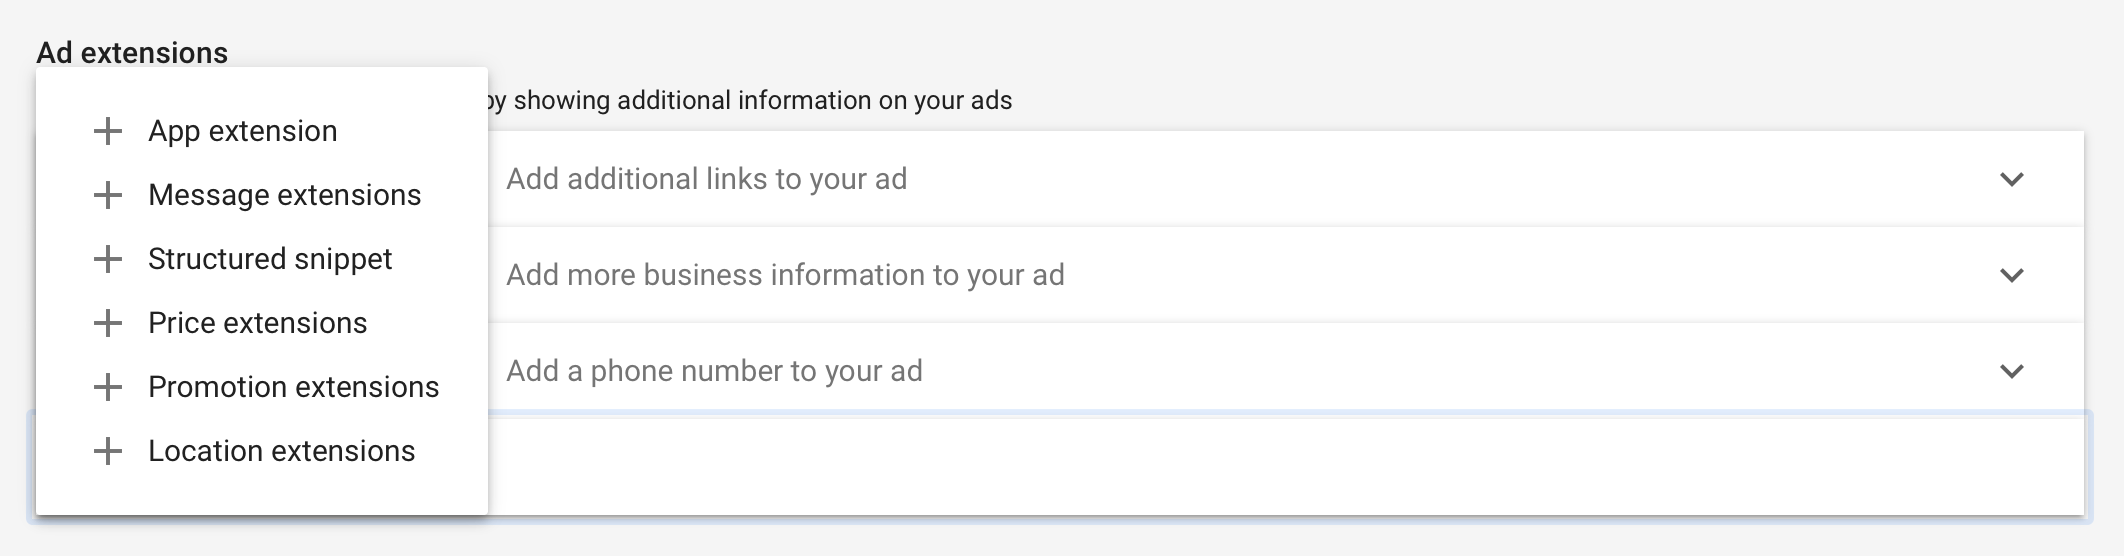
The next step is to define ad extensions for your RLSA campaign. There are different types of Ad Extensions which you can choose from. To know more about Ad Extensions, refer article – Google Ad Extensions Guide To Increase ROI
I have added structured snippets and call out extensions for my RLSA campaign.
Step 27:
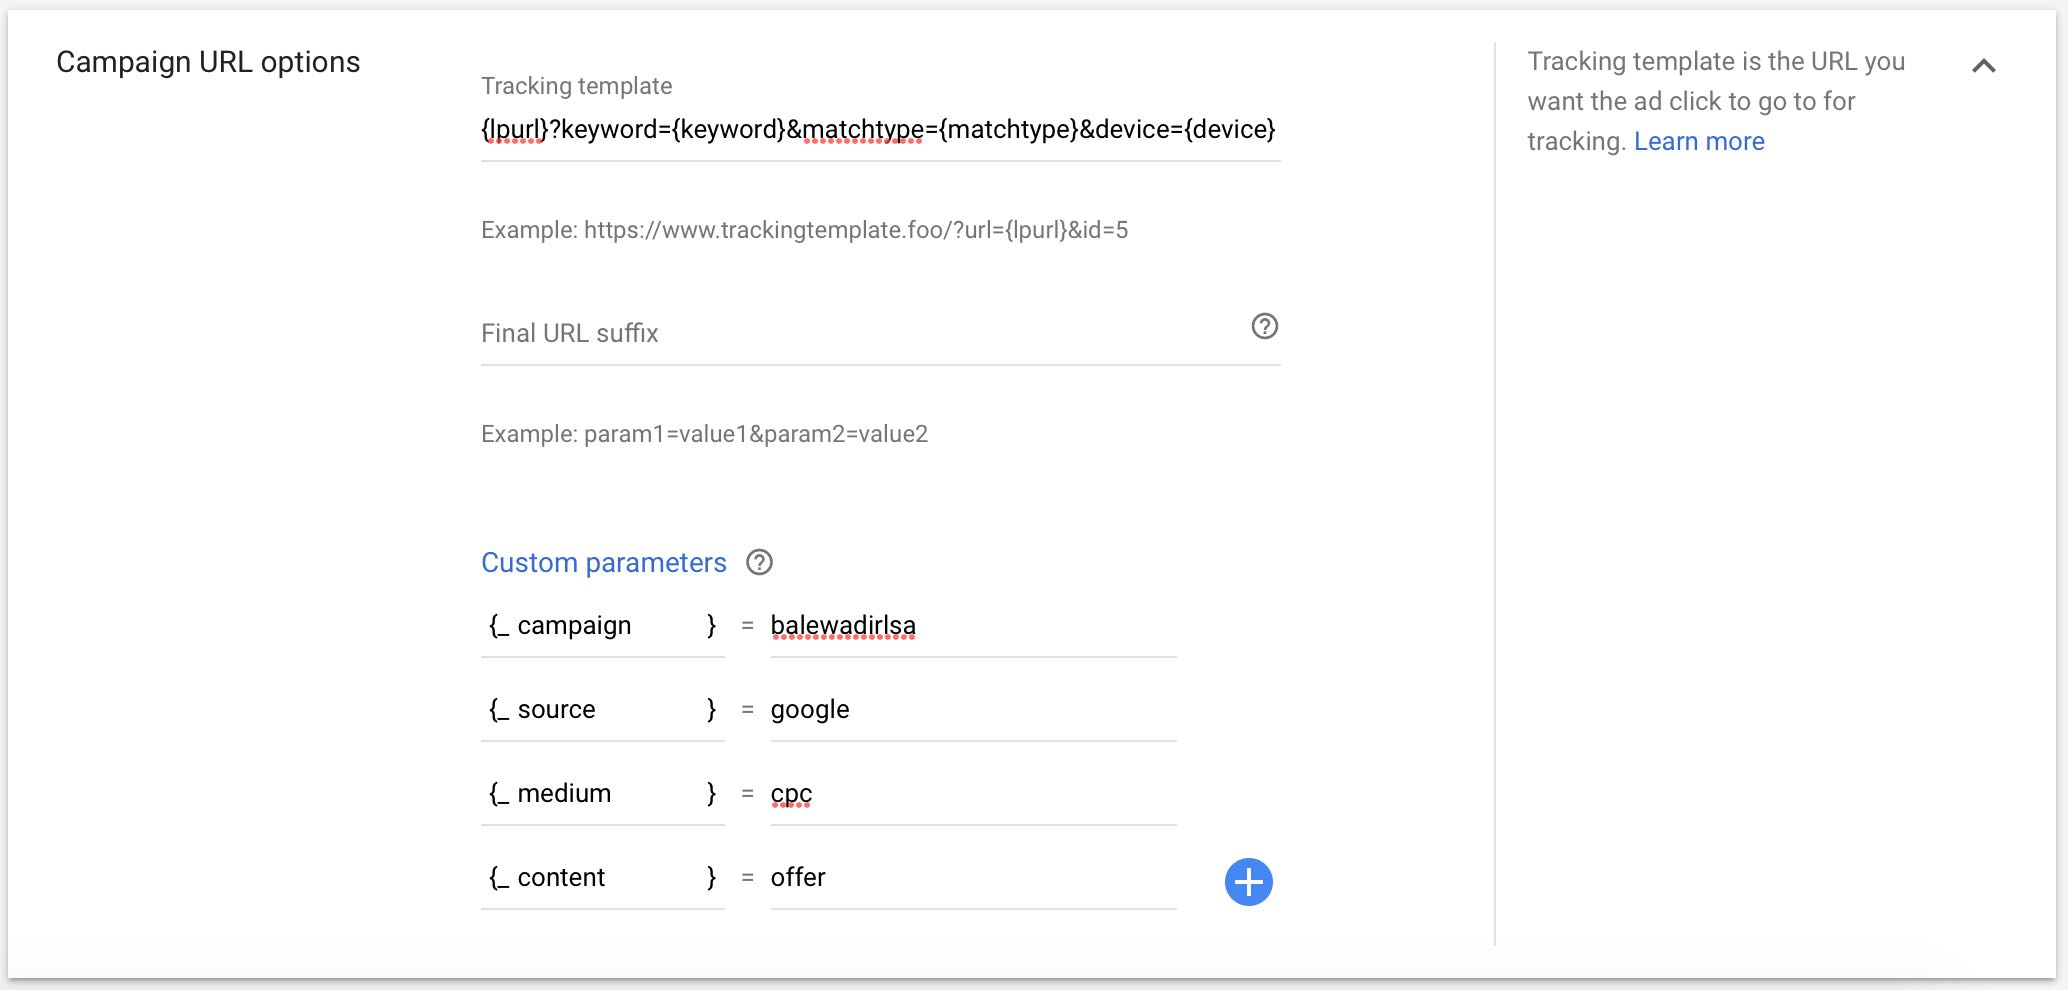
The next step is to define campaign URL options. To know more about URL options and how to setup them, refer article – Master Guide To Using UTM Parameters
I have set up the campaign URL options as below
Step 28:
The next step is to define ad group name and bid for your ad group. Make sure if you have created a separate RLSA campaign (like the one which I have created), the bid should be higher compared to your regular search campaign which is targeted to new users.

Step 29:
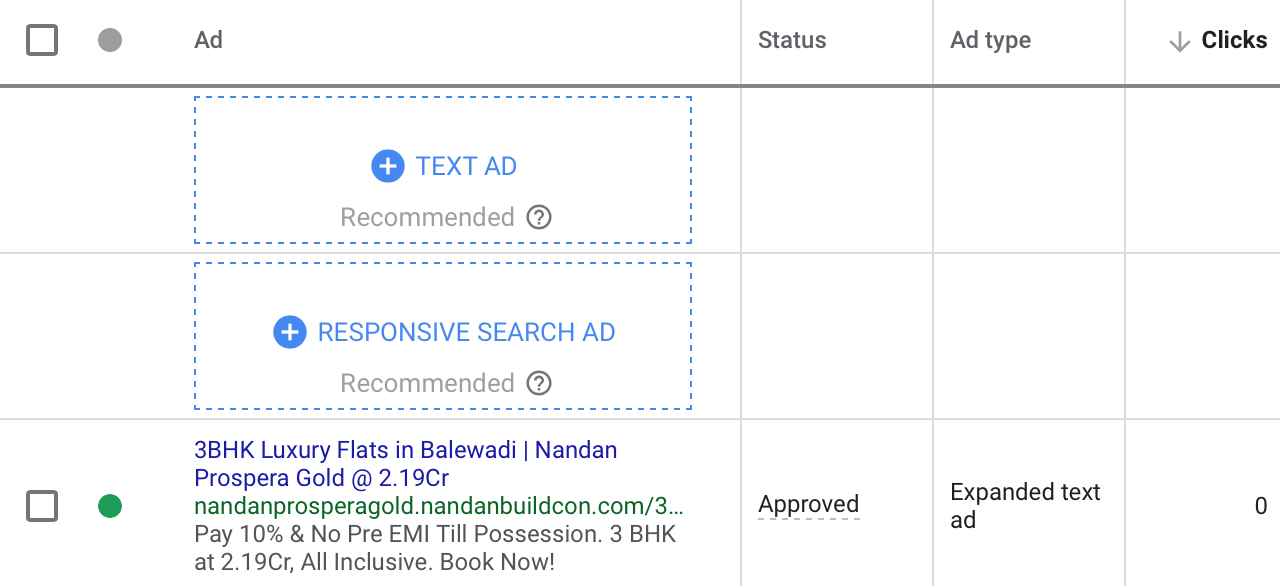
The next step is to ad copy for your RLSA campaign. Make sure you have a different ad copy for your RLSA campaign highlighting offer, different incentive or a different sales pitch compared to your regular search campaign because, these are the users who are still looking for your product/services etc.
I have defined the ad copy as below, by adding the offer element.
Step 30:
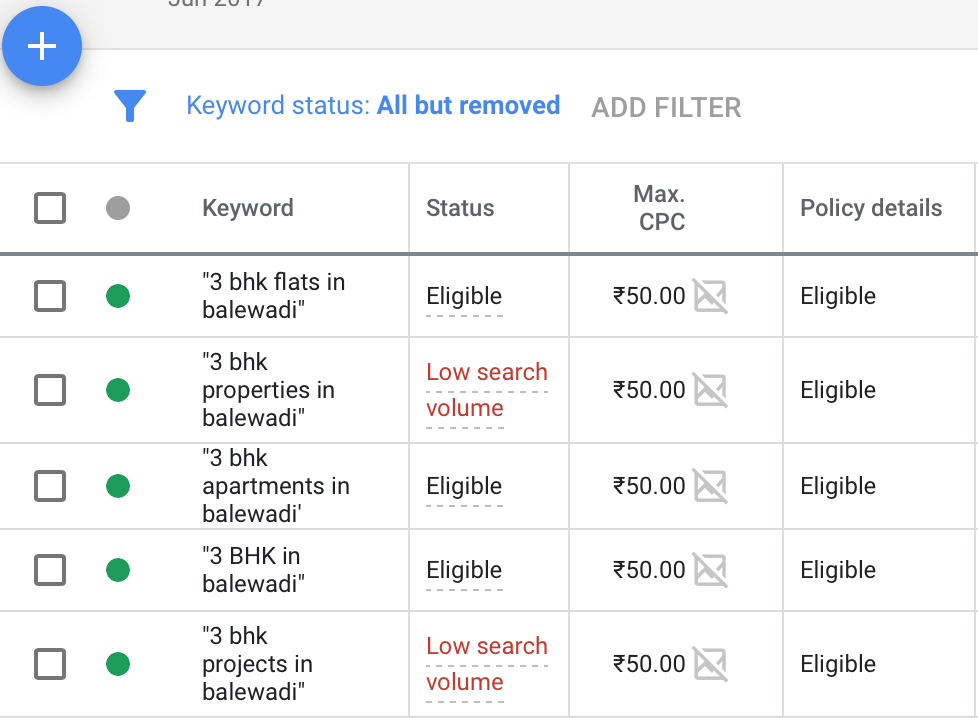
The next step is to define keywords for your campaign. Remember these are going to be the keywords you want to target to the users who are still searching on Google. You can go with different match types of keywords including phrase, exact and broad match modifier. Know more about different match types here – Google Ads Keyword Match Types
I have added few keywords to show you the keywords I have added for RLSA campaign as below
That’s it, your campaign is ready to go live now once your ad copy is approved by Google.
Conclusion:
Remarketing Lists for Search Ads (RLSAs) campaigns are very effective to improve conversions for your business as your are remarketing them on search. The success of the campaign will depend on the keywords in the campaign and the message you are putting across to your audience. You can also use different landing pages to boost conversions through RLSA. So set up your RLSA campaign today and let me know how it’s performing!
Related Article:

